USB not open

Explorer not opening files from USB stick

Connect the usb drive then goto Control Panel -> Administrative Tools -> Computer Management. Select disk management if your removable drive is listed then it is most likely that it is assigned the same drive letter as another device.
Right click the usb drive and select change drive letter and paths then select change and assign it an unused drive letter.

or.

Right-click on My Computer and choose Manage
Click on Disk Management
Right-click on your Thumbdrive and select "Change drive letter and paths"

Give it another drive letter and see if it sorts itself :-)

or.

How to remove Virus from USB Drives
One of the ways by which a virus can infect your PC is through USB/Pen drives. Common viruses
such as ’Ravmon’ , ‘New Folder.exe’, ‘Orkut is banned’ etc are spreading through USB drives. Most
anti virus programs are unable to detect them and even if they do, in most cases they are unable to
delete the file, only quarantine it. Here are the things which you can do if you want to remove such
viruses from your USB drives.
1. Whenever you plug a USB drive in your system, a window will appear similar to the one
shown below
2. Don’t click on Ok , just choose ‘Cancel’.
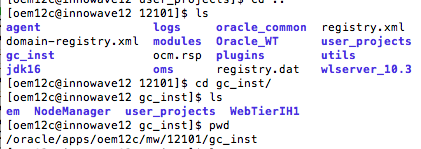
3. Open the Command Prompt by typing ‘cmd‘ in the run box.
4. In the command prompt type the drive letter: and press enter.
5. Now type dir /w/a and press enter.
6. This will display a list of the files in the pen drive. Check whether the following files are there
or not:
• Autorun.inf
• Ravmon.exe
• New Folder.exe
• svchost.exe
• Heap41a
• or any other exe file which may be suspicious.
7. If any of the above files are there, then probably the USB drive is infected.
8. In command prompt type attrib -r -a -s -h *.* and press enter.
9. This will remove the Read Only, Archive, System and hidden file attribute from all the files.
10. Now just delete the files using the command del filename. --
Example del Ravmon.exe. -
Delete all the files that are suspicious.
Example:
• Microsoft Windows XP [Version 5.1.2600]
• (C) Copyright 1985-2001 Microsoft Corp.

• L:\Documents and Settings\kayzg>o:
• O:\>

• O:\>dir /w/ac
• Volume in drive O is KAYZGPEKEE2
• Volume Serial Number is D834-F037
• Directory of O:\
• [untitled folder] [System]
• [Documents] winzip90.exe
• sdat5277.exe LaunchU3.exe
• ethereal-setup-0.99.0.exe ethereal 1.doc
• PROJECT NETWORK MANAGEMENT.doc About the Raila Virus 1.doc
• About the Raila Virus.doc KAYUMBO G.doc
• 9 File(s) 63,575,709 bytes
• 3 Dir(s) 547,983,360 bytes free
• O:\>
• O:\>del Autorun.inf
• Could Not Find O:\Autorun.inf
• O:\>
11. To be on a safer side, just scan the USB drive with an anti virus program to check whether it is
free of virus or not.
12. Now remove the drive and plug it again. In most of the cases, the real culprit turns out to be the
“Autorun.inf” file which mostly gets executed when someone clicks Ok in the dialog window
which appears above. Thus the infections can spread
Security Tips
1. Disable the Autoplay feature of USB drives. If you disable the Autoplay feature of USB drives,
then there are lesser chances of the virus spreading.
2. A tool which can perform such a function is Tweak UI. Download it from here and install it.
3. Now you can disable the Autoplay feature of the removable drives as shown above.
4. Run the program, expand My Computer, AutoPlay, and then click Types. On the right panel under
AutoDrives Types un-tick Enable Autoplay for removable drives.
5. By following the above steps, you can keep your USB drives clean.
Other simple ways
1. Don’t loan your flash drive to anyone. If you do you're taking a risk there. Lending your flash
card is not a good idea. You don't know what’s on your friend’s computer or what worm will
work its way to your flash drive then to your computer.
2. When you insert it to your USB port run your anti virus scanner on it first. BEFORE YOU
OPEN THE DRIVE!!!! If it is infected it will tell you.
3. Make sure you update your anti virus program first. Anytime you hook anything to your
computer scan for virus before you open it.
How to quickly scan your flash drive
1. When you connect the flash drive, before open your flash drive:
• Right click [on removable disk, ]
• scan with antivirus then you can use,
• If you are going to copy any file from your pc, first scan the particular then only copy to your
flash drive.


Unable to Create Entity Object from 10.1.3 Jdev

  Unable to Create Entity Object from 10.1.3 Jdev

While creating my first workspace on Oracle JDeveloper 10.1.3 I encountered following error

Error:
Unable to Create Entity Object from 10.1.3 Jdev(R12).The check box for the table and synonym are not enabled.

 Fix:
Add all the BC4J libraries to the project for resolving this issue.

Right click the project properties and select Business Components and press OK.This will definitely resolve the issue.Then you can create the EO without any problem.  

sql DDL, DML, DCL and TCL

DDL, DML, DCL and TCL


In  this  post  we will  learn the basics of  DDL, DML, DCL and  TCL  statements.

DDL (Data Definition Language )


statements are used to define the database structure or schema. Such as:

CREATE - to create objects in the database
ALTER - alters the structure of the database
DROP - delete objects from the database
TRUNCATE - remove all records from a table, including all spaces allocated for the records are removed
COMMENT - add comments to the data dictionary
RENAME - rename an object

 
DML(Data Manipulation Language)
statements are used for managing data within schema objects. Such as:

SELECT - retrieve data from the a database
INSERT - insert data into a table
UPDATE - updates existing data within a table
DELETE - deletes all records from a table, the space for the records remain
MERGE - UPSERT operation (insert or update)
CALL - call a PL/SQL or Java subprogram
EXPLAIN PLAN - explain access path to data
LOCK TABLE - control concurrency

DCL(Data Control Language)

       
GRANT - gives user's access privileges to database
REVOKE - withdraw access privileges given with the GRANT command

TCL(Transaction Control)

statements are used to manage the changes made by DML statements. It allows statements to be grouped together into logical transactions.

COMMIT - save work done
SAVEPOINT - identify a point in a transaction to which you can later roll back
ROLLBACK - restore database to original since the last COMMIT
SET TRANSACTION - Change transaction options like isolation level and what rollback segment to use

REP-3000

REP-3000: Internal error starting Oracle Toolkit.


How to resolve REP-3000: Internal error starting Oracle Toolkit for customized reports


1-       Check the vnc process from for oracle user
                                ps -ef | grep vnc

2-       If any process exists then kill it from
vncserver -kill :3

3-       Switch user to root and repeat first two steps

4-       Now from root
vncserver -depth 24 -geometry 1024x768

5-       And from oraprod
vncserver -depth 24 -geometry 1024x768

Ora-20001

Gather Schema Statistics fails with Ora-20001

Following solution is extracted from article id 781813.1.

Cause
There are two reasons for that error message:
1 ) There are duplicate rows on FND_HISTOGRAM_COLS table for JE_BE_LINE_TYPE_MAP table.
Because of this problem, FND_STATS tries to gather histogram information using wrong command and
it fails with ora-20001 errors.
Following SQL should have returned one row , not two.
SQL> select column_name, nvl(hsize,254) hsize
from FND_HISTOGRAM_COLS
where table_name = 'JE_BE_LINE_TYPE_MAP'
order by column_name;
COLUMN_NAME HSIZE
------------------------------ ----------
SOURCE 254
SOURCE 254
Since there are two rows in histograms table, FND_STATS creates following command to gather statistics on table 'JE_BE_LINE_TYPE_MAP' :
 dbms_Stats.gather_table_stats(OWNNAME => 'GL', TABNAME
=>'JE_BE_LINE_TYPE_MAP',METHOD_OPT=>'FOR ALL COLUMNS SIZE 1 FOR COLUMNS SOURCE SIZE 254 FOR
COLUMNS SOURCE SIZE 254');
 Above command will work on 9i and 10G databases but it will fail with ora-20001 errors on 11G.
2) Column does not exist on the table but still listed in FND_HISTOGRAMS_COL table.
You can use following SQL to identify. SQL will prompt for table name, use table name from the errors. In above examples you can use FII_FIN_ITEM_HIERARCHIES.
select hc.table_name, hc.column_name
from FND_HISTOGRAM_COLS hc , dba_tab_columns tc
where hc.table_name ='&TABLE_NAME'
and hc.table_name= tc.table_name (+)
and hc.column_name = tc.column_name (+)
and tc.column_name is null]
Solution
Find out all duplicates and/or obsolete rows in FND_HISTOGRAM_COLS and delete one of them.
Remember to take backup of the FND_HISTOGRAM_COLS table before deleting any data.
-- identify duplicate rows
select table_name, column_name, count(*)
from FND_HISTOGRAM_COLS
group by table_name, column_name
having count(*) > 1;
-- Use above results on the following SQL to delete duplicates
delete from FND_HISTOGRAM_COLS
where table_name = '&TABLE_NAME'
and  column_name = '&COLUMN_NAME'
and rownum=1;
-- Use following SQL to delete obsoleted rows
delete from FND_HISTOGRAM_COLS
where (table_name, column_name) in
  (
   select hc.table_name, hc.column_name
   from FND_HISTOGRAM_COLS hc , dba_tab_columns tc
   where hc.table_name  ='&TABLE_NAME'
   and hc.table_name= tc.table_name (+)
   and hc.column_name = tc.column_name (+)
   and tc.column_name is null
  );


increase number of Running Concurrent Requests

R12: How to increase number of Running Concurrent Requests

Step-1 Log in to system, switch responsibility to System Administrator.
Step-2 Go to Concurrent > Manager > Define
Step-3 Query 'Standard Manager' there, press Work Shifts button.
Step- 4 Increase the Processes column to required number. (In following case 5 Concurrent Requests can run at once.).

Grant/Revoke Privileges

Grant Privileges on Tables

You can grant users various privileges to tables. These privileges can be any combination of select, insert, update, delete, references, alter, and index. Below is an explanation of what each privilege means.
Privilege Description
Select Ability to query the table with a select statement.
Insert Ability to add new rows to the table with the insert statement.
Update Ability to update rows in the table with the update statement.
Delete Ability to delete rows from the table with the delete statement.
References Ability to create a constraint that refers to the table.
Alter Ability to change the table definition with the alter table statement.
Index Ability to create an index on the table with the create index statement.

The syntax for granting privileges on a table is:
grant privileges on object to user;
For example, if you wanted to grant select, insert, update, and delete privileges on a table called suppliers to a user name smithj, you would execute the following statement:
grant select, insert, update, delete on suppliers to smithj;
You can also use the all keyword to indicate that you wish all permissions to be granted. For example:
grant all on suppliers to smithj;
If you wanted to grant select access on your table to all users, you could grant the privileges to the public keyword. For example:
grant select on suppliers to public;

Revoke Privileges on Tables

Once you have granted privileges, you may need to revoke some or all of these privileges. To do this, you can execute a revoke command. You can revoke any combination of select, insert, update, delete, references, alter, and index.
The syntax for revoking privileges on a table is:
revoke privileges on object from user;
For example, if you wanted to revoke delete privileges on a table called suppliers from a user named anderson, you would execute the following statement:
revoke delete on suppliers from anderson;
If you wanted to revoke all privileges on a table, you could use the all keyword. For example:
revoke all on suppliers from anderson;
If you had granted privileges to public (all users) and you wanted to revoke these privileges, you could execute the following statement:
revoke all on suppliers from public;

Grant Privileges on Functions/Procedures

When dealing with functions and procedures, you can grant users the ability to execute these functions and procedures. The Execute privilege is explained below:
Privilege Description
Execute Ability to compile the function/procedure.
Ability to execute the function/procedure directly.

The syntax for granting execute privileges on a function/procedure is:
grant execute on object to user;
For example, if you had a function called Find_Value and you wanted to grant execute access to the user named smithj, you would execute the following statement:
grant execute on Find_Value to smithj;
If you wanted to grant all users the ability to execute this function, you would execute the following:
grant execute on Find_Value to public;

Revoke Privileges on Functions/Procedures

Once you have granted execute privileges on a function or procedure, you may need to revoke these privileges from a user. To do this, you can execute a revoke command.
The syntax for the revoking privileges on a function or procedure is:
revoke execute on object from user;
If you wanted to revoke execute privileges on a function called Find_Value from a user named anderson, you would execute the following statement:
revoke execute on Find_Value from anderson;
If you had granted privileges to public (all users) and you wanted to revoke these privileges, you could execute the following statement:
revoke execute on Find_Value from public;

Data Control Language (DCL) Statements


Data Control Language Statements are used to grant privileges on tables, views, sequences, synonyms, procedures to other users or roles.

The DCL statements are

GRANT          :Use to grant privileges to other users or roles.
REVOKE       :Use to take back privileges granted to other users and roles.

Privileges are of two types :

  • System Privileges
  • Object privileges

System Privileges are normally granted by a DBA to users. Examples of system privileges are CREATE SESSION, CREATE TABLE, CREATE USER etc.

Object privileges means privileges on objects such as tables, views, synonyms, procedure. These are granted by owner of the object.

Object Privileges are

ALTER  
Change the table definition with the ALTER TABLE statement.  
DELETE  
Remove rows from the table with the DELETE statement.
Note: You must grant the SELECT privilege on the table along with the DELETE privilege. 
INDEX  
Create an index on the table with the CREATE INDEX statement.  
INSERT  
Add new rows to the table with the INSERT statement.  
REFERENCES  
Create a constraint that refers to the table. You cannot grant this privilege to a role.  
SELECT  
Query the table with the SELECT statement.  
UPDATE  
Change data in the table with the UPDATE statement.  

Note: You must grant the SELECT privilege on the table along with the UPDATE privilege. 

Grant

Grant is use to grant privileges on tables, view, procedure to other users or roles


Examples

Suppose you own emp table. Now you want to grant select,update,insert privilege on this table to other user “SAMI”.
 
grant select, update, insert on emp to sami;

Suppose you want to grant all privileges on emp table to sami. Then

grant  all on emp to sami;

Suppose you want to grant select privilege on emp to all other users of the database. Then

grant select on emp to public;

Suppose you want to grant update and insert privilege on only certain columns not on all the columns then include the column names in grant statement. For example you want to grant update privilege on ename column only and insert privilege on empno and ename columns only. Then give the following statement

grant update (ename),insert (empno, ename)  on emp to sami;


To grant select statement on emp table to sami and to make sami be able further pass on this privilege you have to give WITH GRANT OPTION clause in GRANT statement like this.

grant select on emp to sami with grant option;


REVOKE


Use to revoke privileges already granted to other users.

For example to revoke select, update, insert privilege you have granted to Sami then give the following statement.

revoke select, update, insert on emp from sami;

To revoke select statement on emp granted to public give the following command.

revoke select on emp from public;

To revoke update privilege on ename column and insert privilege on empno and ename columns give the following revoke statement.

revoke update, insert on emp from sami;

Note :You cannot take back column level privileges. Suppose you just want to take back  insert privilege on ename column then you have to first take back the whole insert privilege and then grant privilege on empno column.

ROLES


A role is a group of Privileges. A role is very handy in managing privileges, Particularly in such situation when number of users should have the same set of privileges.
 
 
For example you have four users :Sami, Scott, Ashi, Tanya in the database. To these users you want to grant select ,update privilege on emp table, select,delete privilege on dept table. To do this first create a role by giving the following statement
 
create role clerks
 
Then grant privileges to this role.
 
grant select,update on emp to clerks;
grant select,delete on dept to clerks;
 
Now grant this clerks role to users like this
 
grant clerks to sami, scott, ashi, tanya ;
 
Now Sami, Scott, Ashi and Tanya have all the privileges granted on clerks role.
 
Suppose after one month you want grant delete on privilege on emp table all these users then just grant this privilege to clerks role and automatically all the users will have the privilege.
 
grant delete on emp to clerks;
 
If you want to take back update privilege on emp table from these users just take it back from clerks role.
 
revoke update on emp from clerks;
 
 
To Drop a role
 
Drop role clerks;
 

LISTING INFORMATION ABOUT PRIVILEGES

 
To see which table privileges are granted by you to other users.
 
SELECT * FROM USER_TAB_PRIVS_MADE
 
To see which table privileges are granted to you by other users
 
SELECT * FROM USER_TAB_PRIVS_RECD;
 
To see which column level privileges are granted by you to other users.
 
SELECT * FROM USER_COL_PRIVS_MADE
 
To see which column level privileges are granted to you by other users
 
SELECT * FROM USER_COL_PRIVS_RECD;
 
To see which privileges are granted to roles
 
SELECT * FROM USER_ROLE_PRIVS;


APP-FND-00668 and 00926.

  R12-Compiling Flexifield-error

In Release 12 While I am creating the new COA and compiling my flexifield i got some error.


The Error code is APP-FND-00668 and 00926.

The following steps can be checked if these errors encountered

1) Verify that tables FND_ID_FLEX_STRUCTURES ,FND_DESCRIPTIVE_FLEXS FND_ID_FLEX__STRUCTURES_TL, FND_DESCRIPTIVE_FLEXS_TL are visible from the APPS user

2) Verify that APPS user has select/update/insert privledges to these tables

For the first two tables grant select, insert, and update privileges to these tables

3) Run the following selects

Code sql:
 SELECT COUNT(*), LANGUAGE 
  FROM fnd_id_flex_structures_tl 
  GROUP BY LANGUAGE; 
 
  SELECT COUNT(*) FROM fnd_id_flex_structures;

The select count from fnd_id_flex_structures should be the same as the count retrieved from fnd_id_flex_structures_tl for each installed language.

Code sql:
 SELECT COUNT(*), LANGUAGE 
  FROM FND_DESCRIPTIVE_FLEXS_TL
  GROUP BY LANGUAGE; 
 
  SELECT COUNT(*) FROM FND_DESCRIPTIVE_FLEXS;

The select count from FND_DESCRIPTIVE_FLEXS should be the same as the count retrieved from FND_DESCRIPTIVE_FLEXS_TL for each installed language.

If they do not match, run "Maintain Multilingual Tables" option from adadmin.


Install Oracle Enterprise Manager (OEM) 12c

Install Oracle Enterprise Manager (OEM) 12c : 12.1.0.1 


OEM 12c
 This post covers installation of Oracle Enterprise Manager (OEM) Cloud Control 12c . For overview of OEM 12c installation


After i (Internet) and g (Grid) it’s now turn of c (cloud). As Oracle Enterprise Manager (OEM) 12c is now available. 

OEM 12c Component
OEM 12c is more or less similar to its predecessor OEM 11g with exception of Management Plug-In (all components to be managed by OEM 12c like database, fusion middleware and so on will have respective plug-in so if you upgrade component that you are managing then simply upgrade management plug-in for that component)
a) Management Repository
b)  Management Service
c) Management Agent
d) Management Plug-In
e) OEM Console

Key Points for OEM 12c

1. Sun JDK 1.6 patch 24 is required which can be installed in advance or OEM 12c installer installs by default (if JDK 1.6 is not available). JRockit JDK is NOT supported with OEM 12c (as of 3 Oct 2011)

2. When you install OEM 12c , installer creates default domain name GCDomain. To change domain name during installation use parameter WLS_DOMAIN_NAME for ex.
runInstaller WLS_DOMAIN_NAME=oem12c

3. There are two options for OEM 12c installation
a) Simple – Default settings
b) Advanced – option to provide weblogic server details, database data file and tablespace customisation or custom port selection.

4. OEM 12c installer creates instance directory gc_inst in Middleware Home (MW_HOME).

5. Instance directory gc_inst contains WebLogic Domain Directory (user_projects/domains/GCDomain) and Oracle HTTP Instance (WebTierIH1)

6. OEM 12c Installer creates WebLogic domain with Admin Server (EMGC_ADMINSERVER) and Managed Server (EMGC_OMS1).

7. OEM 12c cloud control console (UI) is accessible only on HTTPS (SSL). To access console on HTTP (non SSL) use
emctl secure unlock -console

8. Default URL to access EM 12c is https://serverName:[EMGC_OMS1_SSL_PORT]/em (Note https in URL)
After logon (weblogic/<password>) You should see screen like below


1. Install database that will contain OEM repository.

2. Start Installer by running $OEM12C_SOFTWARE/runInstaller (setup.exe for Windows)

3. Select Install Types (You can select Simple or Advanced, for this post I am suing Simple install type) and provide Middleware Home (This must be blank directory in which installer will install weblogic, jdk, OEM Binary for OMS & Agent )
OEM 12c

4. Provide Administrator Password and Database connection details (administrator password is used with weblogic user to log on to OEM Cloud Control Console and Weblogic Console)
OEM 12c

5. If Database contains dbcontrol then, installer will prompt you to de-register it. Deregister database control using emca -deconfig (run this command on database node) as shown below from database
OEM 12c

6. If prerequisite check fails then installer will warn you but you can skip checks and fix them later (It is recommended to fix failed pre-requisite checks)
OEM 12c
7. Click on Install button on Review screen
OEM 12c
.
Note: Installer will install three homes as shown above WLS_HOME, OMS_HOME, and AGENT_HOME 

8. After configuration when prompted run allroot.sh from root user (Only on Unix)

9. After installation note down URLs listed on Installer screen
OEM 12c
10. Directory structure after installation should look like
OEM 12c 
a) Directory agent is AGENT_HOME
b) Directory gc_inst is ORACLE_INSTANCE that contains OHS instance (gc_inst/WebTierIH1) and Weblogic Domain (gc_inst/user_projects)

11. WebLogic Server will create Domain with 1 Admin Server and 1 Managed Server as shown below
WebLogic Admin Server (EMGC_ADMINSERVER) & Managed Server (EMGC_OMS1) – To know more about WebLogic Domain, Admin Server and Managed Server click here
OEM 12COEM 12C 

12. Access OEM 12c Cloud Control Console using https://hostname:OHS_SSL_PORT/em (Default Protocol is HTTPS and port is WebTier/OHS SSL Listen Port)

13. In Nutshell OEM 12c will creates
a) OMS – Oracle Management Service controlled by emctl . OMS consists of Java Component (WebLogic with 1 Admin Server and 1 Managed Server) and System Component (Oracle HTTP Server managed by OPMN)
b) OMA – Oracle Management Agent controlled by emctl


1.Pre-installation Requirements

This part describes the pre-installation requirements you must meet before installing any of the core components of Enterprise Manager Cloud Control.

2.Meeting Hardware Requirements

This chapter describes the hardware requirements you must meet before installing Oracle Management Service (OMS), Oracle Management Agents (Management Agents), and Oracle Management Repository (Management Repository).

CPU, RAM, Heap Size, and Hard Disk Space Requirements for OMS

Table 2-1 describes the CPU, physical memory (RAM), heap size, and hard disk space requirements for installing an OMS (including a Management Agent that comes with it).
Note:
If you plan to have the OMS and the Management Repository on the same host, then meet the requirements described in Table 2-1 and Table 2-2, and make sure the CPU, RAM, and hard disk space requirements are a combination of the values mentioned in both tables.
Table 2-1 CPU, RAM, Heap Size, and Hard Disk Space Requirements Per OMS

Small Medium Large
  (1 OMS, <1000 Targets, <100 Agents, <10 Concurrent User Sessions)
(2 OMSes, >=1000 but <10,000 Targets, >=100 but <1000 Agents,>=10 but <25 Concurrent User Sessions)
(> 2 OMSes, >=10,000 Targets, >=1000 Agents, >=25 but <=50 Concurrent User Sessions)
CPU Cores/Host
2
4
8
RAM
6 GB
8 GB
16 GB
RAM with ADPFoot 1 , JVMDFoot 2 
8 GB
12 GB
20 GB
Oracle WebLogic Server JVM Heap Size
1.7 GB
4 GB
8 GB
Hard Disk SpaceFoot 3 
7 GB
7 GB
7 GB
Hard Disk Space with ADP, JVMD
10 GB
12 GB
14 GB
Footnote 1 ADP Manager is Application Dependency and Performance
Footnote 2 JVMD is JVM Diagnostics
Footnote 3 Without Oracle Software Library configured
Note:
While installing an additional OMS (by cloning an existing one), if you have installed BI publisher on the source host, then ensure that you have 7 GB of additional hard disk space on the destination host, so a total of 14 GB.

CPU, RAM, and Hard Disk Space Requirements for Management Agents

The following are the CPU, RAM, and hard disk space requirements for installing Management Agents.
  • For a standalone Management Agent, ensure that you have 2 CPU cores per host, 512 MB of RAM, and 1 GB of free hard disk space.
  • For a Master Agent, ensure that you have 2 CPU cores per host, 512 MB of RAM, and 1 GB of free hard disk space.
  • For a Shared Agent, ensure that you have 2 CPU cores per host, 512 MB of RAM, and 15 MB of free hard disk space.

CPU, RAM, and Hard Disk Space Requirements for Management Repository

Table 2-2 describes the RAM and the hard disk space requirements for configuring a Management Repository:
Note:
If you plan to have the Management Repository and the OMS on the same host, then meet the requirements described in Table 2-2 and Table 2-1, and make sure the CPU, RAM, and hard disk space requirements are a combination of the values mentioned in both tables.
Table 2-2 CPU, RAM, and Hard Disk Space Requirements for Management Repository

Small Medium Large
  (1 OMS, <1000 Targets, <100 Agents, <10 Concurrent User Sessions)
(2 OMSes, >=1000 but <10,000 Targets, >=100 but <1000 Agents,>=10 but <25 Concurrent User Sessions)
(> 2 OMSes, >=10,000 Targets, >=1000 Agents, >=25 but <=50 Concurrent User Sessions)
CPU Cores/HostFoot 1 
2
4
8
RAM
6 GB
8 GB
16 GB
Hard Disk Space
50 GB
200 GB
400 GB
Footnote 1 For high availability, Oracle Real Application Cluster (Oracle RAC) database must be set up.

3.Meeting Package, Kernel Parameter, and Library Requirements

This chapter describes the packages, kernel parameters settings, and libraries required on different platforms (32-bit and 64-bit) for installing a new Enterprise Manager system, an additional Oracle Management Service (OMS), and a standalone Oracle Management Agent (Management Agent).
In particular, this chapter covers the following:
Note:
The packages and libraries are NOT required for Microsoft Windows platforms.

Package Requirements

This section lists the packages required on different platforms (32-bit and 64-bit) for installing an OMS or a Management Agent. In particular, this section covers the following:
Note:
To manage or monitor database targets on SuSE 10 platform, you must install the packages libaio-32bit-0.3.104-14.2 and libaio-devel-32bit-0.3.104-14.2 on the SuSE 10 host where the Management Agent is running.

Identifying Installed Packages

To identify the packages already installed on your system, run the following command. If the command does not list the packages listed in Package Requirements for Oracle Management Service or Package Requirements for Oracle Management Agent, then install them manually.
Note:
The following command is meant only for Linux x86 and x86-64 platforms. To know the command for other platforms, contact your system administrator or refer to the platform-specific manual.
rpm -qa --queryformat "%{NAME}-%{VERSION}-%{RELEASE}(%{ARCH})\n" | grep glibc
The command lists all the packages installed on the system. The 32-bit ones are appended with (i386) or (i686), and the 64-bit ones are appended with (x86_64).
For example, if you run the command on a 32-bit system, you should see something similar to the following:
glibc-devel-2.3.4-2.43(i386)
glibc-headers-2.3.4-2.43(i386)
glibc-2.3.4-2.43(i686)
compat-glibc-headers-2.3.2-95.30(i386)
glibc-profile-2.3.4-2.43(i386)
glibc-utils-2.3.4-2.43(i386)
glibc-kernheaders-2.4-9.1.103.EL(i386)
glibc-common-2.3.4-2.43(i386)
compat-glibc-2.3.2-95.30(i386)
For example, if you run the command on a 64-bit system, you should see something similar to the following:
glibc-common-2.3.4-2.43(x86_64)
glibc-devel-2.3.4-2.43(x86_64)
glibc-profile-2.3.4-2.43(x86_64)
glibc-headers-2.3.4-2.43(x86_64)
glibc-utils-2.3.4-2.43(x86_64)
glibc-2.3.4-2.43(x86_64)

Package Requirements for Oracle Management Service

Table 3-1 lists the packages required on different platforms (32-bit and 64-bit) for installing a new Enterprise Manager system or an additional OMS.
Table 3-1 Package Requirements for Oracle Management Service
Platform 32-Bit Packages for 32-Bit Platform 64-Bit Packages for 64-Bit Platform
Oracle Linux 6.x
(Red Hat 6 Kernel and Unbreakable Enterprise Kernel (UEK))
  • make-3.81
  • binutils-2.17.50.0.6
  • gcc-4.1.1
  • libaio-0.3.106
  • glibc-common-2.3.4
  • compat-libstdc++296-2.96
  • libstdc++ 4.1.1
  • libstdc++devel-4.1.0
  • setarch-1.6
  • sysstat-5.0.5
  • compat-db 4.1.25
  • xorg-x11-utils (This package is required only for GUI-based interactive installation, and not for silent installation)
  • (Applicable only for Oracle Linux 6.2) glibc-2.12-1.47.0.2
  • make-3.81
  • binutils-2.17.50.0.6
  • gcc-4.1.1
  • libaio-0.3.106
  • glibc-common-2.3.4
  • libstdc++-4.1.1
  • sysstat-5.0.5
  • glibc-devel-2.5-49-i686 (This is a 32-bit package)
  • glibc-devel-2.5-49-x86_64 (This is a 64-bit package)
  • (Applicable only for Oracle Linux 6.2) glibc-2.12-1.47.0.2
Oracle Linux 5.x
Red Hat Enterprise Linux 5.x
  • make-3.81
  • binutils-2.17.50.0.6
  • gcc-4.1.1
  • libaio-0.3.106
  • glibc-common-2.3.4
  • compat-libstdc++296-2.96
  • libstdc++ 4.1.1
  • libstdc++devel-4.1.0
  • setarch-1.6
  • sysstat-5.0.5
  • compat-db 4.1.25
  • rng-utils-2.0
  • libXtst-1.0.1-3.1(i386)
  • xorg-x11-utils (This package is required only for GUI-based interactive installation, and not for silent installation)
  • make-3.81
  • binutils-2.17.50.0.6
  • gcc -4.1.1
  • libaio-0.3.106
  • glibc-common-2.3.4
  • libstdc++ -4.1.1
  • setarch-1.6
  • sysstat-5.0.5
  • rng-utils-2.0
  • libXtst-1.0.1-3.1(x86_64)
  • xorg-x11-utils (This package is required only for GUI-based interactive installation, and not for silent installation)
In addition, install the 32-bit version as well as the 64-bit version of glibc-devel-2.5-49 to avoid any linking errors while installing the OMS. The installer checks for this package, so if this package is not installed, the installer displays an error.
Oracle Linux 4.x
Red Hat Enterprise Linux 4.x
  • make-3.80
  • binutils-2.15.92.0.2
  • gcc-3.4.5
  • libaio-0.3.105
  • glibc-common-2.3.4
  • libstdc++-3.4.5
  • libstdc++-devel-3.4.3
  • pdksh-5.2.14
  • setarch-1.6
  • sysstat-5.0.5
  • compat-db-4.1.25
  • kernel-utils-2.4
  • libXtst-1.0.1-3.1(i386)
  • xorg-x11-utils (This package is required only for GUI-based interactive installation, and not for silent installation)
Not Supported
SUSE Linux Enterprise 10
  • make-3.80
  • binutils-2.16.91.0.5
  • gcc-4.1.0
  • libstdc++ 4.1.0
Not Supported
SUSE Linux Enterprise 11
  • make-3.81
  • binutils-2.19-9.3
  • gcc-4.3-62.198
  • libstdc++ 43.4.3
  • make-3.80
  • binutils-2.16.91.0.5
  • gcc -4.1.0
  • libstdc++ 43.4.3
In addition, install the 32-bit version as well as the 64-bit version of glibc-devel-2.5-49 to avoid any linking errors while installing the OMS. The installer checks for this package, so if this package is not installed, the installer displays an error.
Asianux Server 3
  • make-3.81-3AXS3-i386
  • binutils-2.17.50.0.6-9AXS3-i386
  • gcc-4.1.2-44.1-i386
  • libaio-0.3.106-3.2-i386
  • glibc-common-2.5-34.1AXS3-i386
  • compat-libstdc++-296-2.96-138.2AX-i386
  • libstdc++-4.1.2-44.1-i386
  • libstdc++-devel-4.1.2-44.1-i386
  • setarch-2.0-1.1-i386
  • sysstat-7.0.4-1AX-i386
  • compat-db-4.2.52-5.1-i386
  • libXtst-1.0.1-3.1(i386)
  • xorg-x11-utils (This package is required only for GUI-based interactive installation, and not for silent installation)
  • make-3.81
  • binutils-2.17.50.0.6
  • gcc -4.1.1
  • libaio-0.3.106
  • glibc-common-2.3.4
  • libstdc++ -4.1.1
  • setarch-1.6
  • sysstat-5.0.5
  • libXtst-1.0.1-3.1(x86_64)
  • xorg-x11-utils (This package is required only for GUI-based interactive installation, and not for silent installation)
In addition, install the 32-bit version as well as the 64-bit version of glibc-devel-2.5-49 to avoid any linking errors while installing the OMS. The installer checks for this package, so if this package is not installed, the installer displays an error.
Solaris SPARC 5.9
Not Supported
  • SUNWlibm
  • SUNWlibms
  • SUNWsprot
  • SUNWsprox
  • SUNWtoo
  • SUNWi1of
  • SUNWxwfnt
Solaris SPARC 5.10
Also supported on Solaris Local Container
Not Supported
SUNWbtool
Solaris SPARC 5.11
Not Supported
  • SUNWbtool
  • SUNWhea
  • SUNWlibm
  • SUNWlibms
  • SUNWsprot
  • SUNWtoo
  • SUNWxwplt (This is for setting xwindow)
  • SUNWfont-xorg-core (This package is required only for GUI-based interactive installation, and not for silent installation)
  • SUNWlibC
  • SUNWcsl
Solaris x86-64 5.11
Not Supported
  • SUNWbtool
  • SUNWhea
  • SUNWlibm
  • SUNWlibms
  • SUNWsprot
  • SUNWtoo
  • SUNWxwplt (This is for setting xwindow)
  • SUNWfont-xorg-core (This package is required only for GUI-based interactive installation, and not for silent installation)
  • SUNWlibC
  • SUNWcsl
Solaris x86-64 5.10
Not Supported
  • SUNWbtool
  • SUNWarc
  • SUNWhea
  • SUNWlibm
  • SUNWlibms
  • SUNWsprot
  • SUNWtoo
  • SUNWi1of
  • SUNWi1cs
  • SUNWi15cs
  • SUNWxwfnt
IBM AIX 5.3.00.04
Note: Maintenance level 4 and higher are supported for AIX 5.3.
Check the maintenance level using the following command:
oslevel -r
Not Supported
  • bos.perf.proctools(0.0)
  • bos.adt.base(0.0)
  • bos.adt.libm(0.0)
IBM AIX 6.1
Note: All maintenance levels are supported.
Check the maintenance level using the following command:
oslevel -r
Not Supported
  • bos.adt.base(0.0)
  • bos.adt.lib(0.0)
  • bos.adt.libm(0.0)
  • bos.perf.libperfstat(0.0)
  • bos.perf.perfstat(0.0)
  • bos.perf.proctools(0.0)
  • rsct.basic.rte(0.0)
  • rsct.compat.clients.rte(0.0)
  • xlC.aix61.rte.(9.0.0.0)
  • xlC.rte.(9.0.0.0)
IBM AIX 7.1
Note: All maintenance levels are supported.
Check the maintenance level using the following command:
oslevel -r
Not Supported
  • bos.adt.base(0.0)
  • bos.adt.lib(0.0)
  • bos.adt.libm(0.0)
  • bos.perf.libperfstat(0.0)
  • bos.perf.perfstat(0.0)
  • bos.perf.proctools(0.0)
  • rsct.basic.rte(0.0)
  • rsct.compat.clients.rte(0.0)
  • xlC.aix61.rte.(9.0.0.0)
  • xlC.rte.(9.0.0.0)

Package Requirements for Oracle Management Agent

Table 3-2 lists the packages required on different platforms (32-bit and 64-bit) for installing a Management Agent.
Table 3-2 Package Requirements for Oracle Management Agent
Platform 32-Bit Packages for 32-Bit Platform 64-Bit Packages for 64-Bit Platform
Oracle Linux 6.x
(Red Hat 6 Kernel and Unbreakable Enterprise Kernel (UEK))
  • make-3.81
  • binutils-2.17.50.0.6
  • gcc-4.1.1
  • libstdc++ 4.1.1
  • make-3.81
  • binutils-2.17.50.0.6
  • gcc-4.1.1
  • libaio-0.3.106
  • glibc-common-2.3.4
  • libstdc++-4.1.1
  • sysstat-5.0.5
Oracle Linux 5.x
Red Hat Enterprise Linux 5.x
  • make-3.81
  • binutils-2.17.50.0.6
  • gcc-4.1.1
  • libstdc++-4.1.1
  • libXtst-1.0.1-3.1(i386)
Oracle Linux 5.x and Red Hat Enterprise Linux 5.x, where x <= 5 [for example, Oracle Linux 5.3]
  • make-3.81
  • binutils-2.17.50.0.6
  • gcc -4.1.1
  • libstdc++ -4.1.1
  • libXtst-1.0.1-3.1(x86_64)
Oracle Linux 5.x and Red Hat Enterprise Linux 5.x, where x > 5 [for example, Oracle Linux 5.6]
  • make-3.81
  • binutils-2.17.50.0.6
  • gcc -4.1.1
  • libaio-0.3.106
  • glibc-common-2.3.4
  • libstdc++ -4.1.1
  • setarch-1.6
  • sysstat-5.0.5
  • rng-utils-2
  • libXtst-1.0.1-3.1(x86_64)
Oracle Linux 4.x
Red Hat Enterprise Linux 4.x
  • make-3.80
  • binutils-2.15.92.0.2
  • gcc-3.4.5
  • libstdc++-3.4.5
  • kernel-utils-2.4
  • libXtst-1.0.1-3.1(i386)
64-bit Management Agent is NOT supported on 64-bit platform, but 32-bit Management Agent is supported, so install all 32-bit packages (listed in the previous column) on your 64-bit platform.
SUSE Linux Enterprise 10
  • make-3.80
  • binutils-2.16.91.0.5
  • gcc-4.1.0
  • libstdc++ 4.1.0
  • libaio-32bit-0.3.104-14.2
  • libaio-devel-32bit-0.3.104-14.2
64-bit Management Agent is NOT supported on 64-bit platform, but 32-bit Management Agent is supported, so install all 32-bit packages (listed in the previous column) on your 64-bit platform.
SUSE Linux Enterprise 11
  • make-3.81
  • binutils-2.19-9.3
  • gcc-4.3-62.198
  • libstdc++ 43.4.3
  • make-3.80
  • binutils-2.16.91.0.5
  • gcc -4.1.0
  • libstdc++ 43.4.3
Asianux Server 3
  • make-3.81-3AXS3-i386
  • binutils-2.17.50.0.6-9AXS3-i386
  • gcc-4.1.2-44.1-i386
  • libstdc++-4.1.2-44.1-i386
  • libXtst-1.0.1-3.1(i386)
  • make-3.81
  • binutils-2.17.50.0.6
  • gcc -4.1.1
  • libstdc++ -4.1.1
  • libXtst-1.0.1-3.1(x86_64)
Solaris SPARC 5.9
Not Supported
  • SUNWlibm
  • SUNWlibms
  • SUNWsprot
  • SUNWsprox
  • SUNWtoo
  • SUNWi1of
  • SUNWxwfnt
Solaris SPARC 5.10
Also supported on Solaris Local Container
Not Supported
SUNWbtool
Solaris SPARC 5.11
Not Supported
  • SUNWbtool
  • SUNWhea
  • SUNWlibm
  • SUNWlibms
  • SUNWsprot
  • SUNWtoo
  • SUNWlibC
  • SUNWcsl
Solaris x86-64 5.11
Not Supported
  • SUNWbtool
  • SUNWhea
  • SUNWlibm
  • SUNWlibms
  • SUNWsprot
  • SUNWtoo
  • SUNWlibC
  • SUNWcsl
Solaris x86-64 5.10
Not Supported
  • SUNWbtool
  • SUNWarc
  • SUNWhea
  • SUNWlibm
  • SUNWlibms
  • SUNWsprot
  • SUNWtoo
  • SUNWi1of
  • SUNWi1cs
  • SUNWi15cs
  • SUNWxwfnt
Solaris Express 5.11 x86-64
Note: The supported Kernel ID is 175.0.0.0.2.0,151.0.1.12.
To check the kernel ID, run the following command:
uname -X |grep KernelID
Not Supported
  • SUNWbtool
  • SUNWhea
  • SUNWlibm
  • SUNWlibms
  • SUNWsprot
  • SUNWtoo
  • SUNWlibC
  • SUNWcsl
Solaris SPARC Express 5.11
Note: The supported Kernel ID is 175.0.0.0.2.0,151.0.1.12.
To check kernel ID, run the following command:
uname -X |grep KernelID
Not Supported
  • SUNWbtool
  • SUNWhea
  • SUNWlibm
  • SUNWlibms
  • SUNWsprot
  • SUNWtoo
  • SUNWlibC
  • SUNWcsl
IBM AIX 5.3.00.04
Note: Maintenance level 4 and higher are supported for AIX 5.3.
Maintenance level can be checked using the following command:
oslevel -r
Not Supported
  • bos.perf.proctools(5.3.0.50)
  • bos.adt.base(0.0)
  • bos.adt.libm(0.0)
IBM AIX 6.1
Note: All maintenance levels are supported.
Check the maintenance level using the following command:
oslevel -r
Not Supported
  • bos.adt.base(0.0)
  • bos.adt.lib(0.0)
  • bos.adt.libm(0.0)
  • bos.perf.libperfstat(0.0)
  • bos.perf.perfstat(0.0)
  • bos.perf.proctools(0.0)
  • rsct.basic.rte(0.0)
  • rsct.compat.clients.rte(0.0)
  • xlC.aix61.rte.(9.0.0.0)
  • xlC.rte.(9.0.0.0)
IBM AIX 7.1
Note: All maintenance levels are supported.
Check the maintenance level using the following command:
oslevel -r
Not Supported
  • bos.adt.base(0.0)
  • bos.adt.lib(0.0)
  • bos.adt.libm(0.0)
  • bos.perf.libperfstat(0.0)
  • bos.perf.perfstat(0.0)
  • bos.perf.proctools(0.0)
  • rsct.basic.rte(0.0)
  • rsct.compat.clients.rte(0.0)
  • xlC.aix61.rte.(9.0.0.0)
  • xlC.rte.(9.0.0.0)
HP PA-RISC 11.23
Not Supported
BUNDLE11i(B.11.23.0409.3)
HP PA-RISC 11.31
Not Supported
  • OnlineDiag(B.11.31.01.03)
  • Base-VXFS(B.11.31)
HP-UX Itanium 11.23
Not Supported
BUNDLE11i(B.11.23.0409.3)
HP-UX Itanium 11.31
Not Supported
OS-Core(B.11.31)

Kernel Parameter Requirements

For installing an OMS or a Management Agent on Unix operating systems (32-bit or 64-bit), set the kernel.shmmax parameter to a value 1 byte less than 4 GB or 4294967295.
Oracle recommends this value to avoid lack of memory issues for other applications and to enable a complete and successful core file generation under any and all circumstances.
To verify the value assigned to kernel.shmmax parameter, run the following command:
cat /proc/sys/kernel/shmmax
To set the value for kernel.shmmax parameter, run the following command:
sysctl -w kernel.shmmax=<new value>

Library Requirements

This section lists the libraries required on different platforms (32-bit and 64-bit) for installing an OMS or a Management Agent. In particular, this section covers the following:

Library Requirements for Oracle Management Service

Table 3-3 lists the libraries required on different platforms (32-bit and 64-bit) for installing a new Enterprise Manager system or an additional OMS.
Table 3-3 Library Requirements for Oracle Management Service
Platform 32-Bit Libraries for 32-Bit Platform 64-Bit Libraries for 64-Bit Platform
Oracle Linux 6.x
Red Hat Enterprise Linux 6.x
glibc-2.5.12
glibc-2.5.12
Oracle Linux 5.x
Red Hat Enterprise Linux 5.x
glibc-2.5-12
glibc-2.5.12
Oracle Linux 4.x
Red Hat Enterprise Linux 4.x
glibc-2.3.4-2.43.i386
-
SUSE Linux Enterprise 10
glibc-2.2.4-31.7
-
SUSE Linux Enterprise 11
glibc-2.9
glibc-2.9
Asianux Server 3
glibc-2.3.4-2.9
glibc-2.3.4-2.9

Library Requirements for Oracle Management Agent

There are no library requirements for Management Agent.

4.Creating Operating System Groups and Users

The chapter explains what operating system groups and users you need to create and how to create them. In particular, this chapter covers the following:

What Operating System Groups and Users Are Required?

The following operating system group and user are required for all installation types:
  • The Oracle Inventory Group (typically, oinstall)
    You must create this group the first time you install Oracle software on the system. The default name chosen for this group is oinstall. This group owns the Oracle inventory that is a catalog of all Oracle software installed on the system.
    Note:
    If Oracle software is already installed on the system, then the existing Oracle Inventory group must be the primary group of the operating system user that you use to install other Oracle software.
  • The Oracle Software Owner User (typically, oracle)
    You must create this user the first time you install Oracle software on the system. This user owns all of the software installed during the installation. This user must have the Oracle Inventory group as its primary group.
    Note:
    In Oracle documentation, this user is referred to as the oracle user.
A single Oracle Inventory group is required for all installations of Oracle software on the system. After the first installation of Oracle software, you must use the same Oracle Inventory group for all subsequent Oracle software installations on that system.

How to Create the Operating System Groups and Users?

The following sections describe how to create the required operating system users and groups:
Note:
As an alternative to creating local users and groups, you can create the appropriate users and groups in a directory service, for example, Network Information Services (NIS). For information about using directory services, contact your system administrator or refer to your operating system documentation.

Creating the Oracle Inventory Group

You must create the Oracle Inventory group if it does not already exist. The following subsections describe how to determine the Oracle Inventory group name if it exists, and how to create it if necessary.

Determining Whether the Oracle Inventory Group Exists

When you install Oracle software on the system for the first time, the oraInst.loc file is created. This file identifies the name of the Oracle Inventory group and the path to the Oracle Inventory directory.
To determine whether the Oracle Inventory group exists, enter the following command:
$ more /etc/oraInst.loc
Note:
the oraInst.loc file is available in the /etc directory for Linux and other platforms. On Solaris platforms, it is available at /var/opt/oracle/.
If the oraInst.loc file exists, then the output from this command looks like:
inventory_loc=/u01/app/oracle/oraInventory
inst_group=oinstall
The inst_group parameter shows the name of the Oracle Inventory group, oinstall.

Creating the Oracle Inventory Group

If the oraInst.loc file does not exist, or if the file exists but the Oracle Inventory group is different, then create the Oracle Inventory group oinstall using the following command:
# /usr/sbin/groupadd oinstall

Creating the Oracle Software Owner User

You must create an Oracle software owner user in the following circumstances:
  • If an Oracle software owner user does not exist, for example, if this is the first installation of Oracle software on the system
  • If an Oracle software owner user exists, but you want to use a different operating system user, with different group membership, to give database administrative privileges to those groups in a new Oracle Database installation

Determining Whether an Oracle Software Owner User Exists

To determine whether an Oracle software owner user named oracle exists, run the following command:
$ id oracle
If the oracle user exists, then the output from this command looks like this:
uid=440(oracle) gid=200(oinstall) groups=201(dba),202(oper)
If the user exists, then determine whether you want to use the existing user or create another oracle user.
Note:
If necessary, contact your system administrator before using or modifying an existing user.

Creating an Oracle Software Owner User

If the Oracle software owner user does not exist or if you require a new Oracle software owner user, then follow these steps to create one. In the following procedure, use the user name oracle unless a user with that name already exists.
  1. To create the oracle user, enter a command similar to the following:
    # /usr/sbin/useradd -g oinstall oracle
    
    In this command, the -g option specifies the primary group, which must be the Oracle Inventory group, for example oinstall.
  2. Set the password of the oracle user:
    # passwd oracle
    
Note:
Oracle recommends you to use the same UIDs across all the OMS instances, especially when you use Oracle Software Library. If the UIDs are different, then the files created by one OMS cannot be modified by another OMS.

Modifying an Oracle Software Owner User

If the oracle user exists, but its primary group is not oinstall, then enter a command similar to the following to modify it. Specify the primary group using the -g option.

# /usr/sbin/usermod -g oinstall oracle 


5. Installing Cygwin and Starting SSH Daemon

This chapter explains how you can install Cygwin and start the SSH daemon on Microsoft Windows hosts. In particular, this chapter covers the following:
Note:
This chapter is applicable only when the destination host on which you are installing a Management Agent is running on Microsoft Windows.

Overview

The Add Host Targets Wizard is an application built into the Enterprise Manager Cloud Control console. It offers GUI-rich, interactive screens to enable you to install Management Agents on unmanaged hosts and convert them to managed hosts so that they can be monitored and managed in Enterprise Manager Cloud Control.
When you use the Add Host Targets Wizard to install Oracle Management Agent (Management Agent) on a destination host that is running on Microsoft Windows, as a prerequisite, you are expected to have Cygwin installed and the SSH Daemon started on that destination host. To do so, follow the steps listed in Installing Cygwin.
Cygwin is essentially a utility that offers a Linux-like environment on a Microsoft Windows operating system. Technically, it is a DLL (cygwin1.dll) that acts as a Linux API layer providing substantial Linux API functionality. Once you install Cygwin, you can configure the SSH Daemon on it.
The SSH Daemon enables the Add Host Targets Wizard to establish SSH connectivity between the OMS host and the destination host where you want to install the management agent. Using this connectivity, the wizard transfers the software binaries to the destination host over SSH protocol, and installs and configures the Management Agent.
Note:
The Add Host Targets Wizard is certified and supported with Cygwin 1.7.

Before You Begin

Before starting with the SSHD setup, ensure you are not using OpenSSH and MKSNT when using the Add Host Targets Wizard. To do so, perform the following checks:
  1. Ensure OpenSSH\bin and mksnt are not in your PATH environment variable. If they are, remove them by doing the following:
    1. Right-click on My Computer and go to Properties.
    2. In the System Properties window, click Advanced.
    3. In this tab, click Environment Variables.
    4. Here, search for the PATH system variable, select it, and if the OpenSSH\bin and mksnt are present in the PATH, click Edit.
    5. In the Edit System Variable dialog box, delete these two values from the PATH, and click OK.
  2. Stop the SSH Daemon if it is running from OpenSSH, MKS or any other vendor. If the SSH Daemon is running, stop it by doing the following:
    1. Right-click on My Computer, and select Manage.
    2. In the Computer Management window, in the left pane, expand Services and Applications, and select Services.
    3. In the right pane, right click the SSH Daemon/MKS Secure Shell service and click Stop.
      Note:
      • The navigational steps described in this section may vary for different Microsoft Windows operating systems.
      • While running cygwin.bat in Microsoft Windows Server 2008 and Microsoft Windows Vista, ensure that you invoke it in administrator mode. To do this, right-click the cygwin.bat file and select Run as administrator.

Installing Cygwin

To install Cygwin and start the SSH daemon on Microsoft Windows hosts, follow these steps:
  1. Download the setup.exe file corresponding to Cygwin 1.7 from the following Web site, and install the Cygwin software in the C:\cygwin directory:
    http://www.cygwin.com
    Note:
    If you install Cygwin in a different directory on the destination host, then ensure that you update the $<OMS_HOME>/oui/prov/resources/ssPaths_msplats.properties file with the proper Cygwin binary values after installing the Enterprise Manager system.
    1. Invoke Cygwin setup, and click Next to proceed.
      Surrounding text describes cygwin1.gif.
    2. On the Choose Installation Type screen, select Install from Internet, and click Next.
      Surrounding text describes cygwin2.gif.
    3. On the Choose Installation Directory screen, enter C:\cygwin as the Root Directory, and click Next.
      Surrounding text describes cygwin3.gif.
    4. On the Select Local Package Directory screen, select a directory on your local machine where you want the Setup to store the installation files it downloads, and click Next.
      Surrounding text describes cygwin4.gif.
    5. On the Select Connection Type screen, select appropriate settings to connect to the internet, and click Next.
      Surrounding text describes cygwin5.gif.
    6. On the Choose Download Site(s) screen, select any site from the available list, and click Next.
      Surrounding text describes cygwin6.gif.
    7. On the select packages screen, ensure that you select the following packages, and click Next:
      From the Archive category, select unzip and zip as follows:
      Surrounding text describes cygwin8a.gif.
      From the Net category, select openssh as follows:
      Surrounding text describes cygwin8b.gif.
      After selecting the packages, a Resolving Dependencies screen is displayed. Click Next to proceed.
    8. On the Installation Status and Create Icons screen, do not make any changes. Click Finish to complete the installation process.
      Surrounding text describes cygwin10.gif.
  2. After you install Cygwin, navigate to the C:\cygwin directory, open the Cygwin.bat file in edit mode, and add the following line before invoking the bash shell.
    set CYGWIN=binmode ntsec
    For example, here are the contents for the Cygwin.bat file after adding the above line:
    @echo off
    C:
    chdir C:\cygwin\bin
    set CYGWIN=binmode ntsec
    bash --login -i
    
  3. To verify if Cygwin (cygrunsrv) is installed properly, run C:\cygwin\Cygwin.bat, and execute the following command:
    cygrunsrv -h
    
    If Cygwin is installed properly, then all the Cygwin help options are displayed on the screen. However, if this returns an error message, then it means you are not on the right track, and might have to reinstall Cygwin.
  4. To install SSHD service, run C:\cygwin\Cygwin.bat, and execute the following command:
    ssh-host-config
    
    After running the command, you are prompted the following questions:
    *** Query: Should privilege separation be used? <yes/no>: yes
    *** Query: New local account 'sshd'? <yes/no>: yes
    *** Query: Do you want to install sshd as a service?
    *** Query: <Say "no" if it is already installed as a service> <yes/no>: yes
    *** Query: Enter the value of CYGWIN for the deamon: [] binmode ntsec
    *** Info: 'cyg_server' will only be used by registered services.
    *** Query: Do you want to use a different name? (yes/no) yes
        (Note: At this point you will be prompted to create a new user)
    *** Query: Create new privileged user account 'cyg_server'? (yes/no) yes
    *** Info: that this password matches the password rules given on your system.
    *** Info: Entering no password will exit the configuration.
    *** Query: Please enter the password:
    ***Query: Renter:
    
    If the configuration is successful, you will see the following message:
    Host configuration finished. Have fun!
    
  5. Backup the /etc/passwd file and then use a vim or vi editor to open it in edit mode. Remove only those entries of the user that you will use to connect to the destination host on which you want to install the Management Agent. Ask the user to make a backup of the /etc/passwd file before editing.
    • If the user that you are employing to connect to the destination host on which you want to install the Management Agent is a local user, run C:\cygwin\Cygwin.bat and execute the following:
      /bin/mkpasswd -l –u <USER> >> /etc/passwd
      
    • If the user you are employing to connect to the destination host on which you want to install the Management Agent running is a domain user, run C:\cygwin\Cygwin.bat and execute the following:
      /bin/mkpasswd -d -u <USER> >> /etc/passwd
      /bin/mkgroup -d >> /etc/group
      
      
      mkdir -p /home/<USER>  (for example, mkdir -p /home/pjohn)
      chown <USER> /home/<USER> (for example, chown pjohn /home/pjohn)
      
  6. (domain user only) If the user you are employing to connect to the destination host on which you want to install the Management Agent is a domain user, do the following to start the SSH daemon:
    1. Right-click on My Computer, and select Manage.
    2. In the Computer Management dialog box that appears, go to Services and Applications, and select CYGWIN sshd.
    3. Right-click CYGWIN sshd and select Properties.
    4. In the Properties dialog box, go to the Log On tab.
    5. Here, specify the domain/user name and password. Click Apply.
    6. Run C:\cygwin\Cygwin.bat, and execute the following:
      chown <USERNAME> /var/log/sshd.log
      chown -R <USERNAME> /var/empty
      chown <USERNAME> /etc/ssh*
      chmod 755 /var/empty
      chmod 644 /var/log/sshd.log
      
      Note:
      If /var/log/sshd.log does not exist, you do not have to execute the following commands:
      chown <USERNAME> /var/log/sshd.log
      chmod 644 /var/log/sshd.log
      
  7. Perform one of the following steps to start the SSH daemon:
    Run C:/cygwin/Cygwin.bat and execute the following command:
    /usr/sbin/sshd
    OR
    Run C:/cygwin/Cygwin.bat and execute the following command:
    cygrunsrv -S sshd
    OR
    Perform these steps:
    1. Right-click on My Computer, and select Manage.
    2. In the Computer Management dialog box that appears, go to Services and Applications, and select CYGWIN sshd.
    3. Right-click CYGWIN sshd and select Start.
  8. You can now test your Cygwin setup.
    To do this, go to a different machine (that has the ssh client running), and execute the following command:
    ssh -l <USERNAME> <localhost> 'date'
    
    OR
    
    ssh -l <USERNAME> <this node> 'date'
    
    For example,
    ssh -l pjohn example.com 'date'
     
    This command will prompt you to specify the password. When you specify the correct password, the command should return the accurate date.

    6 Installing Enterprise Manager System

    This chapter describes how you can install a new Enterprise Manager system while utilizing an existing, certified Oracle Database to store Oracle Management Repository (Management Repository). In particular, this chapter covers the following:
Note:
For information on the releases Enterprise Manager Cloud Control has had so far, refer to Oracle Enterprise Manager Cloud Control Advanced Installation and Configuration Guide.

Introduction

This section covers the following:

Overview of the Installation Types

You can install Enterprise Manager Cloud Control with either simple or advanced configuration. Table 6-1 describes the basic differences between the two installation types.
Table 6-1 Differences Between Simple and Advanced Installation
Simple Installation Advanced Installation
Meant for demo or evaluation purposes, and small deployments, and when you do not want to worry about the granular control of the installer and want to install the Enterprise Manager system quickly, with less memory, and for monitoring fewer targets in their environment
Meant for small, medium, and large deployments, and when you want to customize your installation with custom locations, directory names, and passwords.
Installs with minimal, default configuration settings and preferences that you need for a complete Enterprise Manager system. Does not offer too many options to customize your installation.
Offers custom or advanced configuration options that you can select to suit your environment and customize your installation.
Configures with less memory to monitor up to 30 targets, with 2 Oracle Management Agents (Management Agent) and 2 concurrent user sessions for handling about 10 jobs per day.
Offers an option to select the deployment size (small, medium, or large) of your choice, and depending on the deployment size you select, configures with the required memory.
The deployment size essentially indicates the number of targets you plan to monitor, the number Management Agents you plan to have, and the number of concurrent user sessions you plan have. The prerequisite checks are run regardless of the selection you make, but the values to be set for the various parameters checked depend on the selection you make
For more information on deployment sizes, the prerequisite checks that are run, the database parameters that are set, and how you can modify the deployment size after installation, refer to Oracle Enterprise Manager Cloud Control Advanced Installation and Configuration Guide.
Sets fewer database parameters.
For information about the database parameters that are set, refer to Setting Database Initialization Parameters
Sets more database parameters.
For information about the database parameters set for different deployment sizes, refer to the Oracle Enterprise Manager Cloud Control Advanced Installation and Configuration Guide.
Allows you to use a database where the Management Repository is preconfigured using the database templates offered by Oracle.
Installs four mandatory plug-ins such as Oracle Database plug-in, Oracle Fusion Middleware plug-in, Oracle My Oracle Support plug-in, and Oracle Exadata plug-in.
Installs four mandatory plug-ins such as Oracle Database plug-in, Oracle Fusion Middleware plug-in, Oracle My Oracle Support plug-in, and Oracle Exadata plug-in, and any other plug-in you select.
Creates a default user account weblogic for the WebLogic domain GCDomain.
Allows you to change the name of the default user account weblogic for the WebLogic domain GCDomain.
Prompts for a common password for WebLogic Server administration, Node Manager, SYSMAN user account, and Management Agent registration.
Prompts for separate, distinct passwords for WebLogic Server administration, Node Manager, SYSMAN user account, and Management Agent registration.
Creates a default OMS instance base directory (gc_inst) in the Middleware home.
Allows you to change the name of the default OMS instance base directory (gc_inst) in the Middleware home.
Creates tablespaces for management, configuration data, and JVM diagnostics data in default locations.
Allows you to change the locations of the tablespaces for management, configuration data, and JVM diagnostics data.
Installs with default ports.
Allows you to customize the ports according to your environment.
Has only a few interview screens to fill in the Enterprise Manager Cloud Control Installation Wizard.
Has many interview screens to fill in the Enterprise Manager Cloud Control Installation Wizard

Overview of What Is Installed and Configured

As part of a new Enterprise Manager system, the installation wizard does the following:
  • Installs the following components in the Middleware home you enter in the installation wizard:
    • Java Development Kit (JDK) 1.6 v24
    • Oracle WebLogic Server 11g Release 1 (10.3.5)
    • Oracle Management Service 12c Release 2 (12.1.0.2)
    • Oracle JRF 11g Release (11.1.1.6.0), which includes oracle_common directory
    • Oracle Web Tier 11g Release (11.1.1.6.0), which includes Oracle_WT directory
    • Oracle Plug-Ins
      • Oracle Database Plug-In
      • Oracle Fusion Middleware Plug-In
      • Oracle My Oracle Support Plug-In
      • Oracle Exadata Plug-In
        Note:
        • Java Development Kit (JDK) 1.6 v24 and Oracle WebLogic Server 11g Release 1 (10.3.5) are installed only if they do not exist in your environment.
        • If you want to manually install Oracle WebLogic Server 11g Release 1 (10.3.5), then follow the guidelines outlined in Before You Begin.
        • For advanced installation, in addition to the mandatory plug-ins listed above, you can optionally install other plug-ins available in the software kit (DVD, downloaded software). The installer offers a screen where you can select the optional plug-ins and install them. However, if you want to install some plug-ins that are not available in the software kit (DVD, downloaded software), then refer to Advanced Installer Options.
  • Installs Oracle Management Agent 12c Release 2 (12.1.0.2) in the agent base directory you specify (outside the Middleware home).
    For example, if the middleware home is /u01/app/Oracle/Middleware/, then you can specify the agent base directory as /u01/app/Oracle/agent12c.
  • Creates an Oracle WebLogic domain called GCDomain. For this WebLogic Domain, a default user account, weblogic, is used as the administrative user. In advanced installation, you can choose to change this if you want.
  • Creates a Node Manager user account called nodemanager. A Node Manager enables you to start, shut down, or restart an Oracle WebLogic Server instance remotely, and is recommended for applications with high availability requirements.
  • Configures an Oracle Management Service Instance Base location (gc_inst) in the Oracle Middleware home (Middleware home), for storing all configuration details related to Oracle Management Service 12c. In advanced installation, you can choose to change this if you want.
    For example, if the Middleware home is /u01/app/Oracle/Middleware/, then the instance base location is /u01/app/Oracle/Middleware/gc_inst. You can choose to change this, if you want, in the installer. However, you can change it for only advanced installation and not for simple installation.
  • Configures Oracle Management Repository in the existing, certified Oracle Database. If the database instance is created using the database template offered by Oracle, then this step is skipped.
    Note:
    The existing, certified Oracle Database must be one of the certified databases listed in the Enterprise Manager certification matrix available on My Oracle Support, or a database instance created with a preconfigured Oracle Management Repository (Management Repository) using the database templates offered by Oracle. To access the Enterprise Manager certification matrix, follow the steps outlined in Appendix E.
    For information about creating a database instance with a preconfigured Management Repository using the database templates offered by Oracle, refer to Appendix D.
    The database can be on a local or remote host, and if it is on a remote host, it must be monitored by Oracle Management Agent. However, Oracle Real Application Clusters (Oracle RAC) databases must only be on a shared disk.
  • Runs the following configuration assistants to configure the installed or upgraded components:
    • Plugins Prerequisites Check Configuration Assistant
    • Repository Configuration Assistant
      Note:
      If you use a database instance that was created with a preconfigured Management Repository using the database templates offered by Oracle, then Repository Out-of-Box Configuration Assistant is run instead of Repository Configuration Assistant.
    • MDS Schema Configuration Assistant
    • OMS Configuration Assistant
    • Plugins Deployment and Configuration Assistant
    • Start Oracle Management Service Configuration Assistant
    • Oracle Configuration Manager for OMS Configuration Assistant
    • Agent Configuration Assistant

Overview of the Directory Structures

This section describes the following:

Overview of the Directory Structure for Enterprise Manager Installation

By default, the following are the contents of the Middleware home for this type of installation:
<middleware_home>
    |_____wlserver_10.3
    |_____jdk16
    |_____oms
    |_____plugins
    |_____gc_inst
    |_____Oracle_WT
    |_____oracle_common
    |_____utils
    |_____logs
    |_____modules
    |_____user_projects
    |_____ocm.rsp
    |_____registry.dat
    |_____domain-registry.xml
    |_____registry.xml

Overview of the Directory Structure for Management Agent Installation

By default, the following are the contents of the agent base directory for this type of installation:
<agent_base_directory>
    |_____core
         |_____12.1.0.2.0
    |_____plugins
    |_____agent_inst
    |_____sbin
    |_____plugins.txt
    |_____plugins.txt.status
    |_____agentimage.properties

Before You Begin

Before you begin, keep these points in mind:
  • You must ensure that you have the latest Enterprise Manager Cloud Control software.
    To download the latest software, access the following URL:
    http://www.oracle.com/technetwork/oem/enterprise-manager/downloads/index.html
    For information about downloading the latest software, refer to the Oracle Enterprise Manager Cloud Control Advanced Installation and Configuration Guide.
  • Ensure that there are no white spaces in the name of the directory where you download and run the Enterprise Manager Cloud Control software from. For example, do not download and run the software from a directory titled EM Software because there is a white space between the two words of the directory name.
  • You can install Enterprise Manager Cloud Control using the installation wizard only on a single host, that is, locally on the server where the wizard is invoked. You cannot install on multiple or remote hosts.
  • Oracle Management Service 12c Release 2 (12.1.0.2) can communicate only with Oracle Management Agent 12c Release 2 (12.1.0.2) and Oracle Management Agent 12c Release 1 (12.1.0.1), and not with any earlier release of the Management Agent.
    And Oracle Management Service 12c Release 1 (12.1.0.1) can communicate only with Oracle Management Agent 12c Release 1 (12.1.0.1), and not with any earlier release or higher release of the Management Agent.
  • Do not install on a symlink. If you do, then you will not be able to clone this OMS later.
  • You must not set the ORACLE_HOME and ORACLE_SID environment variables. You must ensure that the Oracle directories do NOT appear in the PATH.
  • You must set the DISPLAY environment variable.
    • In bash terminal, run the following command:
      export DISPLAY=<hostname>:<vnc port>.0
      For example, export DISPLAY=example.com:1.0
    • In other terminals, run the following command:
      setenv DISPLAY <hostname>:1.0
      For example, setenv DISPLAY example.com:1.0
  • The Enterprise Manager Cloud Control Installation Wizard installs Java Development Kit (JDK) 1.6 v24 and Oracle WebLogic Server 11g Release 1 (10.3.5) only if they do not exist in your environment.
  • If Oracle WebLogic Server 11g Release 1 (10.3.5) does not exist and if you want to manually install it, then ensure that you install it using JDK 1.6 v24+ (64-bit version for 64-bit platforms and 32-bit version for 32-bit platforms).
    • Download JDK 1.6 v24+ for your platform from the platform vendor's Web site.
      For example, download SUN JDK 1.6 v24+ for Linux platforms from the following Oracle Web site URL:
      http://www.oracle.com/technetwork/java/javase/downloads/index.html
      Similarly, download the JDK for other platforms from other vendors' trusted Web sites.
    • If you already have JDK, then verify its version by navigating to the <JDK_Location>/bin directory and running the following command:
      "./java -fullversion"
      To verify whether it is a 32-bit or a 64-bit JDK, run the following command:
      "file *"
    • JROCKIT is not supported.
    • If you want to manually install Oracle WebLogic Server 11g Release 1 (10.3.5) on Linux 64-bit platforms, first install the 64-bit JDK for that platform, and then download and use the wls1035_generic.jar file to install Oracle WebLogic Server.
      For example,
      <JDK home>/bin/java -d64 -jar <absolute_path _to_wls1035_generic.jar>
    • If you want to manually install Oracle WebLogic Server 11g Release 1 (10.3.5) on Linux 32-bit platforms, then download and use either the wls1035_linux32.bin file or the wls1035_generic.jar file.
      For example,
      <JDK home>/bin/java -jar <absolute_path _to_wls1035_generic.jar>
    • You must procure the Oracle WebLogic Server 11g Release 1 (10.3.5) software and install it following the instructions outlined in the Oracle® Fusion Middleware Installation Guide for Oracle WebLogic Server. Ensure that it is a default installation. The guide is available in the Fusion Middleware documentation library available at:
      http://www.oracle.com/technetwork/middleware/weblogic/documentation/index.html
    • You must ensure that the Oracle WebLogic Server installation is a typical installation, and even if you choose to perform a custom installation, ensure that components chosen for custom installation are the same as the ones associated with a typical installation.
    • You must ensure that the user installing the WebLogic Server is the same as the one installing Enterprise Manager Cloud Control.
  • If you are installing Enterprise Manager Cloud Control in a Middleware home that is on an NFS-mounted drive, then ensure that you maintain the lock file in a local file system and not in that NFS-mounted location. To do so, after you install, modify the lock file location in the httpd.conf file to map to a location on a local file system. For instructions, refer to After You Install.
  • You must ensure that the Oracle WebLogic Server 11g Release 1 (10.3.5) installed by the Enterprise Manager Cloud Control Installation Wizard or by you is dedicated for Enterprise Manager Cloud Control. You must not have any other Oracle Fusion Middleware product installed in that Middleware home.
    Enterprise Manager Cloud Control cannot coexist with any Oracle Fusion Middleware product in the same Middleware home because the ORACLE_COMMON property is used by both the products.
  • You can optionally use the database templates offered by Oracle to create a database instance with a preconfigured Management Repository. To do so, refer to Appendix D. You can use such a database instance for simple as well as advanced installation.
    However, note that the database templates are essentially designed for simple installation, although they can be used for advanced installation. Therefore, while performing an advanced installation (possibly with small, medium, or large deployment size selection), when you provide the details of such a database, you will be prompted that the database parameters need to be modified to suit the deployment size you selected. You can confirm the message to proceed further. The installation wizard will automatically set the database parameters to the required values.
  • If you want to optionally follow the configuration guidelines for deploying the Management Repository so that your management data is secure, reliable, and always available, refer to the Oracle Enterprise Manager Cloud Control Administrator's Guide.
  • In addition to the mandatory plug-ins, you can optionally install other plug-ins available in the software kit (DVD, downloaded software). The installer offers a screen where you can select the optional plug-ins and install them. However, if you want to install some plug-ins that are not available in the software kit (DVD, downloaded software), then refer to Advanced Installer Options.
  • Oracle offers bug fixes for a product based on the Oracle Lifetime Support Policy. When the license period expires for a particular product, the support for bug fixes offered by Oracle also ends. For more information, see the Oracle Lifetime Support Policy available at:
    http://www.oracle.com/support/library/brochure/lifetime-support-technology.pdf
    When determining supportability and certification combinations for an Enterprise Manager Cloud Control installation, you must consider Enterprise Manager Cloud Control's framework components as well as the targets monitored by Enterprise Manager Cloud Control. Oracle recommends keeping your Cloud Control components and targets updated to the latest certified versions in order to receive code fixes without having to purchase an Extended Support license.
  • You can find the OMS and Management Agent entries in the /etc/oragchomelist file for all UNIX platforms except HPUNIX, HPia64, Solaris Sparc.
    On HPUNIX, HPia64, Solaris Sparc platforms, the entries are present in /var/opt/oracle/oragchomelist.
  • As a prerequisite, you must have an existing Oracle Database to configure the Management Repository. This database can also have the Automatic Memory Management (AMM) feature enabled.

Prerequisites

Table 6-2 lists the prerequisites you must meet before installing Enterprise Manager Cloud Control.
Table 6-2 Prerequisites for Installing Enterprise Manager Cloud Control
Requirement Description
Hardware Requirements
Ensure that you meet the hard disk space and physical memory requirements as described in Chapter 2.
Operating System Requirements
Ensure that you install Enterprise Manager Cloud Control only on certified operating systems as mentioned in the Enterprise Manager certification matrix available on My Oracle Support.
To access the Enterprise Manager certification matrix, follow the steps outlined in Appendix E.
For information about platforms receiving future support, refer to My Oracle Support note 793512.1.
Note: If you use Oracle Solaris 10, then ensure that you have update 9 or higher installed. To verify whether it is installed, run the following command:
cat /etc/release
You should see the output similar to the following. Here, s10s_u6 indicates that update 6 is already installed.
Solaris 10 10/08 s10s_u6wos_07b SPARC
Package Requirements
Ensure that you install all the operating system-specific packages as described in Chapter 3.
Operating System Groups and Users Requirements
Ensure that you create the required operating system groups and users as described in Chapter 4.
Unique Host Name and Static IP Address Requirements
Ensure that you check the network configuration to verify that the host on which you are installing resolves to a unique host name and a static IP address that are visible to other hosts in the network.
Note: Oracle recommends that you use static IP address. If you use dynamic IP address, and if the host is rebooted, then the host might receive a new IP, and as a result, the OMS startup will fail.
Temporary Directory Space Requirements
Ensure that you allocate 400 MB of space for a temporary directory where the executables can be copied.
By default, the temporary directory location set to the environment variable TMP or TEMP is honored. If both are set, then TEMP is honored. If none of them are set, then the following default values are honored: /tmp on UNIX hosts and c:\Temp on Microsoft Windows hosts.
Central Inventory Requirements
Ensure that you allocate 100 MB of space for the central inventory directory.
Also ensure that the central inventory directory is not in a shared file system. If it is already in a shared file system, then create a new inventory in a non-shared file system. You can optionally migrate the products that were previously installed in the shared file system to this new inventory in the non-shared file system.
UMASK Value Requirements
Ensure that you set the default file mode creation mask (umask) to 022 in the shell startup file.
For example:
  • Bash Shell
    $ . ./.bash_profile
  • Bourne or Korn Shell
    $ . ./.profile
  • C Shell
    % source ./.login
CLASSPATH Environment Variable Requirements
Unset the CLASSPATH environment variable. You can always reset the variable to the original value after the installation is complete.
File Descriptor Requirements
Ensure that you set the file descriptor to a minimum of 4096.
To verify the current value set to the file descriptors, run the following command:
/bin/sh -c "ulimit -n"
If the current value is not 4096 or greater, then as a root user, update the /etc/security/limits.conf file with the following entries:
<UID> soft nofile 4096
<UID> hard nofile 4096
Existing Database Version Requirements
Ensure that the existing database is a certified database as mentioned in the Enterprise Manager certification matrix available on My Oracle Support. Alternatively, the database can be a database instance created with a preconfigured Management Repository using the database templates offered by Oracle.
For information about creating a database instance with a preconfigured Management Repository using the database templates offered by Oracle, refer to Appendix D.
To access the Enterprise Manager certification matrix and identify whether your database is a certified database, follow these steps in Appendix E.
Important:
  • Ensure that the database is patched with all the Patch Set Updates (PSU) or Critical Patch Updates (CPU) released for that release. Also ensure that you apply the patches.
  • If you use Oracle Database 11g Release 2 (11.2.0.1), then ensure that you apply the patches for bugs 10014178 and 8799099.
  • If you use Oracle Database 11g Release 1 (11.1.0.7), then ensure that you apply Patch Set Update 2 and the patches for bugs 8644757 and 7525072.
  • The database can also have the Automatic Memory Management (AMM) feature enabled.
  • Ensure that this database is dedicated to Enterprise Manager.
Host File Requirements
Ensure that the host name specified in the /etc/hosts file is unique, and ensure that it maps to the correct IP address of that host. Otherwise, the installation can fail on the product-specific prerequisite check page.
Ensure that localhost is pingable and resolves to 127.0.0.1 (or resolves to ::1 for IPv6 hosts).
The following is the recommended format of the /etc/hosts file:
<ip> <fully_qualified_host_name> <short_host_name>
For example,
127.0.0.1 localhost.localdomain localhost
172.16.0.0 myhost.example.com myhost
According to RFC 952, the following are the assumptions: A name (Net, Host, Gateway, or Domain name) is a text string up to 24 characters drawn from the alphabet (A-Z), digits (0-9), minus sign (-), and period (.). Note that periods are only allowed when they serve to delimit components of domain style names. No blank or space characters are permitted as part of a name. No distinction is made between upper and lower case. The first character must be an alpha character.
Also, if DNS server is configured in your environment, then you should be able to use DNS to resolve the name of the host on which you want to install the OMS.
For example, all these commands must return the same output:
nslookup host1
nslookup example.com
nslookup 172.16.0.0
Installing User Requirements
Ensure that you meet the following requirements:
  • (For UNIX only) The installation must NOT be run by a root user.
  • (For Microsoft Windows only) User must be part of the ORA-DBA group and have administrator permissions.
  • (For Microsoft Windows only) User must belong to the DBA group, and have permissions to perform the following: Act as part of the operating system, Create a token object, Log on as a batch job, and Adjust memory quotas for a process.
    To verify whether the install user has these rights, from the Start menu, click Settings and then select Control Panel. From the Control Panel window, select Administrative Tools, and from the Administrative Tools window, select Local Security Policy. In the Local Security Settings window, from the tree structure, expand Local Policies, and then expand User Rights Assignment.
Permission Requirements
  • Ensure that you have write permission in the Middleware home and the Oracle Management Service Instance Base location.
  • Ensure that you have write permission in the temporary directory where the executables will be copied. For example, /tmp or c:\Temp.
  • Ensure that you have write permission in the location where you want to create the Central Inventory (oraInventory) if it does not already exist. If the Central Inventory already exists, then ensure that you have write permission in the inventory directory.
  • Ensure that the user who installed the existing Oracle Database has write permission in the data file locations where the data files for the new tablespaces will be copied.
    These tablespaces and data files are created while configuring Enterprise Manager Cloud Control. While installing with simple configuration ( Installing with Simple Configuration), the installer automatically honors the default locations so you are not prompted for them. However, while installing with custom configuration ( Installing with Advanced Configuration), the installer prompts you to validate or enter the locations explicitly.
Central Inventory Location Requirements
Ensure that the Central Inventory (oraInventory) is not in a shared location. When you use the /etc/oraInst.loc file, ensure that the inventory location specified there is not pointing to a shared location. If it is, change it to a non-shared location.
Proximity Requirements
Ensure that the host on which the OMS is being installed and the host on which the Management Repository is being configured are located in close proximity to each other. Ideally, the round trip network latency between the two should be less than 1 millisecond.
Port Requirements
Ensure that the ports you assign (within the given range) to the following components are free and available:
  • Admin Server HTTP SSL Port = 7101 - 7200
  • Enterprise Manager Upload HTTP Port = 4889 - 4898
  • Enterprise Manager Upload HTTP SSL Port = 1159, 4899 - 4908
  • Enterprise Manager Central Console HTTP Port = 7788 - 7798
  • Enterprise Manager Central Console HTTP SSL Port = 7799 - 7809
  • Oracle Management Agent Port = 3872, 1830 - 1849
  • Node Manager = 7101 - 7200
  • Managed Server HTTP Port = 7201 - 7300
  • Managed Server HTTPS Port = 7301 - 7400
To verify if a port is free, run the following command:
  • On Unix:
    netstat -anp | grep <port no>
  • On Microsoft Windows:
    netstat -an|findstr <port_no>
Internet Connection Requirements
Oracle recommends that the host from where you are running the installer have a connection to the Internet so that the configuration information can be automatically collected and uploaded to My Oracle Support.

Installation Procedure

This section describes the following:

Installing with Simple Configuration

To install Enterprise Manager Cloud Control with simple configuration, follow these steps:
Note:
The simple installation type installs with default configuration settings and preferences that you need for a complete Enterprise Manager system. It does not offer too many options to customize your installation. This installation type is meant for demo or evaluation purposes, and small deployments, and when you do not want to worry about the granular control of the installer and want to install the Enterprise Manager system quickly, with less memory, and for monitoring fewer targets in their environment.
Note:
Oracle recommends you to run the EM Prerequisite Kit before invoking the installer to ensure that you meet all the repository requirements beforehand. Even if you do not run it manually, the installer anyway runs it in the background while installing the product. However, running it manually beforehand sets up your Management Repository even before you can start the installation or upgrade process. For information on the kit, to understand how to run it, and to know about the prerequisite checks it runs, see Appendix A.
  1. Invoke the Enterprise Manager Cloud Control Installation Wizard.
    Invoke the installation wizard as a user who belongs to the oinstall group you created following the instructions in Chapter 4.
    <Software_Location>/runInstaller
    In this command, <Software_Location> is either the DVD location or the location where you have downloaded the software kit.
    Note:
    • To invoke the installation wizard on UNIX platforms, run runInstaller. To invoke on Microsoft Windows platforms, run setup.exe.
    • Ensure that there are no white spaces in the name of the directory where you download and run the Enterprise Manager Cloud Control software from. For example, do not download and run the software from a directory titled EM Software because there is a white space between the two words of the directory name.
    • When you invoke runInstaller or setup.exe, if the Enterprise Manager Cloud Control Installation Wizard does not appear, then it is possible that you do not have read and write access to the /stage subdirectory, which a subdirectory in the Disk1 directory of the Enterprise Manager software.
      There is a classpath variable that the installation wizard computes for OPatch as ../stage/Components/, and when the TEMP variable is set to /tmp, the installation wizard tries to look for the opatch JAR file in the /tmp/../stage directory, which is equivalent to /stage. However, if you do not have read and write permission on /stage, then the installation wizard can hang. Under such circumstances, verify if you have read and write access to the /stage directory. If you do not have, then set the TEMP variable to a location where the install user has access to, and then relaunch the installation wizard.
  2. Enter My Oracle Support Details.
    My Oracle Support Details Screen
    (Optional) On the My Oracle Support Details screen, enter your My Oracle Support credentials to enable Oracle Configuration Manager. If you do not want to enable Oracle Configuration Manager now, go to Step (3).
    If the host from where you are running the installation wizard does not have a connection to the Internet, then enter only the e-mail address and leave the other fields blank. After you complete the installation, manually collect the configuration information and upload it to My Oracle Support.
  3. Click Next.
  4. Install Software Updates.
    Install Software Updates
    On the Software Updates screen, select one of the following sources from where the software updates can be installed while the installation of the Enterprise Manager system is in progress. If you do not want to apply them now, then select Skip.
    • (Recommended) Select Search for Updates, then select Local Directory if you have already manually downloaded the software updates to an accessible local or remote location.
      Note:
      For instructions to manually download the software updates, refer to Oracle Enterprise Manager Cloud Control Advanced Installation and Configuration Guide.
      Enter the location where the updates are available, and click Search for Updates. To search the computer and select the location, click Browse. Once the search results appear with patch numbers and their details, click the patch number to view the ReadMe associated with that patch.
      • If the updates have been downloaded to the default location, then select or enter the full path to the scratch path location. For example, if the scratch path location is /scratch/OracleHomes and if the software updates are available in /scratch/OracleHomes/Updates, then enter /scratch/OracleHomes/Updates.
      • If the software updates have been downloaded to a custom location, then select or enter the full path to the custom location. For example, if the custom location is /home/john and if the software updates are available in /home/john/Updates, then enter /home/john/Updates.
    • Select Search for Updates, then select My Oracle Support if you want the installer to connect to My Oracle Support and automatically download the updates from there.
      Enter the My Oracle Support account user name and password, and click Search for Updates. Once the search results appear with patch numbers and their details, click the patch number to view the ReadMe associated with that patch
    Note:
    Despite providing the My Oracle Support credentials, if you are unable to download the software updates, then exit the installer, and invoke the installer again passing the -showProxy parameter in the following way: <Software_Location>/runInstaller -showProxy
    Note:
    If you choose to skip installing the software updates during installation by not providing the My Oracle Support credentials, you can always register the credentials later using the Enterprise Manager Cloud Control console and view the recommended security patches. To do so, log in to Enterprise Manager Cloud Control, and from the Setup menu, select My Oracle Support, then click Set Credentials. On the My Oracle Support Preferred Credentials page, enter the credentials and click Apply.
  5. Click Next.
    If Enterprise Manager Cloud Control is the first Oracle product you are installing on the host that is running on UNIX operating system, then the Oracle Inventory screen appears. For details, see step (6). Otherwise, the Check Prerequisites screen appears. For details, see step (8).
    If Enterprise Manager Cloud Control is the first Oracle product you are installing on the host that is running on Microsoft Windows operating system, then the Oracle Inventory screen does not appear. On Microsoft Windows, the following is the default inventory directory:
    <system drive>\Program Files\Oracle\Inventory
    
  6. Enter Oracle Inventory Details.
    On the Oracle Inventory screen, do the following. You will see this screen only if this turns out to be your first ever installation of an Oracle product on the host.
    1. Enter the full path to a directory where the inventory files and directories can be placed.
      Note:
      • The central inventory location you enter must NOT be on a shared file system. If it is already on a shared file system, then switch over to a non-shared file system by following the instructions outlined in My Oracle Support note 1092645.1
      • If this is the first Oracle product on the host, then the default central inventory location is <home directory>/oraInventory. However, if you already have some Oracle products on the host, then the central inventory location can be found in the oraInst.loc file. The oraInst.loc file is located in the /etc directory for Linux and AIX, and in the /var/opt/oracle directory for Solaris, HP-UX, and Tru64.
    2. Select the appropriate operating system group name that will own the Oracle inventory directories. The group that you select must have write permissions on the Oracle Inventory directories.
  7. Click Next.
  8. Check Prerequisites.
    Check Prerequisites
    On the Prerequisite Checks screen, check the status of the prerequisite checks run by the installation wizard, and verify whether your environment meets all the minimum requirements for a successful installation.
    The installation wizard runs the prerequisite checks automatically when you come to this screen. It checks for the required operating system patches, operating system packages, and so on.
    The status of the prerequisite check can be either Warning, Failed, or Succeeded.
    • If some checks result in Warning or Failed status, then investigate and correct the problems before you proceed with the installation. The screen provides details on why the prerequisites failed and how you can resolve them. After you correct the problems, return to this screen and click Rerun to check the prerequisites again.
    • However, all package requirements must be met or fixed before proceeding any further. Otherwise, the installation might fail.
  9. Click Next.
  10. Select Installation Type.
    Surrounding text describes simple_install_types.gif.
    On the Installation Types screen, select Create a New Enterprise Manager System, then select Simple.
  11. Click Next.
  12. Enter Installation Details.
    Installation Details Screen for Simple Installation
    On the Installation Details screen, do the following:
    1. Enter or validate the Middleware home where you want to install the OMS and other core components.
      Note:
      • If you have Oracle WebLogic Server and Java Development Kit already installed, then ensure that they are of the supported releases—Oracle WebLogic Server 11g Release 1 (10.3.5) and JDK 1.6 v24+. If you have the supported releases, the installer automatically detects them and displays the absolute path to the Middleware home where they are installed. In this case, validate the Middleware home. If the location is incorrect, then enter the path to the correct location. Ensure that the Middleware home you select or enter is a Middleware home that does not have any Oracle homes for Oracle Management Service and Oracle Management Agent.
      • If you do not have Oracle WebLogic Server 11g Release 1 (10.3.5) and JDK 1.6 v24+, then the installer automatically installs them for you while installing the Enterprise Manager system. In this case, enter the absolute path to a directory where you want to have them installed. For example, /oracle/software/. Ensure that the directory you enter does not contain any files or subdirectories.
      • If you want to manually install Oracle WebLogic Server 11g Release 1 (10.3.5), then follow the guidelines outlined in Before You Begin.
    2. Enter the absolute path to the agent base directory, a location outside the Oracle Middleware home where the Management Agent can be installed. For example, /oracle/agent. Ensure that this location is empty and has write permission. Also ensure that it is always maintained outside the Oracle Middleware home.
    3. Validate the name of the host where you want to configure the OMS.
      The host name appears as a fully qualified name. The host name can also appear as a virtual host name if your host is configured with virtual machine.
      You can choose to accept the default host name and proceed with the installation. Alternatively, you can change the name if it is incorrect, or enter another host name for this host. Ensure that the host name you enter is accessible from other hosts in the network (other hosts must be able to ping this host).
  13. Click Next.
  14. Enter Configuration Details.
    Configuration Details
    On the Configuration Details screen, do the following:
    1. Enter an administrator password, which can be used as a common password for configuring the Enterprise Manager Cloud Control.
      Note:
      Ensure that your password contains at least 8 characters without any spaces, begins with a letter, and includes at least one numeric value.
      Table 6-3 describes what the administrator password is used for.
      Table 6-3 Usage of Administrator Password
      Purpose Description
      Creates SYSMAN User Account
      The user account is used as the super administrator for configuring the SYSMAN schema in the Management Repository.
      Creates Default WebLogic User Account weblogic
      The user account is used as the administrator for creating the default WebLogic domain GCDomain.
      Creates Default Node Manager User Account nodemanager
      The user account is automatically created during the configuration of Enterprise Manager Cloud Control.
      A Node Manager enables you to start, shut down, or restart an Oracle WebLogic Server instance remotely, and is recommended for applications with high availability requirements.
      Authenticates New Management Agents
      The agent registration password is used for authenticating new Management Agents that join Enterprise Manager system, where the communication between the OMS and the Management Agent is secure.
    2. Provide details of the existing, certified database where the Management Repository needs to be created. If you have already created a database instance with a preconfigured Management Repository using the database templates offered by Oracle, then provide details about that database instance.
      The installer uses this information to connect to the existing database for creating the SYSMAN schema and plug-in schemas. If you provide details of a database that already has a preconfigured Management Repository, then the installer only creates plug-in schemas.
      Note:
      • For information about creating a database instance with a preconfigured Management Repository using the database templates offered by Oracle, refer to Appendix D.
      • If you connect to a database instance that was created using the database template offered by Oracle, then the password assigned to user accounts SYSMAN, SYSMAN_MDS, SYSMAN_APM, and SYSMAN_OPSS, which were created while preconfiguring the Management Repository, are automatically reset with the administrator password you enter here on this screen. We also unlock all these user accounts.
      • To identify whether your database is a certified database listed in the certification matrix, follow the steps outlined in Appendix E.
      • Oracle Real Application Cluster (Oracle RAC) nodes are referred to by their virtual IP (vip) names. The service_name parameter is used instead of the system identifier (SID) in connect_data mode, and failover is turned on. For more information, refer to Oracle Database Net Services Administrator's Guide.
      • If any repository-related prerequisite check fails, see Appendix A to manually run the prerequisite check.
  15. Click Next.
    Note:
    • If you are connecting to an Oracle RAC database, and if you have specified the virtual IP address of one of its nodes, then the installation wizard prompts you with a Connection String dialog and requests you to update the connection string with information about the other nodes that are part of the cluster. Update the connection string and click OK. If you want to test the connection, click Test Connection.
    • If your Oracle RAC database is configured with Single Client Access Name (SCAN) listener, then you can enter a connection string using the SCAN listener.
    • Oracle Real Application Cluster (Oracle RAC) nodes are referred to by their virtual IP (vip) names. The service_name parameter is used instead of the system identifier (SID) in connect_data mode, and failover is turned on. For more information, refer to Oracle Database Net Services Administrator's Guide.
    • If you see an error stating that the connection to the database failed with ORA-01017ORA-01017 invalid user name/password, then follow these steps to resolve the issue:
      (1) Verify that SYS password provided is valid.
      (2) Verify that the database initialization parameter REMOTE_LOGIN_PASSWORDFILE is set to Shared or Exclusive.
      (3) Verify that password file with the file name orapw<SID> exists in the <ORACLE_HOME>/dbs directory of the database home. If it does not, create a password file using the ORAPWD command.
  16. Review and Install
    On the Review screen, review the details you provided for the selected installation type.
    • If you want to change the details, click Back repeatedly until you reach the screen where you want to make the changes.
    • After you verify the details, if you are satisfied, click Install to begin the installation process.
  17. Track the Progress
    On the Install Progress screen, view the overall progress (in percentage) of the installation and the status of each of the configuration assistants. Configuration assistants are run for configuring the installed components of Enterprise Manager Cloud Control.
    Note:
    • If a configuration assistant fails, the installer stops and none of the subsequent configuration assistants are run. Resolve the issue and retry the configuration assistant.
      For more information, see the appendix on troubleshooting tips in the Oracle Enterprise Manager Cloud Control Advanced Installation and Configuration Guide.
    • If you accidently exit the installer before clicking Retry, then do NOT restart the installer to reach the same screen; instead, invoke the runConfig.sh script from the OMS home to rerun the Configuration Assistant in silent mode. For Microsoft Windows platforms, invoke runConfig.bat script.
      $<OMS_HOME>/oui/bin/runConfig.sh ORACLE_HOME=<absolute_path_to_OMS_home> MODE=perform ACTION=configure COMPONENT_XML={encap_oms.1_0_0_0_0.xml}
      If the runConfig.sh script fails, then clean up your environment and redo the installation.
  18. Run Scripts
    Once the software binaries are copied and configured, you are prompted to run the allroot.sh script, and the oraInstRoot.sh script if this is the first Oracle product installation on the host. Open another window, log in as root, and manually run the scripts.
    If you are installing on Microsoft Windows operating system, then you will NOT be prompted to run this script.
  19. End the Installation
    On the Finish screen, you should see information pertaining to the installation of Enterprise Manager. Review the information and click Close to exit the installation wizard.
    For more information about this installation, refer to the following file in the OMS home:
    $<OMS_HOME>/install/setupinfo.txt
Note:
If the installation fails for some reason, review the log files listed in Oracle Enterprise Manager Cloud Control Advanced Installation and Configuration Guide.
Note:
If you have run the installation wizard and let the installation wizard take corrective actions to correct the repository settings, and if you have exited the wizard without completing the installation process, then remember that the repository settings might not reset to their original values because you abruptly ended the installation. In this case, before invoking the installation wizard again, run the following command to manually reset the values. <Software_Location>/install/requisites/bin/emprereqkit -executionType install -prerequisiteXMLLoc <prereq_xml_location> -connectString <connect_string> -dbUser SYS -dbPassword <db_password> -reposUser sysman -reposPassword <repo_user_password> -dbRole sysdba -runPrerequisites -runPostCorrectiveActions -useHistory

Installing with Advanced Configuration

To install Enterprise Manager Cloud Control with advanced configuration, follow these steps:
Note:
Oracle recommends you to run the EM Prerequisite Kit before invoking the installer to ensure that you meet all the repository requirements beforehand. Even if you do not run it manually, the installer anyway runs it in the background while installing the product. However, running it manually beforehand sets up your Management Repository even before you can start the installation or upgrade process. For information on the kit, to understand how to run it, and to know about the prerequisite checks it runs, see Appendix A.
  1. Invoke the Enterprise Manager Cloud Control Installation Wizard.
    Invoke the installation wizard as a user who belongs to the oinstall group you created following the instructions in Chapter 4.
    <Software_Location>/runInstaller
    In this command, <Software_Location> is either the DVD location or the location where you have downloaded the software kit.
    Note:
    • To invoke the installation wizard on UNIX platforms, run runInstaller. To invoke on Microsoft Windows platforms, run setup.exe.
    • Ensure that there are no white spaces in the name of the directory where you download and run the Enterprise Manager Cloud Control software from. For example, do not download and run the software from a directory titled EM Software because there is a white space between the two words of the directory name.
    • When you invoke runInstaller or setup.exe, if the Enterprise Manager Cloud Control Installation Wizard does not appear, then it is possible that you do not have read and write access to the /stage subdirectory, which a subdirectory in the Disk1 directory of the Enterprise Manager software.
      There is a classpath variable that the installation wizard computes for OPatch as ../stage/Components/, and when the TEMP variable is set to /tmp, the installation wizard tries to look for the opatch JAR file in the /tmp/../stage directory, which is equivalent to /stage. However, if you do not have read and write permission on /stage, then the installation wizard can hang. Under such circumstances, verify if you have read and write access to the /stage directory. If you do not have, then set the TEMP variable to a location where the install user has access to, and then relaunch the installation wizard.
  2. Enter My Oracle Support Details.
    My Oracle Support Screen
    (Optional) On the My Oracle Support Details screen, enter your My Oracle Support credentials to enable Oracle Configuration Manager. If you do not want to enable Oracle Configuration Manager now, go to Step (3).
    If the host from where you are running the installation wizard does not have a connection to the Internet, then enter only the e-mail address and leave the other fields blank. After you complete the installation, manually collect the configuration information and upload it to My Oracle Support.
  3. Click Next.
  4. Install Software Updates.
    Install Software Updates
    On the Software Updates screen, select one of the following sources from where the software updates can be installed while the installation of the Enterprise Manager system is in progress. If you do not want to apply them now, then select Skip.
    • (Recommended) Select Search for Updates, then select Local Directory if you have already manually downloaded the software updates to an accessible local or remote location.
      Note:
      For instructions to manually download the software updates, refer to Oracle Enterprise Manager Cloud Control Advanced Installation and Configuration Guide.
      Enter the location where the updates are available, and click Search for Updates. To search the computer and select the location, click Browse. Once the search results appear with patch numbers and their details, click the patch number to view the ReadMe associated with that patch.
      • If the updates have been downloaded to the default location, then select or enter the full path to the scratch path location. For example, if the scratch path location is /scratch/OracleHomes and if the software updates are available in /scratch/OracleHomes/Updates, then enter /scratch/OracleHomes/Updates.
      • If the software updates have been downloaded to a custom location, then select or enter the full path to the custom location. For example, if the custom location is /home/john and if the software updates are available in /home/john/Updates, then enter /home/john/Updates.
    • Select Search for Updates, then select My Oracle Support if you want the installer to connect to My Oracle Support and automatically download the updates from there.
      Enter the My Oracle Support account user name and password, and click Search for Updates. Once the search results appear with patch numbers and their details, click the patch number to view the ReadMe associated with that patch
    Note:
    If you choose to skip installing the software updates during installation by not providing the My Oracle Support credentials, you can always register the credentials later using the Enterprise Manager Cloud Control console and view the recommended security patches. To do so, in Cloud Control, from the Setup menu, select Security, then click Preferred Credentials. On the Preferred Credentials page, click Set MOS Credentials and register the credentials.
    Note:
    Despite providing the My Oracle Support credentials, if you are unable to download the software updates, then exit the installer, and invoke the installer again passing the -showProxy parameter in the following way: <Software_Location>/runInstaller -showProxy
  5. Click Next.
    If Enterprise Manager Cloud Control is the first Oracle product you are installing on the host that is running on UNIX operating system, then the Oracle Inventory screen appears. For details, see step (6). Otherwise, the Check Prerequisites screen appears. For details, see step (8).
    If Enterprise Manager Cloud Control is the first Oracle product you are installing on the host that is running on Microsoft Windows operating system, then the Oracle Inventory screen does not appear. On Microsoft Windows, the following is the default inventory directory:
    <system drive>\Program Files\Oracle\Inventory
    
  6. Enter Oracle Inventory Details.
    On the Oracle Inventory screen, do the following. You will see this screen only if this turns out to be your first ever installation of an Oracle product on the host.
    1. Enter the full path to a directory where the inventory files and directories can be placed.
      Note:
      • The central inventory location you enter must NOT be on a shared file system. If it is already on a shared file system, then switch over to a non-shared file system by following the instructions outlined in My Oracle Support note 1092645.1
      • If this is the first Oracle product on the host, then the default central inventory location is <home directory>/oraInventory. However, if you already have some Oracle products on the host, then the central inventory location can be found in the oraInst.loc file. The oraInst.loc file is located in the /etc directory for Linux and AIX, and in the /var/opt/oracle directory for Solaris, HP-UX, and Tru64.
    2. Select the appropriate operating system group name that will own the Oracle inventory directories. The group that you select must have write permissions on the Oracle Inventory directories.
  7. Click Next.
  8. Check Prerequisites.
    Check Prerequisites
    On the Prerequisite Checks screen, check the status of the prerequisite checks run by the installation wizard, and verify whether your environment meets all the minimum requirements for a successful installation.
    The installation wizard runs the prerequisite checks automatically when you come to this screen. It checks for the required operating system patches, operating system packages, and so on.
    The status of the prerequisite check can be either Warning, Failed, or Succeeded.
    If some checks result in Warning or Failed status, then investigate and correct the problems before you proceed with the installation. The screen provides details on why the prerequisites failed and how you can resolve them. After you correct the problems, return to this screen and click Rerun to check the prerequisites again.
    Note:
    You can choose to ignore the checks with Warning status by clicking Ignore. However, all package requirements must be met or fixed before proceeding any further.
  9. Click Next.
  10. Select Installation Type.
    Surrounding text describes adv_install_types.gif.
    On the Installation Types screen, select Create a New Enterprise Manager System, then select Advanced.
  11. Click Next.
  12. Enter Installation Details.
    Installation Details Screen for Advanced Installation
    On the Installation Details screen, do the following:
    1. Enter or validate the Middleware home where you want to install the OMS and other core components.
      Note:
      • If you have Oracle WebLogic Server and Java Development Kit already installed, then ensure that they are of the supported releases—Oracle WebLogic Server 11g Release 1 (10.3.5) and JDK 1.6 v24+. If you have the supported releases, the installer automatically detects them and displays the absolute path to the Middleware home where they are installed. In this case, validate the Middleware home. If the location is incorrect, then enter the path to the correct location. Ensure that the Middleware home you select or enter is a Middleware home that does not have any Oracle homes for Oracle Management Service and Oracle Management Agent.
      • If you do not have Oracle WebLogic Server 11g Release 1 (10.3.5) and JDK 1.6 v24+, then the installer automatically installs them for you while installing the Enterprise Manager system. In this case, enter the absolute path to a directory where you want to have them installed. For example, /oracle/software/. Ensure that the directory you enter does not contain any files or subdirectories.
      • If you manually install Oracle WebLogic Server 11g Release 1 (10.3.5), then follow the guidelines outlined in Before You Begin.
    2. Enter the absolute path to the agent base directory, a location outside the Oracle Middleware home where the Management Agent can be installed. For example, /oracle/agent. Ensure that this location is empty and has write permission. Also ensure that it is always maintained outside the Oracle Middleware home.
    3. Validate the name of the host where you want to configure the OMS.
      The host name appears as a fully qualified name. The host name can also appear as a virtual host name if your host is configured with virtual machine.
      You can choose to accept the default host name and proceed with the installation. Alternatively, you can change the name if it is incorrect, or enter another host name for this host. Ensure that the host name you enter is accessible from other hosts in the network (other hosts must be able to ping this host).
  13. Click Next.
  14. Deploy Plug-Ins.
    Plug-In Deployment Screen
    On the Plug-In Deployment screen, select the optional plug-ins you want to install from the software kit (DVD, downloaded software) while installing the Enterprise Manager system.
    The pre-selected rows are mandatory plug-ins that will be installed by default. Select the optional ones you want to install.
    Note:
    During installation, if you want to install a plug-in that is not available in the software kit, then refer to Advanced Installer Options for the point that describes how you can install additional plug-ins.
  15. Click Next.
  16. Enter WebLogic Server Configuration Details.
    WebLogic Server Configuration Details screen
    On the WebLogic Server Configuration Details screen, enter the credentials for the WebLogic Server user account and the Node Manager user account, and validate the path to the Oracle Management Service instance base location.
    Note:
    Ensure that your password contains at least 8 characters without any spaces, begins with a letter, and includes at least one numeric value.
    By default, the WebLogic Domain name is GCDomain, and the Node Manager name is nodemanager. These are non-editable fields. The installer uses this information for creating Oracle WebLogic Domain and other associated components such as the admin server, the managed server, and the node manager. A Node Manager enables you to start, shut down, or restart an Oracle WebLogic Server instance remotely, and is recommended for applications with high availability requirements.
  17. Click Next.
  18. Enter Database Connection Details.
    Database Connection Details Screen
    On the Database Connection Details screen, do the following:
    1. Provide details of the existing, certified database where the Management Repository needs to be created. If you have already created a database instance with a preconfigured Management Repository using the database templates offered by Oracle, then provide details about that database instance.
      The installer uses this information to connect to the existing database for creating the SYSMAN schema and plug-in schemas. If you provide details of a database that already has a preconfigured Management Repository, then the installer only creates plug-in schemas.
      Note:
      • If you connect to a database instance that was created using the database template offered by Oracle, then note that the password assigned to the user accounts SYSMAN_MDS, SYSMAN_APM, and SYSMAN_OPSS, which were created while preconfiguring the Management Repository, are automatically reset with the SYSMAN password you enter on the Repository Configuration Details screen (as described in Step (20)).
      • Oracle Real Application Cluster (Oracle RAC) nodes are referred to by their virtual IP (vip) names. The service_name parameter is used instead of the system identifier (SID) in connect_data mode, and failover is turned on. For more information, refer to Oracle Database Net Services Administrator's Guide.
    2. Select the deployment size from the Deployment Size list to indicate the number of targets you plan to monitor, the number Management Agents you plan to have, and the number of concurrent user sessions you plan have.
      Table 6-4 describes each deployment size.
      Table 6-4 Deployment Size
      Deployment Size Targets Count Management Agents Count Concurrent User Session Count
      Small
      Up to 999
      Up to 99
      Up to 10
      Medium
      Between 1000 and 9999
      Between 100 and 999
      Between 10 and 24
      Large
      10,000 or more
      1000 or more
      Between 25 and 50
      For more information on deployment sizes, the prerequisite checks that are run, the database parameters that are set, and how you can modify the deployment size after installation, refer to Oracle Enterprise Manager Cloud Control Advanced Installation and Configuration Guide.
  19. Click Next.
    Note:
    • If you connect to a database instance that was created using the database template offered by Oracle, then you will be prompted that the database parameters need to be modified to suit the deployment size you selected. This is because the templates are essentially designed for simple installation, and the database parameters are set as required for simple installation. Since it is used for advanced installation, the parameters must be set to different values. You can confirm the message to proceed further. The installation wizard will automatically set the parameters to the required values.
    • If you are connecting to an Oracle RAC database, and if you have specified the virtual IP address of one of its nodes, then the installation wizard prompts you with a Connection String dialog and requests you to update the connection string with information about the other nodes that are part of the cluster. Update the connection string and click OK. If you want to test the connection, click Test Connection.
    • If your Oracle RAC database is configured with Single Client Access Name (SCAN) listener, then you can enter a connection string using the SCAN listener.
    • Oracle Real Application Cluster (Oracle RAC) nodes are referred to by their virtual IP (vip) names. The service_name parameter is used instead of the system identifier (SID) in connect_data mode, and failover is turned on. For more information, refer to Oracle Database Net Services Administrator's Guide
    • If you see an error stating that the connection to the database failed with invalid user name/password, then follow these steps to resolve the issue:
      (1) Verify that SYS password provided is valid.
      (2) Verify that the database initialization parameter REMOTE_LOGIN_PASSWORDFILE is set to Shared or Exclusive.
      (3) Verify that password file with the file name orapw<SID> exists in the <ORACLE_HOME>/dbs directory of the database home. If it does not, create a password file using the ORAPWD command.
  20. Enter Repository Configuration Details
    Repository Configuration Details Screen
    On the Repository Configuration Details screen, do the following:
    1. For SYSMAN Password, enter a password for creating the SYSMAN user account. The SYSMAN user account is used for creating the SYSMAN schema, which holds most of the relational data used in managing Enterprise Manager Cloud Control. SYSMAN is also the super administrator for Enterprise Manager Cloud Control.
      Note:
      • Ensure that your password contains at least 8 characters without any spaces, begins with a letter, and includes at least one numeric value.
      • If you connect to a database instance that was created using the database template offered by Oracle, then note that the password assigned to the user accounts SYSMAN_MDS, SYSMAN_APM, and SYSMAN_OPSS, which were created while preconfiguring the Management Repository, are automatically reset with the SYSMAN password you enter on this screen.
    2. For Registration Password, enter a password for registering the new Management Agents that join the Enterprise Manager system.
      Note:
      Ensure that your password contains at least 8 characters without any spaces, begins with a letter, and includes at least one numeric value.
    3. For Management Tablespace, enter the full path to the location where the data file for management tablespace (mgmt.dbf) can be stored. The installer uses this information for storing data about the monitored targets, their metrics, and so on. Ensure that the specified path leads up to the file name.
      For example, /u01/oracle/prod/oradata/mgmt.dbf
    4. For Configuration Data Tablespace, enter the full path to the location where the data file for configuration data tablespace (mgmt_ecm_depot1.dbf) can be stored. This is required for storing configuration information collected from the monitored targets. Ensure that the specified path leads up to the file name.
      For example, /u01/oracle/prod/oradata/mgmt_ecm_depot1.dbf
    5. For JVM Diagnostics Data Tablespace, enter the full path to a location where the data file for JVM Diagnostics data tablespace (mgmt_ad4j.dbf) can be stored. Ensure that the specified path leads up to the file name. Enterprise Manager Cloud Control requires this data file to store monitoring data related to JVM Diagnostics and Application Dependency Performance (ADP).
      For example, /u01/oracle/prod/oradata/mgmt_ad4j.dbf
    Note:
    If you are configuring the Management Repository on a database that uses Oracle Automatic Storage Management (Oracle ASM) for storage, then when you enter the data file location, only the disk group is used for creating the tablespaces. For example, if you specify +DATA/a.dbf, then only +DATA is used for creating the tablespaces on Oracle ASM, and the exact location of the data file on the disk group is decided by Oracle Managed Files.
  21. Click Next.
  22. Customize Ports
    Port Configuration Details Screen
    On the Port Configuration Details screen, customize the ports to be used for various components.
    Note:
    If all the ports on this screen appear as -1, then it indicates that the installer is unable to bind the ports on the host. To resolve this issue, exit the installer, verify the host name and the IP configuration of this host (ensure that the IP address of the host is not being used by another host), restart the installer, and try again.
    You can enter a free custom port that is either within or outside the port range recommended by Oracle.
    To verify if a port is free, run the following command:
    • On Unix:
      netstat -anp | grep <port no>
    • On Microsoft Windows:
      netstat -an|findstr <port_no>
    However, the custom port must be greater than 1024 and lesser than 65535. Alternatively, if you already have the ports predefined in a staticports.ini file and if you want to use those ports, then click Import staticports.ini File and select the file.
    Note:
    If the staticports.ini file is passed during installation, then by default, the ports defined in the staticports.ini file are displayed. Otherwise, the first available port from the recommended range is displayed. The staticports.ini file is available in the following location:
    <Software_Extracted_Location>/response
  23. Click Next.
  24. Review and Install
    On the Review screen, review the details you provided for the selected installation type.
    • If you want to change the details, click Back repeatedly until you reach the screen where you want to make the changes.
    • After you verify the details, if you are satisfied, click Install to begin the installation process.
  25. Track the Progress
    On the Install Progress screen, view the overall progress (in percentage) of the installation and the status of each of the Configuration Assistants. Configuration Assistants are run for configuring the installed components of Enterprise Manager Cloud Control.
    Note:
    • If a configuration assistant fails, the installer stops and none of the subsequent configuration assistants are run. Resolve the issue and retry the configuration assistant.
      For more information, see the appendix on troubleshooting tips in the Oracle Enterprise Manager Cloud Control Advanced Installation and Configuration Guide.
    • If you accidently exit the installer before clicking Retry, then do NOT restart the installer to reach the same screen; instead, invoke the runConfig.sh script from the OMS home to rerun the Configuration Assistant in silent mode. For Microsoft Windows platforms, invoke runConfig.bat script.
      $<OMS_HOME>/oui/bin/runConfig.sh ORACLE_HOME=<absolute_path_to_OMS_home> MODE=perform ACTION=configure COMPONENT_XML={encap_oms.1_0_0_0_0.xml}
      If the runConfig.sh script fails, then clean up your environment and redo the installation.
  26. Run Scripts
    Once the software binaries are copied and configured, you are prompted to run the allroot.sh script, and the oraInstRoot.sh script if this is the first Oracle product installation on the host. Open another window, log in as root, and manually run the scripts.
    If you are installing on Microsoft Windows operating system, then you will NOT be prompted to run this script. You will directly reach the Finish screen as described in Step (27).
  27. End the Installation
    On the Finish screen, you should see information pertaining to the installation of Enterprise Manager. Review the information and click Close to exit the installation wizard.
    For more information about this installation, refer to the following file available in the OMS home:
    $<OMS_HOME>/install/setupinfo.txt
Note:
If the installation fails for some reason, review the log files listed in Oracle Enterprise Manager Cloud Control Advanced Installation and Configuration Guide.
Note:
If you have run the installation wizard and let the installation wizard take corrective actions to correct the repository settings, and if you have exited the wizard without completing the installation process, then remember that the repository settings might not reset to their original values because you abruptly ended the installation. In this case, before invoking the installation wizard again, run the following command to manually reset the values. <Software_Location>/install/requisites/bin/emprereqkit -executionType install -prerequisiteXMLLoc <prereq_xml_location> -connectString <connect_string> -dbUser SYS -dbPassword <db_password> -reposUser sysman -reposPassword <repo_user_password> -dbRole sysdba -runPrerequisites -runPostCorrectiveActions -useHistory

Advanced Installer Options

The following are some additional, advanced options you can pass while invoking the installer:
  • By default, GCDomain is the default name used for creating the WebLogic Domain. To override this and use a custom WebLogic Domain name, invoke the installer with the WLS_DOMAIN_NAME option, and enter a unique custom name.
    For example, if you want to use the custom name EMDomain, then run the following command:
    ./runInstaller WLS_DOMAIN_NAME=EMDomain
  • By default, a Provisioning Advisor Framework (PAF) staging directory is created for copying the Software Library entities related to the deployment procedures. By default, this location is the scratch path location (/tmp). The location is used only for provisioning activities—entities are copied for a deployment procedure, and then, deleted once the deployment procedure ends.
    If you want to override this location with a custom location, then invoke the installer with the EM_STAGE_DIR option, and enter a unique custom location.
    For example,
    ./runInstaller EM_STAGE_DIR=/home/john/software/oracle/pafdir
  • During installation, if you want to install some plug-ins that are not in the software kit (DVD, downloaded software), then follow these steps:
    1. Manually download the plug-ins from the Enterprise Manager download page on OTN, and store them in an accessible location:
      http://www.oracle.com/technetwork/oem/grid-control/downloads/oem-upgrade-console-502238.html
    2. Invoke the installer with the following option, and pass the location where the plug-ins you want to install are available:
      ./runInstaller -pluginLocation <absolute_path_to_plugin_software_location>
      This displays a list of plug-ins available in the software kit (DVD, downloaded software) as well as the plug-ins available in this custom location. You can choose the ones you want to install.
  • After the installation ends successfully, the OMS and the Management Agent start automatically. If you do not want them to start automatically, then invoke the installer with START_OMS and b_startAgent options, and set them to true or false depending on what you want to control.
    For example, if you do not want the Management Agent to start automatically, then run the following command:
    ./runInstaller START_OMS=true b_startAgent=false
    To understand the limitations involved with this advanced option, see Limitations.

Limitations

When you use START_OMS and b_startAgent as advanced options to control the way the OMS and the Management Agent start up automatically, sometimes the Management Agent and the host on which it was installed do not appear as targets in the Cloud Control console.
Table 6-5 lists the different combinations of these advanced options, and describes the workaround to be followed for each combination:
Table 6-5 Advanced Options and Workarounds
Advanced Option Workaround
START_OMS=false
b_startAgent=false
  1. Start the OMS:
    $<OMS_HOME>/bin/emctl start oms
  2. Secure the Management Agent:
    $<AGENT_HOME>/bin/emctl secure agent
  3. Start the Management Agent:
    $<AGENT_HOME>/bin/emctl start agent
  4. Add the targets:
    $<AGENT_HOME>/bin/emctl config agent addinternaltargets
  5. Upload the targets:
    $<AGENT_HOME>/bin/emctl upload agent
START_OMS=true
b_startAgent=false
Start the Management Agent:
$<AGENT_HOME>/bin/emctl start agent
START_OMS=false
b_startAgent=true
  1. Start the OMS:
    $<OMS_HOME>/bin/emctl start oms
  2. Secure the Management Agent:
    $<AGENT_HOME>/bin/emctl secure agent
  3. Add the targets:
    $<AGENT_HOME>/bin/emctl config agent addinternaltargets
  4. Upload the targets:
    $<AGENT_HOME>/bin/emctl upload agent

After You Install

After you install, do the following:
  1. (Only for UNIX Operating Systems) If you did not run the allroot.sh script when the installer prompted you to do so, then run it manually now:
    • If this is the first Oracle product you just installed on the host, then run the oraInstroot.sh script from the inventory location specified in the oraInst.loc file that is available in the Management Agent home.
      For example, if the inventory location specified in the oraInst.loc file is $HOME/oraInventory, then run the following command:
      $HOME/oraInventory/oraInstRoot.sh
      Note:
      If you are not a root user, then use SUDO to change to a root user. For example, run the following command: /usr/local/bin/sudo $HOME/oraInventory/oraInstRoot.sh
    • Run the allroot.sh script from the OMS home:
      $<OMS_HOME>/allroot.sh
      Note:
      If you are not a root user, then use SUDO to change to a root user. For example, run the following command: /usr/local/bin/sudo $<OMS_HOME>/allroot.sh
  2. If the name of the host (including the domain name) where you installed the OMS is longer than 30 characters, then apply patch 13788861 on the <MIDDLEWARE_HOME>/oracle_common directory. To apply the patch, follow the instructions outlined in the patch ReadMe.
    If you do not apply this patch, then all the Enterprise Manager jobs fail, and you will see an Java Object Cache (JOC) error similar to the following in the EMGC_OMS1-diagnostic.log file.
    [2012-02-23T11:16:02.391-08:00] [EMGC_OMS1] [ERROR] [WSM-02311]
    [oracle.wsm.resources.policymanager] [tid: [ACTIVE].ExecuteThread: '2' for
    queue: 'weblogic.kernel.Default (self-tuning)'] [userId: <anonymous>] [ecid:
    19f969fe781e0dcb:-4eacfe4a:135ab778dad:-8000-0000000000000d12,0] [APP: emgc]
    Failed to retrieve requested documents due to underlying error
    "java.rmi.RemoteException: EJB Exception: ; nested exception is: [[
    oracle.mds.exception.MDSRuntimeException: MDS-00001: exception in Metadata
    Services layer   
    
    J2EE JOC-044 An exception is occurring in the method. CacheAccess.put
    J2EE JOC-039 cannot find region: "ADFApplication1/main_region"".
    ]]
    [2012-02-23T11:16:07.022-08:00] [EMGC_OMS1] [ERROR] [] [oracle.mds] [tid:
    [ACTIVE].ExecuteThread: '2' for queue: 'weblogic.kernel.Default
    (self-tuning)'] [userId: OracleSystemUser] [ecid:
    19f969fe781e0dcb:-4eacfe4a:135ab778dad:-8000-0000000000000d15,0] [APP:
    wsm-pm] [[
    oracle.mds.exception.MDSRuntimeException: 
    J2EE JOC-044 An exception is occurring in the method. CacheAccess.put
    J2EE JOC-039 cannot find region: "ADFApplication1/main_region"
    at oracle.mds.internal.cache.JOCCache.put(JOCCache.java:273)
    at oracle.mds.internal.cache.JOCCache.put(JOCCache.java:228)
    at
    oracle.mds.internal.cache.LayeredCache.getCacheAccess(LayeredCache.java:460)
    ...
    
    This error occurs when web services are being called by the Enterprise Manager job subsystem, and when Oracle Web Service Manager (OWSM) is unable to access the web service security policy that is stored in the Metadata Services (MDS) repository. When the jobs fail, you will see that they are constantly in a scheduled or running state. Once the patch is applied, a simple test can be conducted by submitting a basic OS command job and ensuring that it completes successfully.
  3. Verify the installation:
    1. Navigate to the OMS home and run the following command to see a message that confirms that OMS is up and running.
      $<OMS_HOME>/bin/emctl status oms
      For example,
      /u01/middleware/oms/bin/emctl status oms
    2. Navigate to the Management Agent home and run the following command to see a message that confirms that the Management Agent is up and running.
      $<AGENT_HOME>/bin/emctl status agent
      For example,
      /u01/agent/core/12.1.0.2.0/bin/emctl status agent
    3. Navigate to the Management Agent home and run the following command to see a message that confirms that EMD upload completed successfully.
      $<AGENT_HOME>/bin/emctl upload agent
      For example,
      /u01/agent/core/12.1.0.2.0/bin/emctl upload agent
    Note:
    By default, you can access Enterprise Manager Cloud Control only using the HTTPS protocol. If you want to use the HTTP protocol, then unlock it by running the following command from the OMS home: emctl secure unlock -console
  4. Verify if all the plug-ins were installed successfully. To do so, access the following log file from the Management Agent home, and search for the sentence WARN:Plugin configuration has failed.
    $<AGENT_HOME>/cfgtoollogs/cfgfw/CfmLogger-<timestamp>.log
    For example,
    $/u01/agent/core/12.1.0.2.0/cfgtoollogs/cfgfw/CfmLogger-<timestamp>.log
    If you find the sentence, resolve the issue by running the AgentPluginDeploy.pl script from the Management Agent home.
    $<AGENT_BASE_DIR>/agent/core/12.1.0.2.0/perl/bin/perl <AGENT_BASE_DIR>/agent/core/12.1.0.2.0/bin/AgentPluginDeploy.pl -oracleHome <AGENT_BASE_DIR>/agent/core/12.1.0.2.0 -agentDir <AGENT_BASE_DIR> -pluginIdsInfoFile <AGENT_BASE_DIR>/plugins.txt -action configure -emStateDir <AGENT_INSTANCE_HOME>
    For example,
    /u01/agent/core/12.1.0.2.0/perl/bin/perl /u01/agent/core/12.1.0.2.0/bin/AgentPluginDeploy.pl -oracleHome /u01/agent/core/12.1.0.2.0/ -agentDir /u01/agent -pluginIdsInfoFile /u01/agent/plugins.txt -action configure -emStateDir /u01/agent/agent_inst
  5. (Optional) If the repository prerequisites had failed, and if you had manually run the EM Prerequisite Kit and taken corrective actions to meet the repository requirements, then run the utility again to reset the repository settings to what it had originally:
    <Software_Location>/install/requisites/bin/emprereqkit -executionType install -prerequisiteXMLLoc <prereq_xml_location> -connectString <connect_string> -dbUser SYS -dbPassword <db_password> -reposUser sysman -reposPassword <repo_user_password> -dbRole sysdba -runPrerequisites -runPostCorrectiveActions -useHistory
    Note:
    If you had run the installation wizard and let the installation wizard take corrective actions to correct the repository settings, and if you had exited the wizard without completing the installation process, then remember that the repository settings might not reset to their original values because you abruptly ended the installation. In this case, before invoking the installation wizard again, run this command to manually reset the values.
  6. By default, the following targets get automatically discovered and monitored in the Enterprise Manager Cloud Control console:
    • Oracle WebLogic Domain (for example, GCDomain)
    • Oracle WebLogic AdminServer
    • Oracle WebLogic Server
    • Oracle Web Tier
    • Application deployments, one for the Enterprise Manager Cloud Control console and one for the platform background services.
    • Oracle Management Service
    • Oracle Management Repository
    • Oracle Management Agent
    • The host on which you installed Enterprise Manager Cloud Control
    However, the other targets running on that host and other hosts do not get automatically discovered and monitored. To monitor the other targets, you need to add them to Enterprise Manager Cloud Control either using the Auto Discovery Results page, the Add Targets Manually page, or the discovery wizards offered for the targets you want to monitor.
    For information about discovering targets in Enterprise Manager Cloud Control, refer to the chapter on adding targets in the Oracle Enterprise Manager Cloud Control Administrator's Guide.
  7. If you installed in a Middleware home that is on an NFS-mounted drive, then ensure that you maintain the lock file in a local file system and not in that NFS-mounted location. To do so, modify the lock file location in the httpd.conf file to map to a location on a local file system.
    1. Stop the OMS:
      <OMS_HOME>/bin/emctl stop oms -all
    2. Open the following file:
      Note:
      Oracle recommends you to take a backup of this file before editing it.
      <WEBTIER_INSTANCE_HOME>/config/OHS/ohs1/httpd.conf
    3. Search for sections related to the modules mpm_prefork_module and mpm_worker_module. In both these sections, modify the value for the LockFile parameter so that the path leads to a location on the local file system.
      <IfModule mpm_prefork_module>
      StartServers 5
      MinSpareServers 5
      MaxSpareServers 10
      MaxClients 150
      MaxRequestsPerChild 0
      AcceptMutex fcntl
      LockFile "${ORACLE_INSTANCE}/diagnostics/logs/${COMPONENT_TYPE}/${COMPONENT_NAME}/http_lock"
      </IfModule>
      ....
      <IfModule mpm_worker_module>
      StartServers 2
      MaxClients 150
      MinSpareThreads 25
      MaxSpareThreads 75
      ThreadsPerChild 25
      MaxRequestsPerChild 0
      AcceptMutex fcntl
      LockFile "${ORACLE_INSTANCE}/diagnostics/logs/${COMPONENT_TYPE}/${COMPONENT_NAME}/http_lock"
      </IfModule>
      
    4. Save the changes.
    5. Restart the OMS:
      <OMS_HOME>/bin/emctl start oms
  8. Configure your proxy server as described in Appendix C.
  9. (Optional) If you want to change the passwords of SYSMAN and all other internal user accounts such as SYSMAN_MDS, SYSMAN_OPSS, and SYSMAN_APM, then shut down the OMS, run the following command from the OMS home, and then restart the OMS. You will be prompted to enter the old and the new password.
    <OMS_HOME>/bin/emctl config oms -change_repos_pwd
    Note:
    This command concurrently changes the passwords in both the OMS configuration and the database for these affected user accounts. Therefore, it is sufficient to run this command just once.
  10. An encryption key is generated to encrypt sensitive data in the Management Repository. If this key is lost, all encrypted data in the Management Repository become unusable. Therefore, back up the Management Service configuration including the emkey, and maintain the backup on another host.
    To back up the Management Service configuration including the emkey, run the following command:
    <OMS_HOME>/bin/emctl exportconfig oms -dir <path_to_backup_location>
  11. Before accessing the Enterprise Manager Cloud Control Console in a browser, install a security certificate from a trusted certification authority on the browser.
    This it to ensure that the Enterprise Manager Cloud Control Console that you are accessing over HTTPS protocol is recognized as a genuine and secure Web site.
    For instructions to install a security certificate on your browser and avoid security certificate alerts,

    7 Installing Oracle Management Agent

    This chapter describes how you can install Oracle Management Agent (Management Agent). In particular, this chapter covers the following:

Overview

Oracle Management Agent (Management Agent) is one of the core components of Enterprise Manager Cloud Control that enables you to convert an unmanaged host to a managed host in the Enterprise Manager system. The Management Agent works in conjunction with the plug-ins to monitor the targets running on that managed host.
Therefore, at any point in time, if you want to monitor a target running on a host, ensure that you first convert that unmanaged host to a managed host by installing a Management Agent, and then manually discover the targets running on it to start monitoring them.
To install a Management Agent, use the Add Host Targets Wizard that is accessible from within the Enterprise Manager Cloud Control console. Oracle recommends that you use this wizard for the mass-deployment of Management Agents.
Figure 7-1 describes a method to access the Add Host Targets Wizard.
Figure 7-1 Add Host Targets Wizard
Add Host Targets Wizard
The Add Host Targets Wizard is an application that offers GUI-rich, interactive screens. To access it, do one of the following:
  • From the Setup menu, select Add Target, then select Add Targets Manually. On the Add Targets Manually page, select Add Host Targets and click Add Host.
  • From the Setup menu, select Add Target, then select Auto Discovery Results. On the Auto Discovery Results page, select a host you want to monitor in Enterprise Manager Cloud Control, and click Promote.
The wizard enables you to do the following on multiple hosts across platforms with options to run preinstall and postinstall scripts:
  • Deploy a fresh Management Agent
  • Clone an existing well-tested and patched Management Agent
  • Install a Management Agent (called Shared Agent) using an existing, centrally shared Management Agent (called Master Agent)
Note:
This chapter only describes how you can deploy a fresh Management Agent using the Add Host Targets Wizard. For information on cloning an existing instance and deploying a Management Agent using a shared instance, refer to Oracle Enterprise Manager Cloud Control Advanced Installation and Configuration Guide.
To monitor a target, you need to add the target to Enterprise Manager Cloud Control either using the Auto Discovery Results page, the Add Targets Manually page, or the discovery wizards offered for the targets you want to monitor.
For information about discovering targets in Enterprise Manager Cloud Control, refer to the chapter on adding targets in the Oracle Enterprise Manager Cloud Control Administrator's Guide.
Once the installation is complete, you will see the following default contents in the agent base directory:
<agent_base_directory>
    |_____core
         |_____12.1.0.2.0
    |_____plugins
    |_____agent_inst
    |_____sbin
    |_____plugins.txt
    |_____plugins.txt.status
    |_____agentimage.properties
Note:
If you want to repoint your existing Management Agents to a new Oracle Management Service (OMS), then you must first deinstall those Management Agents and plug-ins, and then redeploy those Management Agents and plug-ins using the new OMS. This is typically done when you want to move from an Enterprise Manager Cloud Control system in a test environment to an Enterprise Manager Cloud Control system in a production environment. When you repoint your existing Management Agents to a new OMS, you cannot move the targets monitored by the Management Agents, the target history, and the Management Agent history. The monitored targets and the history data is lost.

Before You Begin

Before you begin installing a Management Agent using the Add Host Targets Wizard, keep these points in mind:
  • The Add Host Targets Wizard converts an unmanaged host to a managed host in the Enterprise Manager system by installing a 12.1.0.2.0 Management Agent.
  • Oracle recommends you to use the Add Host Targets Wizard to mass-deploy Management Agents in your environment.
  • Oracle Management Agent 12c communicates only with Oracle Management Service 12c and not with any earlier release of Enterprise Manager.
    A 12.1.0.1.0 Management Agent is compatible with a 12.1.0.2.0 OMS. However, using the Add Host Targets Wizard of a 12.1.0.2.0 OMS, you can install only the latest available Management Agent 12c software. For example, if the 12.1.0.2.0 Management Agent software is available in Oracle Software Library, you cannot use the Add Host Targets Wizard of a 12.1.0.2.0 OMS to install a 12.1.0.1.0 Management Agent.
    For information about the compatibility between 12c releases of Management Agents and the OMS, see Table 1-1 present in the Introduction to Upgrade Approaches chapter in the Oracle Enterprise Manager Cloud Control Upgrade Guide.
  • If you have multiple hosts, sharing a common mounted drive, then install the Management Agents in two different phases:
    1. In the Add Host Targets Wizard, select the deployment type Fresh Agent Install, and install a Management Agent on the host where the drive is shared. Alternatively, you can select the deployment type Clone Existing Agent, and clone the Management Agent to the host where the drive is shared.
      For more information, refer to the chapter on cloning a Management Agent in the Oracle Enterprise Manager Cloud Control Advanced Installation and Configuration Guide.
    2. In the Add Host Targets Wizard, select the deployment type Add Host to Shared Agent, and install a Management Agent on all other hosts that access the shared, mounted drive. (Here, you will select the Management Agent you installed in the previous step as the master agent or shared agent.)
      For more information, refer to the chapter on installing a Shared Agent in the Oracle Enterprise Manager Cloud Control Advanced Installation and Configuration Guide.
  • If you have an Oracle RAC Cluster with multiple nodes, then you must install a Management Agent on each of the nodes separately. In other words, in the Add Host Targets Wizard, you must add each node explicitly as a destination host.
  • The Add Host Targets Wizard uses SSH to establish connectivity between Oracle Management Service (OMS) and the remote hosts where you want to install the Management Agents.
  • Only SSH1 (SSH version 1) and SSH2 (SSH version 2) protocols offered by OpenSSH are supported for deploying a Management Agent.
  • SSH public key authentication and password based authentication are supported. So you can use an existing SSH public key authentication without exposing your passwords. You can provide a dummy password in the wizard and bypass the validation.
    To set up SSH public key authentication, follow these steps:
    1. Navigate to the following location in the OMS home:
      $<OMS_HOME>/oui/prov/resources/scripts
      For example,
      /home/software/em/middleware/oms/oui/prov/resources/scripts
    2. Run the following script on the OMS host as the OMS user, and pass the Management Agent install user name and the fully qualified name of the target hosts:
      sshUserSetup.sh -setup -user <agent_install_1user_name> -hosts <target_hosts>
    3. Access the Add Host Targets Wizard, and provide the dummy password and install the Management Agent.
    The wizard ignores the dummy password, and honors the keys present in the following location on the OMS host to perform the installation. Here, $HOME refers to the home directory of the OMS install user.
    • $HOME/.ssh/id_rsa
    • $HOME/.ssh/id_dsa
    • $HOME/.ssh/identity
    If you want to provide additional keys, specify them as values for the oracle.sysman.prov.remoteinterfaces.identitylist property present in the $<OMS_HOME>/sysman/prov/agentpush/agentpush.properties file, using a comma separated list.
  • The Add Host Targets Wizard supports Named Credentials that enable you to use a set of credentials registered with a particular name specifically for this operation, by your administrator. This ensures an additional layer of security for your passwords because as an operator, you can only select the named credential, which is saved and stored by an administrator, and not know the actual user name and password associated with it.
    In case the named credential you select does not have the privileges to perform the installation, then you can set the named credential to run as another user (locked user account). In this case, the wizard logs in to the hosts using the named credential you select, but performs the installation using the locked user account you set.
    For example, you can create a named credential titled User_A, and set it to run as User_X that has the required privileges. In this case, the wizard logs in to the hosts as User_A, but installs as User_X, using the privilege delegation setting (sudo or PowerBroker) specified in the named credential.
  • By default, the Add Host Targets Wizard configures only the following types of plug-ins:
    • All discovery plug-ins that were configured with the OMS from where the Management Agent software is being deployed.
    • Oracle Home discovery plug-in
    • Oracle Home monitoring plug-in
  • You must have read privileges on the Oracle WebLogic Server's alert log directories for the Support Workbench (Incident) metrics to work properly. You must also ensure that the Management Agent that is monitoring this Oracle WebLogic Server target is running on the same host as the Oracle WebLogic Server.
  • If you have common mount point in your organization, then ensure that it is generic and ensure that you install the Management Agent in this generic mount points. This guideline helps when you upgrade your Management Agents to higher releases in the future within the same mount point, and not acquire new mount points each time.
    For example, have a mount point such as /oracle/product/agent and install the Management Agent in there so that it appears as /oracle/product/agent/agent12c.Do not install the Management Agent directly in the mount point because it breaks the upgrade path and causes problems with cleanup operations.

Prerequisites

Table 7-1 lists the prerequisites you must meet before installing the Management Agent using the Add Host Targets Wizard.
Table 7-1 Prerequisites for Installing Oracle Management Agent
Requirement Description
Hardware Requirements
Ensure that you meet the hard disk space and physical memory requirements as described in Chapter 2.
Software Requirements
(For Microsoft Windows) Ensure that you have installed Cygwin 1.7 on the destination host as described in Chapter 5.
Note: While running cygwin.bat in Microsoft Windows Server 2008 and Microsoft Windows Vista, ensure that you invoke it in administrator mode. To do this, right-click the cygwin.bat file and select Run as administrator.
Operating System Requirements
Ensure that you install the Management Agent only on certified operating systems as mentioned in the Enterprise Manager certification matrix available on My Oracle Support.
To access the Enterprise Manager certification matrix, follow the steps outlined in Appendix E.
For information about platforms receiving future support, refer to My Oracle Support note 793512.1.
Note: If you use Oracle Solaris 10, then ensure that you have update 9 or higher installed. To verify whether it is installed, run the following command:
cat /etc/release
You should see the output similar to the following. Here, s10s_u6 indicates that update 6, which is not a supported update level for installation, is installed.
Solaris 10 10/08 s10s_u6wos_07b SPARC
Package Requirements
Ensure that you install all the operating system-specific packages as described in Chapter 3.
User and Operating System Group Requirement
Ensure that you create the required operating system groups and users as described in Chapter 4.
Destination Host Requirements
Ensure that the destination hosts are accessible from the host where the OMS is running.
If the destination host and the host on which OMS is running belong to different network domains, then ensure that you update the /etc/hosts file on the destination host to add a line with the IP address of that host, the fully qualified name of that host, and the short name of the host.
For example, if the fully-qualified host name is example.com and the short name is mypc, then add the following line in the /etc/hosts file:
172.16.0.0 example.com mypc
Destination Host Credential Requirements
Ensure that all the destination hosts running on the same operating system have the same set of credentials. For example, all the destination hosts running on Linux operating system must have the same set of credentials.
The wizard installs the Management Agent using the same user account. If you have hosts running on the same operating system but with different credentials, then have two different deployment sessions.
Permission Requirements
  • Ensure that the agent base directory you specify is empty and has write permission.
  • Ensure that the instance directory is empty and has write permission.
Destination Host Time Zone Requirements
Ensure that the time zones of the destination hosts have been set correctly. To verify the time zone of a destination host, log in to the OMS host, and run the following command:
ssh -l <install_user> <destination_host_name> /bin/sh -c 'echo $TZ'
If the time zone displayed is incorrect, log in to the destination host, and follow these steps:
  1. Run the following commands to set the time zone on the destination host:
    • For Korn shell:
      TZ=<value>
      export TZ
    • For Bourne shell or Bash shell:
      export TZ=<value>
    • For C shell:
      setenv TZ <value>
    For example, in the Bash shell, run the following command to set the time zone to America/New_York:
    export TZ='America/New_York'
    The time zones you can use are listed in <AGENT_HOME>/sysman/admin/supportedtzs.lst.
  2. Restart the SSH daemon.
    If the destination host runs on a UNIX based operating system, run the following command:
    sudo /etc/init.d/sshd restart
    If the destination host runs on a Microsoft Windows operating system, run the following commands:
    cygrunsrv -E sshd
    cygrunsrv -S sshd
  3. Verify whether the SSH server can access the TZ environment variable by logging in to the OMS host, and running the following command:
    ssh -l <install_user> <destination_host_name> /bin/sh -c 'echo $TZ'
Note: If you had ignored a prerequisite check warning about wrong time zone settings during the Management Agent install, you must set the correct time zone on the destination hosts after installing the Management Agents. For information on setting time zones post install, refer After You Install.
sudo/pbrun/sesu/su SSH Requirements
(Only for UNIX)
Ensure that you set the oracle.sysman.prov.agentpush.enablePty property to true in the $<OMS_HOME>/sysman/prov/agentpush/agentpush.properties file, if the privilege delegation tool you are using requires a pseudo terminal for remote command execution via SSH. Most privilege delegation tools such as pbrun, sesu, and su require a pseudo terminal for remote command execution, by default.
Note: If you are using sudo as your privilege delegation tool, and you do not want to set the oracle.sysman.prov.agentpush.enablePty property to true, do one of the following:
  • Include Defaults visiblepw in the /etc/sudoers file, or enter the sudo command with the -S option for Privileged Delegation Setting on the Installation Details page.
    For information on how to access the Installation Details page, see Installation Procedure.
  • Comment out Defaults requiretty in the /etc/sudoers file.
sudo/pbrun/sesu/su Requirements (for Root User)
(Only for UNIX)
  • Ensure that the installing user has the privileges to invoke the id command and the agentdeployroot.sh script as root. Grant the privileges in the configuration file of your privilege delegation tool.
    For example, if you are using sudo as your privilege delegation tool, include the following in the /etc/sudoers file to grant the required privileges:
    oracle ALL=(root) /usr/bin/id, /home/oracle/agentibd/*/agentdeployroot.sh
    Here, oracle is the installing user, and /home/oracle/agentibd is the agent base directory.
  • You do not require the following entry in the /etc/sudoers file for installing a Management Agent. However, the entry is required for performing provisioning and patching operations in Enterprise Manager. Therefore, if you are removing this entry before installing a Management Agent, then ensure that you bring back the entry after installing the Management Agent.
    (root)/oracle/product/oms12c/agent/agent_inst/bin/nmosudo
sudo/pbrun/sesu/su Requirements (for Locked Account User)
(Only for UNIX)
  • Ensure that the installing user has the privileges to invoke /bin/sh as the locked account user. Grant the privileges in the configuration file of your privilege delegation tool.
    For example, if you are using sudo as your privilege delegation tool, include the following in the /etc/sudoers file to grant the required privileges:
    login_user1 ALL=(oracle) /bin/sh
    Here, login_user1 is the SSH log in user, and oracle is the locked account and install user.
    If you do not want to grant privileges to the installing user to invoke /bin/sh as the locked account user, set the oracle.sysman.prov.agentpush.pdpShellOutEnabled property to false, and ensure that the installing user has the privileges to invoke id, chmod, cp, mkdir, rm, tar, emctl, agentDeploy.sh, runInstaller, and unzip as the locked account user. Grant the privileges in the configuration file of your privilege delegation tool.
    For example, if you are using sudo as your privilege delegation tool, include the following in the /etc/sudoers file to grant the required privileges:
    login_user1 ALL=(oracle) /usr/bin/id, /bin/chmod, /bin/cp, /bin/mkdir, /bin/rm, /bin/tar, /home/oracle/agentibd/agent_inst/bin/emctl, /home/oracle/agentibd/*/agentDeploy.sh, /home/oracle/agentibd/*/prereq_stage/core/12.1.0.2.0/oui/bin/runInstaller, /home/oracle/agentibd/*/unzip, /home/oracle/agentibd/*/unzipTmp/unzip
    Here, login_user1 is the SSH log in user, oracle is the locked account and install user, and /home/oracle/agentibd is the agent base directory.
  • You do not require the following entry in the /etc/sudoers file for installing a Management Agent. However, the entry is required for performing provisioning and patching operations in Enterprise Manager. Therefore, if you are removing this entry before installing a Management Agent, then ensure that you bring back the entry after installing the Management Agent.
    (root)/oracle/product/oms12c/agent/agent_inst/bin/nmosudo
Locked Account Requirements
Ensure that the locked account user (oracle) has read permission on the home directory of the login user.
Default SSH Port Requirements
Ensure that the SSH daemon is running on the default port (that is, 22) on all the destination hosts. To verify the port, run the following command:
netstat -anp | grep <port_no>
If the port is a non-default port, that is, any port other than 22, then update the SSH_PORT property in the following file that is present in the OMS home:
$<OMS_HOME>/oui/prov/resources/Paths.properties
PATH Environment Variable Requirements
On the destination host, ensure the following:
  • (For Microsoft Windows) Ensure that the Cygwin software location appears before other software locations in the PATH environment variable. After making it the first entry, restart the SSH daemon (sshd).
  • (For UNIX) On the destination host, ensure that the SCP binaries (for example, /usr/bin/scp) are in the PATH environment variable.
CLASSPATH Environment Variable Requirements
Unset the CLASSPATH environment variable. You can always reset the variable to the original value after the installation is complete.
Software Availability Requirements
Ensure that the software of the Management Agent you want to install is available in Oracle Software Library (Software Library).
  • If you want to install Oracle Management Agent 12c on an operating system that is the same as the one on which Oracle Management Service 12c is running, then the Management Agent software for that release and for that platform is available by default in the Software Library. Therefore, no action is required from your end.
  • If you want to install Oracle Management Agent 12c on an operating system that is different from the one on which Oracle Management Service 12c is running, then ensure that the Management Agent software for the intended platform is downloaded and stored in the Software Library using the Self Update console.
    For information about how to download and apply software using the Self Update console, see the chapter on Self Update in the Oracle Enterprise Manager Cloud Control Administrator's Guide.
Path Validation Requirements
Validate the path to all command locations as described in Appendix B.
Temporary Directory Space Requirements
Ensure that you allocate 400 MB of space for a temporary directory where the executables can be copied.
By default, the temporary directory location set to the environment variable TMP or TEMP is honored. If both are set, then TEMP is honored. If none of them are set, then the following default values are honored: /tmp on UNIX hosts and c:\Temp on Microsoft Windows hosts.
Agent Base Directory Requirements
  • Ensure that the agent base directory you provide is empty and has at least 1 GB of free space.
    If a previously run deployment session had failed for some reason, then you might see an ADATMP_<timestamp> subdirectory in the agent base directory. In this case, either delete the subdirectory and start a new deployment session, or retry the failed session from the Add Host Status page.
  • Ensure that the directory name does not contain any spaces.
  • Ensure that the installing user owns the agent base directory. Ensure that the installer user or the root user owns all the parent directories. Ensure that the root user owns the root directory.
    For example, if the agent base directory is /scratch/OracleHomes/agent, and oracle is the installing user, then the /scratch/OracleHomes/agent directory must be owned by oracle, directories scratch and OracleHomes must be owned by either oracle or root user, and the root directory (/) must be owned by root user.
  • If the agent base directory is mounted, then ensure that it is mounted with the setuid turned on.
Central Inventory (oraInventory) Requirements
  • Ensure that you allocate 100 MB of space for the Central Inventory.
  • Ensure that the central inventory directory is not in a shared file system. If it is already in a shared file system, then create a new inventory in a non-shared file system. You can optionally migrate the products that were previously installed in the shared file system to this new inventory in the non-shared file system.
  • Ensure that you have read, write, and execute permissions on oraInventory on all remote hosts. If you do not have these permissions on the default inventory (typically at /etc/oraInst.loc) on any remote host, then ensure that you specify the path to an alternative inventory location by using one of the following options in the Additional Parameters field of the Add Host Targets Wizard. However, note that these parameters are supported only on UNIX platforms, and not on Microsoft Windows platforms.
    INVENTORY_LOCATION=<absolute_path_to_inventory_directory>
    -invPtrLoc <absolute_path_to_oraInst.loc>
Installing User Requirements
  • If the central inventory owner and the user installing the Management Agent are different, then ensure that they are part of the same group.
  • Also ensure that the inventory owner and the group to which the owner belongs have read and write permissions on the inventory directory.
    For example, if the inventory owner is abc and the user installing the Management Agent is xyz, then ensure that abc and xyz belong to the same group, and they have read and write access to the inventory.
Agent User Account Permissions and Rights (For Microsoft Windows)
(For Microsoft Windows) If you are installing the Management Agent on a Microsoft Windows-based operating system, then ensure that the agent user account has permissions and rights to perform the following:
  • Act as part of the operating system.
  • Adjust memory quotas for a process.
  • Replace process level token.
  • Log in as a batch job.
To verify whether the agent user has these rights, follow these steps:
  1. Launch the Local Security Policy.
    From the Start menu, click Settings and then select Control Panel. From the Control Panel window, select Administrative Tools, and from the Administrative Tools window, select Local Security Policy.
  2. In the Local Security Policy window, from the tree structure, expand Local Policies, and then expand User Rights Assignment.
Permissions for cmd.exe (For Microsoft Windows)
(For Microsoft Windows) If you are installing the Management Agent on a Microsoft Windows-based operating system, then ensure that you grant the cmd.exe program Read and Execute permissions for the user account that the batch job runs under. This is a restriction from Microsoft.
For more information on this restriction and to understand how you can grant these permissions, access the following URL to Microsoft Web site:
http://support.microsoft.com/kb/867466/en-us
Preinstallation/Postinstallation Scripts Requirements
Ensure that the preinstallation and postinstallation scripts that you want to run along with the installation are available either on the OMS host, destination hosts, or on a shared location accessible to the destination hosts.
Browser Requirements
  • Ensure that you use a certified browser as mentioned in the Enterprise Manager certification matrix available on My Oracle Support.
    To access the Enterprise Manager certification matrix, follow the steps in Appendix E.
  • If you use Microsoft Internet Explorer 8 or 9, do the following:
    • Turn off the compatibility view mode. To do so, in Microsoft Internet Explorer, from the Tools menu, click Compatibility View to disable it if it is enabled. Also, click Compatibility View Settings and deregister the Enterprise Manager Cloud Control console URL.
    • Enable XMLHTTP. To do so, from the Tools menu, click Internet Options. Click the Advanced tab, and under the Security heading, select Enable native XMLHTTP support to enable it.

Installation Procedure

To install a fresh Management Agent using the Add Host Targets Wizard, follow these steps:
  1. In Cloud Control, do one of the following:
    • From the Setup menu, select Add Target, then select Auto Discovery Results. On the Auto Discovery Results page, select a host you want to monitor in Enterprise Manager Cloud Control, and click Promote.
    • From the Setup menu, select Add Target, then select Add Targets Manually. On the Add Targets Manually page, select Add Host Targets and click Add Host.
  2. On the Host and Platform page, do the following:
    1. Accept the default name assigned for this session or enter a unique name of your choice. The custom name you enter can be any intuitive name, and need not necessarily be in the same format as the default name. For example, add_host_operation_1.
      Session Name
      A unique deployment activity name enables you to save the installation details specified in this deployment session and reuse them in the future without having to enter all the details all over again in the new session.
    2. Click Add to enter the fully qualified name and select the platform of the host on which you want to install the Management Agent.
      Add button to add hosts
      Note:
      • Oracle recommends you to enter the fully qualified domain name of the host. For monitoring purpose, Enterprise Manager Cloud Control adds that host and the Management Agent with the exact name you enter here.
      • You must enter only one host name per row. Entering multiple host names separated by a comma is not supported.
      • You must ensure that the host name does not contain underscores("_").
      • If the platform name is appended with Agent Software Unavailable, then it indicates that the software for that platform is not available on the OMS host, and that you must download and apply it using the Self Update console. To access the Self Update console, from the Setup menu, select Extensibility, then click Self Update.
        For more information on using the Self Update Console to download and apply the latest software, refer to Oracle Enterprise Manager Cloud Control Administrator's Guide.
      Alternatively, you can click either Load from File to add host names stored in a file, or Add Discovered Hosts to add host names from a list of hosts discovered by Enterprise Manager. For information on how the host name entries must appear in the host file, see Format of Host List File.
      Load from File and Add from Discovered Hosts Options
      Note:
      When you click Add Discovered Hosts and add hosts from a list of discovered hosts, the host's platform is automatically detected and displayed. The platform name is detected using a combination of factors, including hints received from automated discovery and the platform of the OMS host. This default platform name is a suggestion, so Oracle strongly recommends you to verify the platform details before proceeding to the next step.
      If you are correcting the platform names, and if all the hosts run on the same platform, then set the platform for the first host in the table and from the Platform list, select Same for All Hosts. This will ensure that the platform name you selected for the first host is also set for the rest of the hosts in the table.
      Platform Information
      Note:
      • If you reach this page (Host and Platform page) from the Auto Discovery Results page, then the hosts you selected on that page automatically appear in the table. In this case, you need to only validate the host names and their platforms.
      • If you are installing a Management Agent on a platform that is different from the platform on which the OMS is running, then ensure that you have the software for that platform. If you do not have that software, then go to the Self Update console within Enterprise Manager Cloud Control, download the software, then apply it. For more information, see the prerequisite about Software Availability in Table 7-1.
    3. Click Next.
  3. On the Installation Details page, do the following:
    1. In the Deployment Type section, select Fresh Agent Install.
      Install Type
      Note:
      If you have multiple hosts sharing a common mounted drive, then install the Management Agents in two different phases:
      1. In the Add Host Targets Wizard, select the deployment type Fresh Agent Install, and install a Management Agent on the host where the drive is shared.
      2. In the Add Host Targets Wizard, select the deployment type Add Host to Shared Agent, and install a Management Agent on all other hosts that access the shared, mounted drive. (Here, you will select the Management Agent you installed in the previous step as the master agent or shared agent.)
    2. From the table, select the first row that indicates the hosts grouped by their common platform name.
    3. In the Installation Details section, provide the installation details common to the hosts selected in Step 3 (b). For Installation Base Directory, enter the absolute path to the agent base directory where you want the software binaries, security files, and inventory files of the Management Agent to be copied.
      For example, /u01/app/Oracle/
      If the path you enter does not exist, the application creates a directory at the specified path, and copies the Management Agent software binaries, security files, and inventory files there.
      Note:
      The Installation Base Directory is essentially the agent base directory. Ensure that the directory you provide is empty. If a previously run deployment session had failed for some reason, then you might see an ADATMP_<timestamp> subdirectory in the agent base directory. In this case, either delete the subdirectory and start a new deployment session, or retry the failed session from the Add Host Status page.
    4. For Instance Directory, accept the default instance directory location or enter the absolute path to a directory of your choice where all Management Agent-related configuration files can be stored.
      For example, /u01/app/Oracle/agent_inst
      If you are entering a custom location, then ensure that the directory has write permission. Oracle recommends you to maintain the instance directory inside the agent base directory.
      If the path you enter does not exist, the application creates a directory at the specified path, and stores all the Management Agent-related configuration files there.
    5. From Named Credential list, select an appropriate profile whose credentials can be used for setting up the SSH connectivity between the OMS and the remote hosts, and for installing a Management Agent on each of the remote hosts.
      Named Credentials
      Note:
      • If you do not have a credential profile, or if you have one but do not see it in the Named Credential list, then click the plus icon against this list. In the Create New Named Credential window, enter the credentials and store them with an appropriate profile name so that it can be selected and used for installing the Management Agents. Also set the run privilege if you want to switch over from the Named Credential you are creating, to another user who has the privileges to perform the installation.
      • If the plus icon is disabled against this list, then you do not have the privileges to create a profile with credentials. In this case, contact your administrator and either request him/her to grant you the privileges to create a new profile or request him/her to create a profile and grant you the access to view it in the Named Credential list.
      • If you have manually set up SSH public key authentication between the OMS and the remote hosts, then you may not have a password for your user account. In this case, create a named credential with a dummy password. Do NOT leave the password field blank.
    6. For Privileged Delegation Setting, validate the Privilege Delegation setting to be used for running the root scripts. By default, it is set to the Privilege Delegation setting configured in Enterprise Manager Cloud Control.
      For example, you can specify one of the following for the Privileged Delegation Setting field:
      /usr/bin/sudo -u %RUNAS% %COMMAND%
      /usr/bin/sesu - %RUNAS% -c "%COMMAND%"
      /usr/bin/pbrun %PROFILE% -u %RUNAS% %COMMAND%
      /usr/bin/su - %RUNAS% -c "%COMMAND%"
      
      If you leave the Privileged Delegation Setting field blank, the root scripts will not be run by the wizard; you will have to run them manually after the installation. For information about running them manually, see After You Install.
      This setting will also be used for performing the installation as the user set in the Run As attribute of the selected Named Credential if you had set the user while creating that Named Credential.
      Note:
      In the Privilege Delegation setting, the %RUNAS% is honored as the root user for running the root scripts and as the user set in the Run As attribute of the Named Credential for performing the installation.
    7. For Port, accept the default port (3872) that is assigned for the Management Agent to communicate, or enter a port of your choice.
      The custom port you enter must not be busy. If you are not sure, you can leave this field blank. Enterprise Manager Cloud Control automatically assigns the first available free port within the range of 1830 - 1849.
    8. (Optional) In the Optional Details section, enter the absolute path to an accessible location where the preinstallation and postinstallation scripts you want to run are available. Note that only shell scripts are supported, and only one preinstallation or one postinstallation script can be specified.
      If you want to run the script as root, then select Run as Root. If the script is on the host where OMS is running and is not on the host where you want to install the Management Agent, then select Script on OMS. In this case, the script will be copied from the OMS host to the destination hosts, and then run on the destination hosts.
    9. (Optional) For Additional Parameters, enter a whitespace-separate list of additional parameters that you want to pass during the installation. For a complete list of supported additional parameters, see Table 7-2.
      For example, if you want to provide the inventory pointer location file, then enter -invPtrLoc followed by the absolute path to the file location. However, note that this parameter is supported only on UNIX platforms, and not on Microsoft Windows platforms.
    10. Repeat Step 3 (b) to Step 3 (i) for every other row you have in the table.
    11. Click Next.
  4. On the Review page, review the details you have provided for the installation and do one of the following:
    • If you want to modify the details, then click Back repeatedly to reach the page where you want to make the changes.
    • If you want to cancel the deployment session for some reason, click Cancel. You are automatically taken to the Add Targets Manually page.
    • If you are satisfied with the details, then click Deploy Agent to install the Management Agent. You are automatically taken to the Add Host Status page that enables you to monitor the progress of the deployment session.
      If you want to cancel a running deployment session, then on the Add Host Targets page, click Cancel. Note that once you cancel the session, you cannot track or resume the session in any way. However, the currently launched commands on the remote hosts will continue to run until they are completed.
Note:
If the installation fails for any reason, review the log files. For information on how to access the log files, refer to Oracle Enterprise Manager Cloud Control Advanced Installation and Configuration Guide. One log file is generated per host, so if you installed Management Agents on multiple hosts, then review all the log files.

Format of Host List File

In the Add Host Targets Wizard, you can click Load from File to add the hosts listed in a file. However, ensure that the file you select has one of the following formats:
  • Only the host name.
    For Example,
    host1.example.com
    host2.example.com
  • The host name followed by the platform name.
    For Example,
    host1.example.com linux_x64
    host2.example.com aix
    The supported platform names are linux_x64, linux, solaris, hpunix, hpi, linux64_zseries, aix, linux_ppc64, windows_x64, solaris_x64, win32.

Supported Additional Parameters

Table 7-2 lists the additional parameters supported for installing a new Management Agent using the Add Host Targets Wizard.
Table 7-2 Supported Additional Parameters
Parameter Description
INVENTORY_LOCATION
Enter the absolute path to the Central Inventory (oraInventory).
For example, INVENTORY_LOCATION=$HOME/oraInventory
Note: This parameter is supported only on UNIX platforms, and not on Microsoft Windows platforms.
This parameter will be used only when the Central Inventory pointer /etc/oraInst.loc (or /var/opt/oracle/oraInst.loc) does not exist.
-invPtrLoc
Enter the absolute path to the inventory file that has the location of the Central Inventory (oraInventory).
For example, -invPtrLoc /tmp/oraInst.loc
Note: This parameter is supported only on UNIX platforms, and not on Microsoft Windows platforms.
s_agentSrvcName
(Only for Microsoft Windows) Enter a custom name for the Management Agent service.
Every Management Agent appears as a service in Microsoft Windows, and every Management Agent has a default service name. If you want to assign a custom name to identify it, then use this parameter.
For example, s_agentSrvcName=agentsrvc1
Note: If you upgrade a 12c Release 1 (12.1.0.1) Management Agent installed on a Microsoft Windows host to 12c Release 2 (12.1.0.2), and you want to install another Management Agent on the same host, reporting to a different OMS, ensure that you specify the s_agentSrvcName parameter.
b_startAgent=false
Specify this parameter if you do not want the Management Agent to start automatically once it is installed and configured.
If you do not specify this parameter, the Management Agent starts automatically once it is installed and configured.
b_secureAgent=false
Specify this parameter if you do not want the Management Agent to be secured after the install.
If you specify this parameter, ensure that you also specify the OMS HTTP port, using the EM_UPLOAD_PORT parameter.
For example, b_secureAgent=false EM_UPLOAD_PORT=4899
If you do not specify this parameter, the Management Agent is secured automatically after the install.

After You Install

After you install a Management Agent using the Add Host Targets Wizard, follow these steps:
  1. Verify the installation on the Add Host Status page. Review the progress made on each of the phases of the deployment operation — Initialization, Remote Prerequisite Check, and Agent Deployment.
    Note:
    In the Add Host Targets Wizard, after you click Deploy Agent to install one or more Management Agents, you are automatically taken to the Add Host Status page. If you want to view the details or track the progress of all the deployment sessions, then from the Setup menu, select Add Target, and then, click Add Targets Manually. On the Add Targets Manually page, select Add Host Targets and click Add Host Results.
    If a particular phase fails or ends up with a warning, then review the details provided for each phase in the Agent Deployment Details section, and do one of the following:
    • Ignore the warning or failure, and continue with the session if you prefer.
      • You can choose to proceed with the deployment of Management Agents only on those remote hosts that have successfully cleared the checks, and you can ignore the ones that have Warning or Failed status. To do so, click Continue and select Continue, Ignoring Failed Hosts.
      • You can choose to proceed with the deployment of Management Agents on all the hosts, including the ones that have Warning or Failed status. To do so, click Continue and select Continue, All Hosts.
    • Fix the problem by reviewing the error description carefully, understanding its cause, and taking action as recommended by Oracle.
      • You can choose to retry the deployment of Management Agents with the same installation details. To do so, click Retry and select Retry Using Same Inputs.
      • You can retry the deployment of Management Agents with modified installation details. To do so, click Retry and select Update Inputs and Retry.
    Note:
    If you want to cancel a running deployment session, then click Cancel. Note that once you cancel the session, you cannot track or resume the session in any way. However, the currently launched commands on the remote hosts will continue to run until they are completed.
  2. If required, manually verify the installation:
    1. Navigate to the Management Agent home and run the following command to see a message that confirms that the Management Agent is up and running:
      $<AGENT_INSTANCE_HOME>/bin/emctl status agent
      Note:
      If the status of the Management Agent is down for some reason, then manually start the Management Agent: $<AGENT_INSTANCE_HOME>/bin/emctl start agent
    2. Navigate to the Management Agent home and run the following command to see a message that confirms that EMD upload completed successfully:
      $<AGENT_INSTANCE_HOME>/bin/emctl upload
  3. Verify if all the plug-ins were installed successfully. To do so, access the following log file from the Management Agent home, and search for the sentence WARN:Plugin configuration has failed.
    $<AGENT_HOME>/cfgtoollogs/cfgfw/CfmLogger-<timestamp>.log
    For example,
    $/u01/agent/core/12.1.0.2.0/cfgtoollogs/cfgfw/CfmLogger-<timestamp>.log
    If you find the sentence, resolve the issue by running the AgentPluginDeploy.pl script from the Management Agent home.
    $<AGENT_BASE_DIR>/agent/core/12.1.0.2.0/perl/bin/perl <AGENT_BASE_DIR>/agent/core/12.1.0.2.0/bin/AgentPluginDeploy.pl -oracleHome <AGENT_BASE_DIR>/agent/core/12.1.0.2.0 -agentDir <AGENT_BASE_DIR> -pluginIdsInfoFile <AGENT_BASE_DIR>/plugins.txt -action configure -emStateDir <AGENT_INSTANCE_HOME>
    For example,
    /u01/agent/core/12.1.0.2.0/perl/bin/perl /u01/agent/core/12.1.0.2.0/bin/AgentPluginDeploy.pl -oracleHome /u01/agent/core/12.1.0.2.0/ -agentDir /u01/agent -pluginIdsInfoFile /u01/agent/plugins.txt -action configure -emStateDir /u01/agent/agent_inst
  4. If you have restrictive Privilege Delegation Provider (PDP) configuration settings, enter the location of nmosudo in your PDP configuration file.
    Enterprise Manager supports PDPs such as SUDO and PowerBroker that enable administrators to restrict certain users from running certain commands.
    In Enterprise Manager Cloud Control 12c Release 2 (12.1.0.2), nmosudo is located in the sbin directory, which is in the agent base directory. For example, <AGENT_BASE_DIRECTORY>/sbin/nmosudo. In Enterprise Manager Cloud Control 12c Release 1 (12.1.0.1) [with or without Bundle Patch 1], nmosudo is located in the agent instance directory. For example, <AGENT_INSTANCE_DIRECTORY>/bin/nmosudo.
    Therefore, when you install an Enterprise Manager Cloud Control 12c Release 2 (12.1.0.2) Management Agent, you must modify your PDP configuration file to update the new location of nmosudo.
    For example, if you use SUDO as your PDP, the configuration file for SUDO is typically /etc/sudoers. In this file, update the following entry with the new location to nmosudo.
    sudouser ALL : oracle /eminstall/basedir/sbin/nmosudo * 
    
  5. (Only for UNIX Operating Systems) If you had ignored the prerequisite check warning about not having root privileges, SUDO/PBRUN binaries, or SUDO/PBRUN privileges, then manually run the following scripts as a root user from each of the hosts where the installation was done. If you do not have SUDO/PBRUN privileges, then request your Administrator who has the privileges to run these scripts.
    • If this is the first Oracle product you just installed on the host, then run the oraInstroot.sh script from the inventory location specified in the oraInst.loc file that is available in the Management Agent home.
      For example, if the inventory location specified in the oraInst.loc file is $HOME/oraInventory, then run the following command:
      $HOME/oraInventory/oraInstRoot.sh
      Note:
      If you are not a root user, then use SUDO/PBRUN to change to a root user. For example, run the following command: /usr/bin/sudo $HOME/oraInventory/oraInstRoot.sh
    • Run the root.sh script from the Management Agent home:
      $<AGENT_HOME>/root.sh
      Note:
      If you are not a root user, then use SUDO/PBRUN to change to a root user. For example, run the following command: /usr/bin/sudo $<AGENT_HOME>/root.sh
  6. If you had ignored a prerequisite check warning about wrong time zone settings, follow these steps:
    1. Set the correct time zone on the destination host.
      For information on how to set the time zone on a destination host, refer Destination Host Time Zone Requirements in Table 7-1.
    2. Deinstall the Management Agent present on the destination host.
      For information on how to deinstall a Management Agent, refer to Oracle Enterprise Manager Cloud Control Advanced Installation and Configuration Guide.
    3. Install a Management Agent on the destination host.
  7. By default, the host and the Management Agent get automatically added to the Enterprise Manager Cloud Control console for monitoring. None of the targets running on that host get automatically discovered and monitored.
    To monitor the other targets, you need to add them to Enterprise Manager Cloud Control either using the Auto Discovery Results page, the Add Targets Manually page, or the discovery wizards offered for the targets you want to monitor.
    For information about discovering targets in Enterprise Manager Cloud Control, refer to Oracle Enterprise Manager Cloud Control Administrator's Guide.
Note:
If you want to repoint your existing Management Agents to a new Oracle Management Service (OMS), then you must first deinstall those Management Agents and plug-ins, and then redeploy those Management Agents and plug-ins using the new OMS. This is typically done when you want to move from an Enterprise Manager Cloud Control system in a test environment to an Enterprise Manager Cloud Control system in a production environment. When you repoint your existing Management Agents to a new OMS, you cannot move the targets monitored by the Management Agents, the target history, and the Management Agent history. The monitored targets and the history data is lost.


8 Adding Additional Oracle Management Service

This chapter describes how you can install an additional Oracle Management Service (OMS) to your existing Enterprise Manager Cloud Control environment. In particular, this chapter covers the following:
Note:
This chapter describes how you can install an additional OMS in interactive, graphical mode. If you want to perform the same operation in silent way, then refer to the Oracle Enterprise Manager Cloud Control Advanced Installation and Configuration Guide.
Note:
On the source OMS, if you have deployed additional plug-ins that were not part of the Enterprise Manager software (DVD, or downloaded software), then follow the instructions outlined in Oracle Enterprise Manager Cloud Control Advanced Installation and Configuration Guide.

Overview

Oracle Management Service (OMS) is one of the core components of Enterprise Manager Cloud Control that orchestrates with Oracle Management Agents (Management Agents) and plug-ins to discover targets, monitor and manage them, and store the collected information in a repository for future reference and analysis.
When you install Enterprise Manager for the very first time, by default, the installer installs one OMS along with one Management Agent. While this default configuration suits smaller environments, typically in larger production environments, you may have the need to install additional OMS instances to help reduce the load on a single OMS and improve the efficiency of the data flow.
Note:
You can have multiple OMS instances and still connect to just one Oracle Management Repository (Management Repository).
The Add Management Service deployment procedure helps you meet such high-availability requirements. The deployment procedure offers a wizard that enables you to install an additional Oracle Management Service 12c by cloning an existing OMS that is running on an AdminServer host. The entire Middleware home of the source OMS is cloned to the destination host. For information about the contents of the Middleware home of an OMS, see Introduction.
Figure 8-1 illustrates how you navigate to the Add Additional OMS Deployment wizard.
Figure 8-1 Add Additional OMS Deployment Procedure
Add Additional OMS Deployment Procedure
Note:
If you are cloning the OMS from a complete Enterprise Manager installation, then the Management Agent that was installed with the Enterprise Manager system is not cloned to the destination host.

Before You Begin

Before you begin, keep these points in mind:
  • You can clone only an existing, running Oracle Management Service 12c that is associated with an AdminServer host. The patches applied on the source OMS are automatically carried over to the cloned instance.
  • You can clone only one OMS at a time and to only one destination host at a time. If you want to add multiple OMS instances, then you must repeat the installation procedure on each host.
  • You can clone only when the source host and the destination host are running on the same operating system and architecture. For example, if the source host is a Linux 32-bit host, then the destination host must also be a Linux 32-bit host. Similarly, if the source host is a Linux 64-bit host, then the destination host must also be a Linux 64-bit host.
  • All general purpose file systems, including OCFS2 and ACFS, are acceptable for storing Enterprise Manager Cloud Control 12c software binaries and OMS instance home files (configuration files in gc_inst). However, OCFS is not considered a general purpose file system, and therefore is not considered acceptable for this use.
  • You must not install the additional OMS on an NFS-mounted drive. Installing it on an NFS-mounted drive causes the Oracle HTTP Server to restart frequently, which in turn makes the OMS inaccessible. If you are forced to install on such a shared drive, then ensure that the OMS instance base directory (gc_inst) is created in a non-NFS-mounted location.
  • You can find the OMS and Management Agent entries in the /etc/oragchomelist file for all UNIX platforms except HPUNIX, HPia64, Solaris Sparc.
    On HPUNIX, HPia64, Solaris Sparc platforms, the entries are present in /var/opt/oracle/oragchomelist.

Prerequisites

Table 8-1 lists the prerequisites you must meet before installing the OMS.
Table 8-1 Prerequisites for Adding an Additional Oracle Management Service
Requirement Description
Hardware Requirements
  • Ensure that you meet the hard disk space and physical memory requirements as described in Chapter 2.
  • If you have installed BI publisher on the source host, then ensure that you have 7 GB of additional hard disk space on the destination host, so a total of 14 GB.
Operating System Requirements
  • Ensure that you install Enterprise Manager Cloud Control only on certified operating systems as mentioned in the Enterprise Manager certification matrix available on My Oracle Support.
    To access the Enterprise Manager certification matrix, follow the steps outlined in Appendix E.
    For information about platforms receiving future support, refer to My Oracle Support note 793512.1.
  • Ensure that the destination host (that is, the host on which you are installing an additional OMS) is running on the same operating system as that of the source host (that is, the host from where you are cloning the first OMS).
    Note: If you use Oracle Solaris 10, then ensure that you have update 9 or higher installed. To verify whether it is installed, run the following command:
    cat /etc/release
    You should see the output similar to the following. Here, s10s_u6 indicates that update 6, which is not a suitable update level to support installation, is installed.
    Solaris 10 10/08 s10s_u6wos_07b SPARC
Package and Kernel Parameter Requirements
Ensure that you install all operating system-specific packages and set all kernel parameters as described in Chapter 3.
Operating System Groups and Users Requirements
Ensure that you create the required operating system groups and users as described in Chapter 4.
Existing Oracle Management Service Requirements
Ensure that Oracle Management Service 12c Release 2 is already installed and is available for cloning. Also ensure that the AdminServer on which the OMS is configured is up and running.
Also ensure that it is not installed on a symlink.
Existing Oracle Management Service Backup Requirements
Ensure that regular back-ups are scheduled for the existing Oracle Management Service 12c that you want to clone.
Existing High Availability Configuration Requirements
Ensure that you have met all Oracle-recommended high availability requirements in your environment. For more information, refer to the chapter on high availability requirements in the Oracle Enterprise Manager Cloud Control Administrator's Guide.
Existing Oracle Management Agent Requirements
Ensure that the destination host already has a Management Agent installed, and ensure that it is up and running.
If this Management Agent was manually installed on the destination host, then ensure that the installation was completed by running the root.sh script. Otherwise, the Add Management Service deployment procedure will not be able to run some scripts that require root permission.
Status of Oracle Configuration Manager
(Only for Microsoft Windows) In the existing OMS, if Oracle Configuration Manager is configured, then make sure it is stopped from both the OMS home and the Web Tier home by following these steps.
  1. Navigate to the OMS home.
    cd $<MIDDLEWARE_HOME>/oms/
  2. Set the environment variable ORACLE_CONFIG_HOME to the following location:
    $<OMS_INSTANCE_HOME>/em/EMGC_OMS1
    For example,
    set ORACLE_CONFIG_HOME=C:\win0224\emgc\gc_inst\em\EMGC_OMS1
  3. Navigate to the following location:
    $<MIDDLEWARE_HOME>/oms/ccr/bin
  4. Stop OCM by running the following script:
    emCCR.bat stop
  5. Navigate to the Web Tier home.
    cd $<MIDDLEWARE_HOME>/Oracle_WT
  6. Set the environment variable ORACLE_CONFIG_HOME to the following location:
    $<OMS_INSTANCE_HOME>/WebTier1
    For example,
    set ORACLE_CONFIG_HOME=C:\win0224\emgc\gc_inst\WebTier1
  7. Navigate to the following location:
    $<MIDDLEWARE_HOME>/Oracle_WT/ccr/bin
  8. Stop OCM by running the following script:
    emCCR.bat stop
Temporary Directory Space Requirements on Source and Destination Hosts
Ensure that you have 8 GB of space on the source as well as the destination host for creating a temporary directory. If you have installed BI publisher on the source host, then ensure that you have 14 GB of space.
The temporary directory created by default is ADD_MANAGEMENT_SERVICE_<TimeStamp>.
The temporary directory on the source host is used for temporarily staging the files related to backup or cloning steps of the deployment procedure. The temporary directory on the destination host is used for temporarily staging the cloned image and other related files.
Shared Directory Space Requirements
If you choose to transfer the software and configuration files to a central, shared location, then ensure that you have 4 GB of space for that shared directory.
Middleware home Location Requirement
On the destination host, a Middleware home (absolute path) identical to the one on the source host is created, and then, the source OMS is cloned to that location. Ensure that this Middleware home does not already exist on the destination host.
For example, if the Middleware home on the source host is /home/john/Oracle/Middleware, ensure that the same path does not already exist on the destination host.
Oracle Management Service Instance Base Location Space Requirements
Ensure that you have 1 GB of space on the destination host for the Oracle Management Service Instance Base directory where the configuration files of the OMS will be created.
Management Agent Installation Status Requirements
(Only for Microsoft Windows) If the installation of a Management Agent using the Add Host Targets Wizard is in progress on the source OMS, then ensure that it is completed before you start cloning the OMS.
To verify whether a Management Agent installation using the Add Host Targets Wizard is in progress, search for .lck files in the following location. Presence of such files indicates that there are installation operations in progress.
$<OMS_HOME>/sysman/prov/agentpush/
Server Load Balancer Requirements
  • Ensure that you have installed a Server Load Balancer (SLB) in your network and configured it to work with the first OMS. All Management Agents communicating with the first OMS must be uploading data only via this SLB.
    If you have not configured the SLB yet to work with the first OMS, then configure it now. For information about configuring an SLB, refer to the chapter on high availability requirements in the Oracle Enterprise Manager Cloud Control Administrator's Guide.
  • In order to configure your OMS instances in an active/active configuration behind an SLB, your SLB must meet the following requirements:
    (a) Supports multiple virtual server ports - Enterprise Manager typically requires that up to 4 ports are configured on the SLB (Secure Upload, Agent Registration, Secure Console, Unsecure Console).
    (b) Supports persistence - HTTP and HTTPS traffic between the browser and the OMS requires persistence.
    (c) Supports application monitoring - The SLB must be capable of monitoring the health of the OMS instances and detecting failures, so that requests will not be routed to OMSes that are not available.
SLB Pools and Their Association with the First OMS
On the SLB, using its administration console, create the following SLB pools and add the first OMS host to them:
  • Secure Upload Pool (add the host using the port configured for the Secure Upload service)
  • Agent Registration Pool (add the host using the port configured for the Agent Registration service)
  • Secure Console Pool (add the host using the port configured for the Secured Console service)
  • (Optional) Unsecure Console Pool (add the host using the port configured for the Unsecured Console service)
Virtual Servers and Their Association with the SLB Pools
On the SLB, using its administration console, create the following virtual servers and associate them with the SLB pools.
  • Secure Upload Virtual Server with port 1159 (associate it with Secure Upload Pool)
  • Agent Virtual Server with port 4889 (associate it with Agent Registration Pool)
  • Secure Console Virtual Server with port 443 (associate it with Secure Console Pool)
  • (Optional) Unsecure Console Virtual Server with port 80 (associate it with Unsecure Console Pool)
SLB Monitors and Their Association with the First OMS
On the SLB, using its administration console, create the following SLB monitors and associate the first OMS host with them:
  • Secure Upload Monitor (associate the host using the port configured for the Secure Upload service)
  • Agent Registration Monitor (associate the host using the port configured for the Agent Registration service)
  • Secure Console Monitor (associate the host using the port configured for the Secured Console service)
  • (Optional) Unsecure Console Monitor (associate the host using the port configured for the Unsecured Console service)
Software Library Accessibility Requirements
Ensure that the directories where you have configured the Software Library are accessible (read/write) from the destination hosts.
If you have configured an OMS Shared Storage location to use a local file system path, then you must migrate this location to another OMS Shared Storage location that uses a shared file system path. For instructions, refer to the Oracle Enterprise Manager Cloud Control Administrator's Guide.
Installing User Requirements
Ensure that you meet the following requirements:
  • (For UNIX only) The installation must NOT be run by a root user.
  • (For Microsoft Windows only) User must be part of the ORA-DBA group and have administrator permissions.
  • (For Microsoft Windows only) User must belong to the DBA group, and have permissions to perform the following: Act as part of the operating system, Create a token object, Log on as a batch job, and Adjust memory quotas for a process.
    To verify whether the agent user has these rights, from the Start menu, click Settings and then select Control Panel. From the Control Panel window, select Administrative Tools, and from the Administrative Tools window, select Local Security Settings. In the Local Security Settings window, from the tree structure, expand Local Policies, and then expand User Rights Assignment.
Permission Requirements
Ensure that you are able to access and read/write in the following locations:
  • Oracle Middleware home
    Oracle Middleware home is a directory on the source host that contains the OMS you are cloning, the Oracle WebLogic Server home, the Web tier instance files, and so on.
  • Oracle Management Service Instance Base location
    Oracle Management Service Instance Base is a directory on the source host that contains configuration files related to the OMS. The instance base is typically under the parent directory of the Middleware home.
  • Source Staging location
    Source staging location is a location on the source host that is used for staging the cloned ZIP files before copying them to the destination host.
  • Destination Staging location
    Destination staging location is a location on the destination host that is used for staging the cloned ZIP files when they are copied over from the source host.
  • Temporary directory on the source host where the executables will be copied. For example, /tmp or c:\Temp.
Proximity Requirements
Ensure that the host on which the OMS is being installed and the host on which the Management Repository is being configured are located in close proximity to each other. Ideally, the round trip network latency between the two should be less than 1 millisecond.
Firewall Requirements
If you have a firewall in your environment, then refer to the chapter on configuring Enterprise Manager for firewalls in the Oracle Enterprise Manager Cloud Control Advanced Installation and Configuration Guide.
Unique Host Name and Static IP Address Requirements
Ensure that you check the network configuration to verify that the host on which you are installing resolves to a unique host name and a static IP address that are visible to other hosts in the network.
Note: Oracle recommends that you use static IP address. If you use dynamic IP address, and if the host is rebooted, then the host might receive a new IP, and as a result, the OMS startup will fail.
Central Inventory Requirements
Ensure that you allocate 100 MB of space for Central Inventory (oraInventory).
Also ensure that the central inventory directory is not on a shared file system. If it is already on a shared file system, then switch over to a non-shared file system by following the instructions outlined in My Oracle Support note 1092645.1.
UMASK Value Requirements
Ensure that you set the default file mode creation mask (umask) to 022 in the shell startup file.
For example:
  • Bash Shell
    $ . ./.bash_profile
  • Bourne or Korn Shell
    $ . ./.profile
  • C Shell
    % source ./.login
File Descriptor Requirements
Ensure that you set the file descriptors to a minimum of 4096.
To verify the current value set to the file descriptors, run the following command:
/bin/sh -c "ulimit -n"
If the current value is not 4096 or greater, then as a root user, update the /etc/security/limits.conf file with the following entries:
<UID> soft nofile 4096
<UID> hard nofile 4096
Host File Requirements
Ensure that the host name specified in the /etc/hosts file is unique, and ensure that it maps to the correct IP address of the host.
Ensure that localhost is pingable and resolves to 127.0.0.1 (or resolves to ::1 for IPv6 hosts).
The following is the recommended format of the /etc/hosts file:
<ip> <fully_qualified_host_name> <short_host_name>
For example,
127.0.0.1 localhost.localdomain localhost
172.16.0.0 myhost.example.com myhost
According to RFC 952, the following are the assumptions: A name (Net, Host, Gateway, or Domain name) is a text string up to 24 characters drawn from the alphabet (A-Z), digits (0-9), minus sign (-), and period (.). Note that periods are only allowed when they serve to delimit components of domain style names. No blank or space characters are permitted as part of a name. No distinction is made between upper and lower case. The first character must be an alpha character.
Also, if DNS server is configured in your environment, then you should be able to use DNS to resolve the name of the host on which you want to install the OMS.
For example, all these commands must return the same output:
nslookup host1
nslookup example.com
nslookup 172.16.0.0
Browser Requirements
  • Ensure that you use a certified browser as mentioned in the Enterprise Manager certification matrix available on My Oracle Support.
    To access the Enterprise Manager certification matrix, follow the steps outlined in Appendix E.
  • If you use Microsoft Internet Explorer 8 or 9, do the following:
    • Turn off the compatibility view mode. To do so, in Microsoft Internet Explorer, from the Tools menu, click Compatibility View to disable it if it is enabled. Also, click Compatibility View Settings and deregister the Enterprise Manager Cloud Control console URL.
    • Enable XMLHTTP. To do so, from the Tools menu, click Internet Options. Click the Advanced tab, and under the Security heading, select Enable native XMLHTTP support to enable it.

Installation Procedure

To install an additional Oracle Management Service (OMS), follow these steps:
  1. From the Enterprise menu, select Provisioning and Patching, then select Procedure Library.
  2. On the Deployment Procedure Manager page, in the Procedure Library tab, from the table, select Add Management Service, and then, click Launch.
  3. On the Getting Started page, complete the preinstallation tasks listed there. Once you are done, select each of the tasks you have completed, and then, click Next.
  4. On the Select Destination page, do the following:
    1. For Destination Host, select or enter the name of the managed host (a host managed by the first OMS using a Management Agent) on which you want to install the additional OMS.
      For example, example.com
      Note:
      Do NOT enter the IP address of the managed host. Enter only the fully qualified name.
    2. For Destination Instance Base Location, accept the default location to the OMS instance base directory or enter the absolute path to another location of your choice where OMS-related configuration files can be stored. Ensure that this directory has 100 MB of space. Also ensure that the directories and subdirectories you mention in the path already exist.
      For example, /apps/john/oracle/prod
    3. In the Source Credentials section and in the Destination Credentials section, select the credential type you want to use for accessing the source host. For more information, see Selecting Credentials.
    4. Click Next.
  5. On the Options page, do the following:
    1. In the File Transfer Option section, select a suitable protocol to transfer the cloned ZIP files to a staging location. FTP is the default transfer mode.
      If you want to transfer the files to a shared, NFS-mounted network location, then you can select Shared Directory, and enter the absolute path to the shared location. Ensure that this shared directory has read/write access from source and destination hosts, and has 4 GB of space.
      For example, /net/example.com/scratch/john
      Note:
      • If you have an SFTP set up, then select FTP as the file transfer mode.
      • If you choose to use a shared location as the file transfer mode, then ensure that the shared location has read/write permission and is accessible from the source host as well as the destination host.
      • If you select FTP, then ensure that FTP software is installed on the source host as well as the destination host. Also ensure that your temporary location (/tmp on Unix or C:\Temp on Microsoft Windows) has at least 8 GB of space.
      • If you select HTTP(S), then ensure that your temporary location (/tmp on Unix or C:\Temp on Microsoft Windows) has at least 8 GB of space.
        This location is used for archiving the software binaries and the configuration details of the source OMS. The archive is then copied over to the source staging location, and then transferred to the destination staging location eventually, as described in the next step.
      • If the temporary location required for FTP and HTTP(S) options does not have 8 GB of space, then either increase the space as required, or provide another location that has 8 GB of space. To provide another location, do the following:
        1. From the Targets menu, select All Targets.
        2. On the All Targets page, click the name of the Management Agent that is running on the source OMS host.
        3. On the home page, from the Agent menu, select Properties.
        4. On the Properties page, from the Show list, select Advanced Properties.
        5. In the Add Custom Property section, for the Name field, enter emStageDir. And for the Value field, enter the absolute path the a temporary location that has at least 8 GB of space.
    2. In the Staging Locations section, for Source Staging, enter a location on the source host where the cloned ZIP files can be created and placed temporarily. Ensure that this temporary directory has 8 GB of space.
      For example, /example.com/shared
      Similarly, for Destination Staging, enter a location on the destination host where the cloned ZIP files can be copied to temporarily. Ensure that this temporary directory has 8 GB of space.
      For example, /example.com/shared
      Note:
      Once the OMS is installed on the destination host, the cloned ZIP files are automatically deleted from both the staging locations.
    3. In the Destination Ports section, validate the ports displayed by default.
      These default ports are based on the ports already assigned and used by the OMS that you are cloning. Oracle recommends you to use the same ports as your source OMS so that you have a homogeneous environment.
      You can choose to retain the ports displayed by default or enter a custom port. Ensure that the custom port you enter is within the recommended range as shown in the Recommended Port Range column. If you want to check the availability of a custom port, then click Check Ports.
    4. Click Next.
  6. On the Post Creation Steps page, enter one or more e-mail IDs (separate by a comma) where the details of the postinstallation tasks to be performed can be sent, and then, click Next.
    For your e-mail to work, you must have already configured the mail server. For instructions, see Oracle Enterprise Manager Cloud Control Administrator Guide.
  7. On the Review page, review the details and click Finish.
    Note:
    If the installation fails, particularly in the Install Homes step, then before you retry installing the OMS, clean up the Middleware home on the destination host where the installation failed. To do so, on the destination host, do the following:
    1. Invoke the installer from the following location:
      <Middleware_Home>/oms/oui/bin/runInstaller
    2. In the installation wizard, on the My Oracle Support Details screen, click Installed Products.
      1. Select all plug-in homes and click Remove.
      2. Select the JDK home and click Remove.
      3. Select the Oracle WebTier home and click Remove.
      4. Select the OMS home and the Oracle Common directory, and click Remove.
      5. Exit the installer.
    3. Delete the Middleware home directory.
    4. Return to the Add Management Service deployment procedure that failed, and retry the Install Homes step.

Selecting Credentials

You can select one of the following credential types for accessing the source and the destination hosts:
Table 8-2 Selecting Credential Type
Credential Type Description
Preferred Credential
Select this if you want to use the credentials that are already registered as preferred credentials with Enterprise Manager.
In this case, from the Preferred Credential Name list, select either Normal Host Credentials or Privileged Host Credentials depending on the type of preferred credentials you want to use for accessing the host.
Named Credential
Select this if you want to use the credentials of a named profile created in Enterprise Manager.
In this case, from the Credential Name list, select the profile whose credentials you want to use.
On selection, you will see the credentials details. For more information on the credentials associated with the selected profile, click More Details. If you want to test connecting to the host with those credentials, click Test.
New Credentials
Select this if you want to enter a new set of credentials that will override the preferred credentials or the named credentials registered with Enterprise Manager.
In this case, enter the credentials you want to override with.
If you want to register the new set of credentials with Enterprise Manager, then click Save As, and either accept the default profile name or enter a custom name for it.
Further, if you want to save them as preferred credentials, then select Set as Preferred Credentials, and select an option to indicate whether they should be saved as normal credentials or privilege credentials.
If you want to test connecting to the host with those credentials, click Test.

After You Install

After you install the additional OMS, follow these steps:
  1. (Applicable only if you had stopped the Oracle Configuration Manager as a prerequisite on Microsoft Windows) Start Oracle Configuration Manager:
    1. Navigate to the OMS home.
      cd $<MIDDLEWARE_HOME>/oms/
    2. Set the environment variable ORACLE_CONFIG_HOME to the following location:
      $<OMS_INSTANCE_HOME>/em/EMGC_OMS1
      For example,
      set ORACLE_CONFIG_HOME=C:\win0224\emgc\gc_inst\em\EMGC_OMS1
    3. Navigate to the following location:
      $<MIDDLEWARE_HOME>/oms/ccr/bin
    4. Stop OCM by running the following script:
      emCCR.bat stop
    5. Navigate to the Web Tier home.
      cd $<MIDDLEWARE_HOME>/Oracle_WT
    6. Set the environment variable ORACLE_CONFIG_HOME to the following location:
      $$<OMS_INSTANCE_HOME>/WebTierIH1
      For example,
      set ORACLE_CONFIG_HOME=C:\win0224\emgc\gc_inst\WebTierIH1
    7. Navigate to the following location:
      $<MIDDLEWARE_HOME>/Oracle_WT/ccr/bin
    8. Stop OCM by running the following script:
      emCCR.bat stop
  2. Perform these steps on the Server Load Balancer (SLB) using its administration console:
    (a) Add the additional OMS host to the following SLB pools:
    • Secured Upload Pool (add the host using the port configured for the Secured Upload service)
    • Agent Registration Pool (add the host using the port configured for the Agent Registration service)
    • Secure Console Pool (add the host using the port configured for the Secure Console service)
    • (Optional) Unsecure Console Pool (add the host using the port configured for the Unsecure Console service)
    (b) Associate the additional OMS host with the following monitors:
    • Secure Upload Monitor (associate the host using the port configured for the Secure Upload service)
    • Agent Registration Monitor (associate the host using the port configured for the Agent Registration service)
    • Secure Console Monitor (associate the host using the port configured for the Secure Console service)
    • (Optional) Unsecure Console Monitor (associate the host using the port configured for the Unsecure Console service)
    Note:
    For information about configuring SLB, refer to the Oracle Enterprise Manager Administration Guide.
  3. Run root.sh as a root user on the destination host.
  4. If the name of the host (including the domain name) where you installed the OMS is longer than 30 characters, then apply patch 13788861 on the <MIDDLEWARE_HOME>/oracle_common directory. To apply the patch, follow the instructions outlined in the patch readme.
    If you do not apply this patch, then all the Enterprise Manager jobs fail, and you will see an Java Object Cache (JOC) error similar to the following in the EMGC_OMS1-diagnostic.log file.
    [2012-02-23T11:16:02.391-08:00] [EMGC_OMS1] [ERROR] [WSM-02311]
    [oracle.wsm.resources.policymanager] [tid: [ACTIVE].ExecuteThread: '2' for
    queue: 'weblogic.kernel.Default (self-tuning)'] [userId: <anonymous>] [ecid:
    19f969fe781e0dcb:-4eacfe4a:135ab778dad:-8000-0000000000000d12,0] [APP: emgc]
    Failed to retrieve requested documents due to underlying error
    "java.rmi.RemoteException: EJB Exception: ; nested exception is: [[
    oracle.mds.exception.MDSRuntimeException: MDS-00001: exception in Metadata
    Services layer   
    
    J2EE JOC-044 An exception is occurring in the method. CacheAccess.put
    J2EE JOC-039 cannot find region: "ADFApplication1/main_region"".
    ]]
    [2012-02-23T11:16:07.022-08:00] [EMGC_OMS1] [ERROR] [] [oracle.mds] [tid:
    [ACTIVE].ExecuteThread: '2' for queue: 'weblogic.kernel.Default
    (self-tuning)'] [userId: OracleSystemUser] [ecid:
    19f969fe781e0dcb:-4eacfe4a:135ab778dad:-8000-0000000000000d15,0] [APP:
    wsm-pm] [[
    oracle.mds.exception.MDSRuntimeException: 
    J2EE JOC-044 An exception is occurring in the method. CacheAccess.put
    J2EE JOC-039 cannot find region: "ADFApplication1/main_region"
    at oracle.mds.internal.cache.JOCCache.put(JOCCache.java:273)
    at oracle.mds.internal.cache.JOCCache.put(JOCCache.java:228)
    at
    oracle.mds.internal.cache.LayeredCache.getCacheAccess(LayeredCache.java:460)
    ...
    
    This error occurs when web services are being called by the Enterprise Manager job subsystem, and when Oracle Web Service Manager (OWSM) is unable to access the web service security policy that is stored in the Metadata Services (MDS) repository. When the jobs fail, you will see that they are constantly in a scheduled or running state. Once the patch is applied, a simple test can be conducted by submitting a basic OS command job and ensuring that it completes successfully.
  5. By default, the following targets get automatically discovered and monitored in the Enterprise Manager Cloud Control console:
    • Oracle WebLogic Server, where the additional OMS is deployed
    • Oracle Web Tier
    • Application deployments, one for the Enterprise Manager Cloud Control console and one for the platform background services.
    • Oracle Management Service
    • Oracle Management Agent
    • The host on which you installed Enterprise Manager Cloud Control
    However, the other targets running on that host and other hosts do not get automatically discovered and monitored. To monitor the other targets, you need to add them to Enterprise Manager Cloud Control either using the Auto Discovery Results page, the Add Targets Manually page, or the discovery wizards offered for the targets you want to monitor.
    For information about discovering targets in Enterprise Manager Cloud Control, refer to the chapter on adding targets in the Oracle Enterprise Manager Cloud Control Administrator's Guide.
  6. An encryption key is generated to encrypt sensitive data in the Management Repository. If this key is lost, all encrypted data in the Management Repository becomes unusable. Therefore, back up the Management Service configuration including the emkey, and maintain the backup on another host.
    To back up the Management Service configuration including the emkey, run the following command:
    <OMS_HOME>/bin/emctl exportconfig oms -dir <path_to_backup_location>
  7. Before accessing the Enterprise Manager Cloud Control Console in a browser, install a security certificate from a trusted certification authority on the browser.
    This it to ensure that the Enterprise Manager Cloud Control Console that you are accessing over HTTPS protocol is recognized as a genuine and secure Web site.
    For instructions to install a security certificate on your browser and avoid security certificate alerts, refer to Oracle Enterprise Manager Cloud Control Administrator's Guide.


    9 Installing Application Dependency and Performance

    This chapter describes how you can install Application Dependency and Performance (ADP) in the Enterprise Manager Cloud Control environment.
    In particular, this chapter covers the following:

Overview

Application Dependency and Performance (ADP) is one of the critical functionalities in Enterprise Manager Cloud Control that allows you to analyze Java EE, SOA, Portal, OSB, and ADF applications. It captures the complex relationships among various application building blocks in its application schema model - the core of the Oracle intelligent platform.
Therefore, to manage applications effectively, gain an understanding of the complex relationships among the business functions, associated interconnected components, and the underlying runtime environments, you must deploy Application Dependency and Performance (ADP) Manager application, and monitor them by installing the corresponding ADP agents.
To install ADP, use the Application Performance Management page that is accessible from within Enterprise Manager Cloud Control console. To access the page, from Setup menu, select Application Performance Management.
Figure 9-1 Application Performance Management
Surrounding text describes Figure 9-1 .
The Application Performance Management Page is a GUI based screen that enables you to deploy ADP Manager, and monitor the health of the ADP Manager application in a reliable and an efficient manner.
Using Application Performance Management Page, you can achieve the following:
  • Deploy Application Dependency and Performance Manager.
  • Monitor the availability of all the ADP Managers.
  • Access information about the ADP Managers like the hosts to which the managers are deployed, the current status, the port on which they running, version, and so on.

Before you Begin

Before you begin installing Application Dependency and Performance, keep these points in mind.
For ADP Manager:
  • The Weblogic Server on which you want to deploy the ADP Manager application must be up and running.
  • ADP Manager can be deployed only on managed servers that are part of Enterprise Manager Cloud Control domain.
  • Oracle recommends that you do not deploy other applications to the managed server on which the ADP Manager is deployed.
For ADP Agent:
  • To deploy ADP Agent, the WebLogic Server hosting the ADP Manager should be up and running.
  • Ensure that at least one ADP Manager is up and running in Active state to deploy an ADP Agent.

Prerequisites

Ensure that you meet the following prerequisites:
  • For information about ADP Manager hardware requirements, refer to "CPU, RAM, Heap Size, and Hard Disk Space Requirements for OMS"
  • The default ADP Manager ports are: ADP Manager Port: 51099, Java Provider Port: 55003, and Remote Service Controller Port: 55000
  • Before deploying ADP Agent, ensure that you meet the following prerequisites:
    Requirement Releases
    Oracle WebLogic Server 9.2.x 10.0.x
    10.1.x
    10.2.x
    10.3.x
    11gR1, 11gPS1, 11gPS2, 11gPS3
    Oracle WebLogic Portal 9.2.x 10.0.x
    10.1.x
    10.2.x
    10.3.x
    Oracle Application Server 10.1.3.x
    Oracle SOA Suite 10.1.3.x (on OC4J, WLS 9.2.x) Note: For SOA Suite 10g, ADP requires that at least JDK 1.5.0.6 be in use, and there be minimum values set for the following JVM arguments:
    - XX:MaxPermSize=256M (or higher)
    - Xms512M (or higher)
    - Xmx1024M (or higher)
    11gR1, 11gR1 PS1, PS2, PS3
    Oracle Service Bus (OSB) 2.6 2.6.1
    3
    10gR3
    11
    Oracle Application Integration Architecture (AIA) 2.2.1 2.3

Installation Procedure

This section contains the following topics:

Deploying ADP Manager on the Same Host as OMS

To deploy ADP Manager on the same host as OMS, automatically creating a managed server, you must log in to Enterprise Manager Cloud Control with Super Administrator privileges (SYSMAN), and perform the following steps:
  1. In Cloud Control, from Setup menu, select Application Performance Management.
  2. On the Application Performance Management page, from the Add menu select Application Dependency and Performance Engine.
    The Deploy ADP Engine page appears.
    Deploying ADP Manager on the same host as OMS
  3. On the Deploy ADP Engine page, select Create a managed server, and enter the following details:
    • Select an OMS Server from the Host list. The list comprises of all the servers discovered in Enterprise Manager WebLogic domain.
      For example, host1.example.com (EMGC_OMS1),host2.example.com (EMGC_OMS2), and so on.
    • Enter a unique Managed Server Name.
      For example, EMGC_ADPMANAGER1, EMGC_ADPMANAGER2,and so on.
    • The Port numbers for Listen Port, SSL Listen Port, ADP Manager Registry Port, ADP Manager Java Provider Port, and ADP Manager Controller Port are populated with the default values 4200, 4201, 51099, 55003, and 55000 respectively. You can change these values if required.
      Note: ADP Manager registry port enables communication between ADP Manager and ADP Agent.
  4. Depending on the host selected in the previous step, you are prompted for the credentials, as follows:
    • If you select the same host as the Administration Server (EMGC_OMS1), then you must provide the Oracle WebLogic Administration Server Host Credentials and Oracle WebLogic Domain Credentials.
    • If you select a different host (EMGC_OMS2) from the Administration Server, then in addition to Oracle WebLogic Administration Server Host Credentials and Oracle WebLogic Domain Credentials, you must also provide Oracle WebLogic Managed Server Host Credentials
    Where,
    Oracle WebLogic Administration Server Host Credentials are credentials for the host where the WebLogic Administration Server is running.
    Oracle WebLogic Domain Credentials are credentials of the Weblogic domain in the Enterprise Manager Cloud Control.
    Oracle WebLogic Managed Server Host Credentials are the credentials of the host machine where the Managed Server is running.
    For more information about credentials, see Selecting Credentials.
  5. Click Deploy to submit the job.
    The ADP Deployment Status page appears with a link to the job status. Click the link to see the status of the job that you submitted.

Deploying ADP Agents

To deploy ADP Agents to a WebLogic Server, perform the following steps:
  1. In Cloud Control, from the Targets menu, select Middleware.
    The Middleware page displays a list of all the Middleware targets discovered and managed in Cloud Control. Click target name to select the desired target.
  2. On the Middleware page, select a target of Type Oracle WebLogic Domain. Ensure that the selected domain is not an Enterprise Manager Cloud Control domain (EMGC_DOMAIN).
    Note:
    ADP Agent cannot be deployed on a managed server (WebLogic Server) present in the Enterprise Manager domain.
    All the managed servers present in the domain appear on the domain home page.
  3. From the WebLogic Domain menu, select Diagnostics, and then click Setup Diagnostics Agents to deploy agents to the selected managed servers.
  4. On the Deploy Diagnostics Agents page, choose the Oracle WebLogic Server (managed server) to which you want to deploy the ADP agents.
    Figure 9-2 Deploy Diagnostics Agents
    Surrounding text describes Figure 9-2 .
    Ensure that you retain the selection of only those Diagnostic Agent(s) that you want to deploy to each of the managed server, deselect the others.
    By default, the following servers appear deselected:
    • The Administration Server.
    • All the Managed Servers that are not up and running.
    • If the Deployed Version and the Version to Deploy are the same, and the status of the already deployed ADP agent is up and running.
    Note:
    In Addition to the managed server selected, the ADP Agent is deployed to the Administration Server of the selected domain.
  5. In the Diagnostics Agent Configuration section, enter the ADP Configuration Properties for the selected agents:
    • Select the desired ADP Manager from the ADP Manager list.
      The ADP agents selected for deployment will report to the selected ADP Manager.
    • If you select the Update Remote Start configuration option, then some configuration scripts run in the background to facilitate the monitoring process. Select this option if you use node manager to stop or start the WebLogic Servers to which ADP agent is being deployed.
      For more information about the Node Manager, see Oracle Enterprise Manager Cloud Control Advanced Installation and Configuration Guide.
  6. If the version of the WebLogic Server is greater than 9.2.X, and if the Management Agent is used to discover the monitored WebLogic domain which is not JRF enabled, then an Additional Configuration section appears.
    In the WebLogic Home field, enter the absolute path to the WebLogic home of the monitored domain.
    If the WebLogic Middleware home field appears, then enter the absolute path to the WebLogic Middleware home of the monitored domain.
  7. In the Credentials section, provide Oracle WebLogic Administration Server Host Credentials , Oracle WebLogic Domain Credentials, Oracle Enterprise Manager WebLogic Administration Server Host Credentials, and Oracle Enterprise Manager WebLogic Domain Credentials.
    Where,
    Oracle WebLogic Administration Server Host Credentials are credentials for the host where the WebLogic Administration Server is running.
    Oracle WebLogic Domain Credentials are credentials of the monitored Weblogic domain in the Enterprise Manager Cloud Control.
    Oracle Enterprise Manager WebLogic Administration Server Host Credentials are required to access the host where the WebLogic administration server for the Cloud Control domain is running.
    Oracle Enterprise Manager WebLogic Domain Credentials are required to access the Enterprise Manager Cloud Control domain.
    For more information about selecting credentials, see Selecting Credentials.
  8. Click Deploy to submit the job. A Diagnostics Agent Deployment status page appears:
    Surrounding text describes adp_output.gif.
    The status page appears with a link to the job status. Click the link to see the status of the job that you submitted.
    Note:
    Restart the administration server and the managed servers to which the ADP Agents have been deployed. These servers should be restarted only after the deployment has completed successfully.

After You Install

This section contains the following details:

Verifying ADP Manager Installation

Once you have deployed ADP Manager, you can perform the following sanity checks to verify if the ADP manager has been installed accurately on the managed server:
  • In Cloud Control, from Setup menu, click Application Performance Management.
    On the Application Performance Management page, the newly deployed ADP Manager must appear and its status must be up and running.
  • Follow these steps:
    1. In Cloud Control, from the Targets menu, select Middleware.
    2. From Middleware Features menu, click Application Dependency and Performance.
    3. On the ADP home page, in the Registration tab, the managed server on which the ADP Manager is deployed must appear.
    4. Select the manager name, and click Test Connect to ensure that the manger is up and running.

Verifying ADP Agent Installation

Once you have deployed ADP Agent, you can perform the following steps to verify if the ADP Agent is installed on the targeted manager servers accurately:
  1. In Cloud Control, from Targets menu, select Middleware.
  2. On the Middleware page, from Middleware Features, click Application Dependency and Performance.
  3. On the Monitoring tab, expand the folder corresponding to the ADP Manager associated with the deployed agents.
  4.  Select the Status node in the navigation tree, and click the node, do not expand it. Verify the Agent Information table for the servers that you deployed to.
    Note:
    If you have not restarted the monitored servers, then the EJB Deployed status should be true, and the Agent Installed status should be false. Once you restart the monitored servers, the Agent Status for those servers should be REPORTING.


    10. Installing JVM Diagnostics

    This chapter describes how you can install JVM Diagnostics (JVMD) in the Enterprise Manager Cloud Control environment.
    In particular, this chapter covers the following:

    Overview

    JVM Diagnostics (JVMD) is one of the critical functionalities in Enterprise Manager Cloud Control that enables administrators to diagnose performance problems in Java applications in the production environment. By eliminating the need to reproduce problems, it reduces the time required to resolve these problems thus improving application availability and performance.
    Therefore, to manage applications effectively and identify the root cause of performance problems in the production environment without having to reproduce them in the test or development environment, you must deploy JVMD Manager. The JVMD Manager runs as an Enterprise JavaBeans (EJB) Technology on a WebLogic Server.
    The JVMD Agent is deployed on the targeted JVM (the one running a production WebLogic Server). It collects real-time data and transmits it to the JVM Diagnostics Manager. This data is stored in the Management Repository, and the collected information is displayed on Enterprise Manager Cloud Control console for monitoring purposes. The communication between the JVMD Manager and the JVMD Agent can be a secure (SSL) or non-secure connection.
    To install JVMD, use the Application Performance Management page that is accessible from within Enterprise Manager Cloud Control console. To access the portal, from Setup menu, and then select Application Performance Management.
    Figure 10-1 Application Performance Management
    Surrounding text describes Figure 10-1 .
    The Application Performance Management Page is a GUI based screen that enables you to deploy and upgrade the JVMD Manager and Agents, and monitor the health of the JVMD Manager application in a reliable and an efficient manner.
    Using Application Performance Management Page, you can achieve the following:
    • Deploy JVM Diagnostics Manager.
    • Monitor the availability of all the JVMD Managers.
    • Access information about the JVMD Managers like the hosts to which the managers are deployed, the current status, the port on which they running, version, and so on.

    Before you Begin

    Before you begin installing JVM Diagnostics, keep these points in mind.
    For JVMD Manager:
    • The Weblogic Server on which you want to deploy the JVMD Manager, must be up and running.
    • JVMD Manager can be deployed only on managed servers that are part of Enterprise Manager Cloud Control domain.
    • Oracle recommends that you do not deploy other applications to the managed server on which the JVMD Manager is deployed.
    For JVMD Agents:
    • To deploy JVMD Agent, the WebLogic Server hosting the JVMD Manager should be up and running.
    • Ensure that at least one JVMD Manager is up and running in Active state, to deploy a JVMD Agent.

    Prerequisites

    Ensure that you meet the following prerequisites:
    • For more information about JVMD Manager hardware requirements, refer to "CPU, RAM, Heap Size, and Hard Disk Space Requirements for OMS"
    • The JDK version required to deploy JVMD Agent is JDK 1.5 or higher
    • Supported Operating Systems for JVMD Agents are:
      • Linux x86
      • Linux x86-64
      • Windows x86
      • Windows x86-64
      • Solaris x86
      • Solaris x86-64
      • Solaris SPARC
      • Solaris SPARC (64 bit)
      • AIX PowerPC (32 bit)
      • AIX PowerPC (64 bit)
      • JRVE
      • HP IA-64(32 bit)
      • HP IA-64(64 bit)
      • HP PA-RISC(32 bit)

    Installation Procedure

    This section contains the following topics:

    Deploying JVMD Manager on the Same Host as OMS

    To deploy JVMD Manager on the same host as OMS; automatically creating a managed server, you must log in with SYSMAN account (a default Super Administrators account that is installed with Enterprise Manager), and perform the following steps:
    1. In Cloud Control, from Setup menu, select Application Performance Management.
      For more information about the Application Performance Management page, see Figure 10-1.
    2. On the Application Performance Management page, from the Add menu, select JVM Diagnostics Engine.
      The Deploy JVM Diagnostics Engine appears.
      Figure 10-2 Deploy JVM Diagnostics Engine
      Deploy JVMD Diagnotics Manager
    3. On the Deploy JVM Diagnostics page, select Create a managed server, and enter the following details:
      • Select an OMS Server from the Host list. The list is comprised of all the servers present in the Enterprise Manager WebLogic domain.
        For example, host1.example.com (EMGC_OMS1),host2.example.com (EMGC_OMS2), and so on.
      • Enter a unique name for the managed server in the Managed Server Name field.
        For example, EMGC_JVMDMANAGER1, EMGC_JVMDMANAGER2,and so on.
      • The Port numbers for Managed Server Listen Port and Managed Server SSL Listen Port are populated with the default values 3800 and 3801 respectively. You can change these values by entering custom value if required.
    4. Specify the Oracle Management Server Host Credentials and Oracle WebLogic Domain Credentials:
      Where,
      Oracle Management Server Host Credentials are the credentials for the host machine where the OMS server selected is running. For example, the OMS selected is EMGC_OMS1 (host1.example.com).
      Oracle WebLogic Domain Credentials are credentials of the Weblogic domain in the Enterprise Manager Cloud Control.
      For more information about credentials, see Selecting Credentials.
    5. Click Deploy to submit the job.
      The JVMD Manager Deployment Status page appears with a link to the job status. Click the link to see the status of the job that you submitted.

    Deploying JVMD Agents

    To deploy JVMD Agents to a WebLogic Server, perform the following steps:
    1. In Cloud Control, from the Targets menu, select Middleware.
      The Middleware page displays a list of all the Middleware related targets discovered, and being managed in Cloud Control. Click target name to select the desired target.
    2. From the Middleware page, click Oracle WebLogic Domain. JVMD Agents can be deployed on Enterprise Manager WebLogic domain or other WebLogic Domains too.
      All the managed server present in the domain appear in the domain home page.
    3. From the WebLogic Domain menu, select Diagnostics, and then click Setup Diagnostics Agents to deploy agents to the selected managed servers.
    4. On the Deploy Diagnostics Agents page as shown in Figure 10-3, choose the Oracle WebLogic Server (managed servers) to which you want to deploy the JVMD agents.
      Figure 10-3 Deploy Diagnostics Agent
      Deploy Diagnostics Agent

      Ensure that you retain the selection of only those Diagnostic Agent(s) that you want to deploy to each of the Managed Servers, deselect the others.
      By default, the following servers appear deselected:
      • The Administration server is not selected by default.
      • All the managed servers that are not up and running appear deselected by default.
      • If the Deployed Version and the Version to Deploy are the same, and the status of the already deployed JVMD agent is up and running.
    5. In the Diagnostics Agent Configuration section, enter the JVMD Configuration Properties for the selected agents.
      Select the desired JVMD manager from the JVMD Manager list.
      The JVMD agents selected for deployment will report to this JVMD Manager.
    6. If the version of the WebLogic Server is greater than 9.2.X, and if the Management Agent is used to discover the monitored WebLogic domain which is not JRF enabled, then an Additional Configuration section appears.
      In the WebLogic Home field, enter the absolute path to the WebLogic home of the monitored domain.
      If the WebLogic Middleware home field appears, then enter the absolute path to the WebLogic Middleware home of the monitored domain.
    7. In the Credentials section, provide Oracle Weblogic Administration Server Host Credentials , and Oracle WebLogic Domain Credentials.
      Where,
      Oracle WebLogic Administration Server Host Credentials are credentials for the host where the WebLogic Administration Server is running.
      Oracle WebLogic Domain Credentials are credentials of the monitored WebLogic domain in the Enterprise Manager Cloud Control.
      For more information, see Selecting Credentials.
    8. Click Deploy to submit the job. A Diagnostics Agent Deployment status page as follows appears:
      Surrounding text describes jvmd_output.gif.
      The Status page appears with a link to the job status. Click the link to see the status of the job that you submitted.

    After You Install

    The section contains the following:

    Verifying JVMD Manager Installation

    Once you have deployed JVMD manager, you can perform the following sanity checks to verify if the JVMD manager has been installed accurately on the managed server. To monitor the health of the JVM Diagnostics Manager, perform the following steps:
    • In Cloud Control, from Setup menu, select Application Performance Management.
    • On the Application Performance Management page, all the deployed Managed Servers are listed. Attributes like Host, Port, SSL Port, Version, Status, Availability, and Server available on the Application Performance Management page helps monitor the status and the availability of the JVMD Manager.

    Verifying JVMD Agent Installation

    Once you have deployed JVMD Agent, you can perform the following sanity checks to verify if the JVMD Agent is installed on the targeted managed servers accurately:
    • In Cloud Control, from the Targets menu, select Middleware. On the Middleware home page, select the domain where the JVMD agent was deployed. On the left hand pane, from Target Navigation section, click Java Virtual Machine Pools to expand the menu, the JVMD targets appear.
      JVMD targets menu
      Each of the targets corresponds to one of the managed servers chosen for JVMD agent deployment. All these mentioned targets should be up and running.
    • Log into the WebLogic Administration console of the domain where the JVMD agent was deployed. The targeted managed servers should have a new application with the name javadiagnosticagent_<managed_server_name>, and this application should up and running.


       ***********************************************************************************


ORA-08004: sequence IEX_DEL_BUFFERS_S.NEXTVAL exceeds MAXVALUE

 Error:- IEX: Scoring Engine Harness Error - ORA-08004: sequence IEX_DEL_BUFFERS_S.NEXTVAL exceeds MAXVALUE (Doc ID 2056754.1) SYMPTOMS:- Yo...